Posted on

Shoe Design: Logos for Shoes

Shoe Logo Design - How to design shoes

Your new shoe design isn’t complete until you have detailed the logos. A beautiful set of logos will add value, give information to your customers, or be that unique and special twist. A great logo can provide the centerpiece for your shoe design. Adding logos will cost money, so we better make sure you are getting your money’s worth.

Selecting logos for your shoe design:

When you are working with a new shoe factory, it is very helpful to know their capabilities. For example, if the factory does not have an embroidery machine in-house, it will cost more to send the cut part out for processing.  Or, if the factory has a great relationship with the woven label supplier, it will be worth your while to arrange a visit to see what they can do.

Here we will review the most common types of logos found on sports shoes.  We will discuss what the logo parts cost, set up charges, and design tips.

Shoe Logo Design - How to design shoes Die Cut Logo:
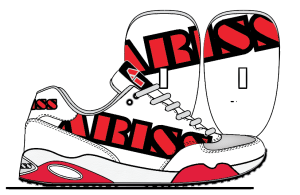
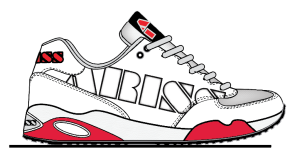
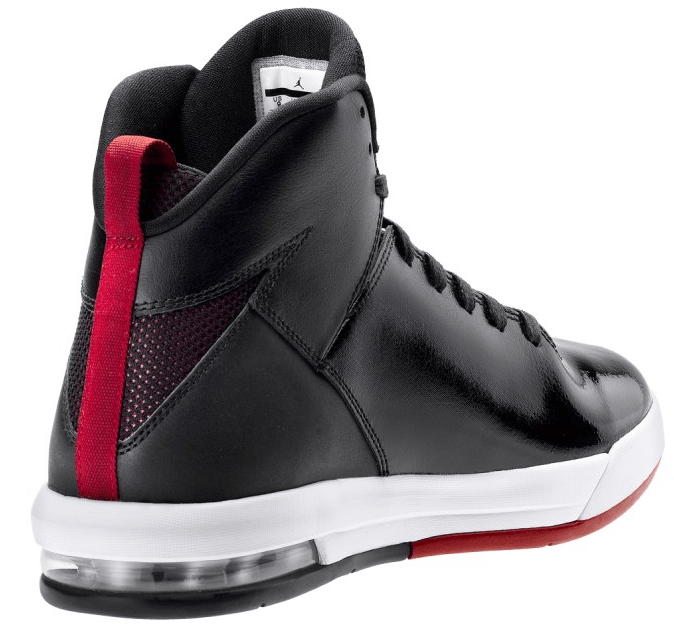
The die cut shoe logo is the most common found on shoe quarter or side panels. The logo is simply cut out from a piece of material and sewn on. The Nike “Swoosh”, Adidas “Stripes”, New Balance “N”, Vans “V” and Puma “Formstrip” are classics. Die cut logos are great for high visibility applications and can be made of almost any material. The die cut logo is a perfect overlay on top of any seam or pattern breaks and can also be reversed so the logo is now a window to the inside of the shoe. The downside is details are limited to what can be sewn down. Price is low, only being the cost of the material.


Shoe Logo Design - How to design shoes Screen Printed Shoe Logos :
Screen printing is a very common logo application for shoes. Set up is nearly zero, colors are almost unlimited. There are many finishes available such as matte, gloss, puff, or 3D styles. However, there are limits to the surfaces you can print on. Rough or suede surfaces will not take prints smoothly. Elastic fabrics will cause cracks in the ink. Any waxed or oiled surface is also not suitable for screen printing. On the flip side, printing is great for big, high contrast logos. Screen printed logos can be several colors but be aware registration can be difficult. Every factory will have a screen printing department. The logo can cost from $.25 to $.75 per unit, depending on the size and number of colors. There are usually no setup charges for silk screen printing logos.

Shoe Logo Design - How to design shoes Print + Emboss Logo:
An inexpensive, but great logo effect for shoes can be created by screen printing, then using an RF welding machine to emboss the logo for a 3D effect. The RF welding machine is an inexpensive tool and the cut brass welding heads don’t cost much. Inexpensive to set up and when it’s done in-house at the factory it’s cheap! The emboss tools may cost $300 depending on the logo size.


Shoe Logo Design - How to design shoes Woven Labels:
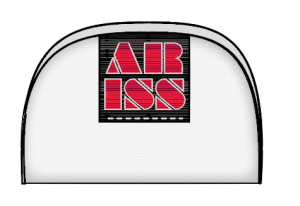
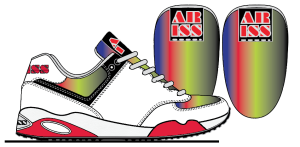
The woven label is another great way to create colorful logo effects. This type of label is machine-made by computer control. The Resolution is great for fine details and small crisp text. Colors are nearly unlimited and one logo can have as many as 15 colors. The basic tongue logos on New Balance or classic Nikes are made by this process. This process can be used to create an informational label on its shoes. Setup charges are low, possibly zero. These woven label logos are not expensive, with prices starting at $.05 and running to $1.00 for a large multicolor patch.

The Ultimate Shoe Material Textbook

Start with an in-depth study of material types available for modern shoemaking. Learn the technical details of material specifications. 195 pages and 300 color photos.

Buy Now

on sale $39.99

Shoe Logo Design - How to design shoes Embroidered Logo:
Another very common shoe logo treatment. Embroidery or computer stitching can add a touch of class to a shoe. Silky threads can create rich looking logo applications. Colors are limited only to your imagination, most machines can handle 8 to 10 colors! This is a great logo application but it needs to be used wisely. Embroidery is priced out by the stitch, with extra cost for more colors. The logo can also run off the side of a panel part, and light colors can be soiled easily with threads being snagged. Use with care in waterproof shoes, the stitching will let water in. Price can vary wildly for this type of logo treatment, depending on if the factory has its own embroidery department or not. There are usually no setup charges. The logo can cost from $.25 to $.75 depending on the stitch count and the number of colors.
Shoe Logo Design - How to design shoes 3D Embroidery:
This is a stunning way to make an amazing 3D effect logo. A small piece of EVA foam is placed under the embroidery head, and the threads cut the edges when they are stitched, leaving behind a logo with a 2 or 3mm 3D effect. A great effect but prone to snags and soiling when used on shoes. Usually no setup charges. The logo can cost from $.25 to $.75 depending on the stitch count and the number of colors.
Shoe Logo Design - How to design shoes TPR Micro Injection:
Often called rubber badges, Micro Injection, or simply “TPR”  (Thermo Plastic Rubber) logos are a great way to add fine detail to your shoe’s design. TPR logos come in all shapes and sizes. Details can be tiny and colors are nearly unlimited. These little logos can be used as under or overlays, placed on tongue or outsole bottoms. They are durable, colorful, and relatively cheap.  $.25  USD.  They can have clear gel bubbles over them, or can have fabric backing. These are great for sport and outdoor shoes. The downside is they will require molds, but TPS molds are cheap to set up.  Less than $200 USD.
Shoe Logo Design - How to design shoes Dye Sublimation Printing:
A printing process that uses a computer to print a full color design onto transfer paper. When the paper is applied to the material surface and heated, the ink turns into a gas (actually sublimes)  and transfers to the shoe material. Dye sublimation is great for 4 color process photographic designs. Setup for sublimation can be zero for computer print, or $500 per color if made by roller print. Part price can be as high as $1.00 or more.
Shoe Logo Design - How to design shoes PVC Gel Bubbles:
A simple way to make a unique logo is the Gel bubble. These are made by adding a clear PVC gel bubble onto a woven label, or printed sticker.  These logos can have a stitch flange to use as an underlay or can be self adhesive for attachment to midsole or outsoles. Setup is low. Part price can be $.05 to $.25, depending on size.

Shoemaking Material Kit

All the hard find parts for your DIY shoemaking project are here in one place. Lasting board, strobel material, lining mesh B&W, collar foam and all the reinforcing parts you need for one pair.
Learn more
On sale $39.99

Shoe Logo Design - How to design shoes Chrome-Plated ABS Plastic:
If you want a chrome logo, you will need to go with metal or injection molded ABS plastic. ABS plastic has a unique surface character that allows vacuum metal coating, so you can get a nice chrome-plated surface. Injection molds for ABS cost from $500 to $1500. Per unit price can be $.25 to $.75 depending on the size.
Shoe Logo Design - How to design shoes Metal Hardware:
Metal hardware is a great place to get some custom logos on your shoe. Logo plates, custom eyelets or lace fobs give you another place to add your logo. This hardware can be cast, stamped, painted, plated, polished, or anodized. You will have many metal choices from steel, to brass, to zinc, or even aluminium. Custom metal hardware will have some setup charges. Tooling prices depend on the metal type and process required but could be anywhere from $300 to $3000.  The part price could vary from $.10 to $.50.
Shoe Logo Design - How to design shoes Molded Logos:
The modern sport shoe may have several molded components, some being EVA midsoles, plastic stabilizers, rubber outsoles, etc…   Each of these is an opportunity for a crisp logo. These logos cost you nothing once they are machined into the mold.
Shoe Logo Design - How to design shoes Backprinting Effects:
If your shoe design has any transparent upper parts or a clear rubber outsole, you can use back printing to add a unique logo application. These can be simple screen prints or pad prints with low setup charges and low unit cost.

Cut Weld:
The cut weld is related to the RF weld. The welding die has a crisp edge, and when the TPU material is welded down and the waste is peeled away, it leaves behind the material. The colors and surfaces are limited to what you can get in the weldable TPU material. This is a strong way to get a glossy logo on rough mesh or even chrome! The cutting weld tools may cost $300 to $1000 depending on the logo size.
Pressed TPR
Pressed TPR is the high-tech version of the basic TPR logo. In this case, while the TPR material is still in the mold, the shoe material gets laid onto the mold, and with heat and pressure is fused to the material. This can be used to make small logos or large reinforcing panels.
Laser Engraving or Cutting:
A new way to cut logos, the laser, is a unique way to make a high-resolution logo. Color is limited to that of the burned substrate. Laser technology is expensive but is getting more popular. A neat feature is the laser can be programmed to make marks or make cuts depending on the power setting. There are usually minor setup charges for the programming, in addition to a higher per-unit charge depending on the time required for each logo.

What logo is right for your shoe design?

As you can see, there are many great options for applying logos to your new shoe design, regardless of your target price, including everything from the basic printing and embroidery to the complicated laser and injection mold. For low volume shoe designs you may want to select logos with no setup charges, while for high volume shoes it is more feasible to go with injection style logos or others that require more expensive tooling before they can get put on shoes.

New Online Course
How to Select Shoe Materials

14 Shoe Material lessons. Over 4 hours of video instruction. In-depth study of leather, textiles, synthetics, and plastics for footwear. Material Design Guide Textbook included.
Course Details
enroll now $399

Posted on

The Sneaker Factory OnLine Shoe School

This is a book about shoemaking

Shoemaking Courses: Learn How to Make Shoes

This is a book about shoemaking, learn how to make shoes

Shoe School

Yes! You are in the right place. The Sneaker Factory offers options to suit your level. Self-paced online learning for free, supplemental books and shoemaking materials, live virtual classes, and private consulting with the Shoe Dog. Free shoe school is outlined below. Please send us an email for more information on the live classes and consulting with The Shoe Dog.

Shoe school – Free and Self-Paced: We have pulled together an online curriculum of shoemaking articles in a sequence that will take you from the basics of shoe design and shoemaking to advanced material selection topics. Step-by-step you will learn how to design shoes. This collection of articles teaches shoe making for beginner students of the trade.

Learn how to make shoes with this short online course where you study the basics of shoe design and techniques for mass production. Get a firm grasp of shoemaking terminology, shoe patterns, and construction. Our shoe making tutorial takes just a few hours to read. Of course, we also offer additional books and instruction for shoe designers.

Welcome to the Sneaker Factory Online shoe school, let’s get started!  We have taken great care to make learning easy! Throughout our articles you will see many shoemaking terms like “last” and “eyestay,” are highlighted in blue. Simply move your mouse over the highlighted terms to see the definitions. So easy! You can also see all the shoemaking terms together in our Shoe Terms Dictionary.

Our shoe school course is free! If want to learn how to make shoes you are in the right place!  This short online course will cover the basics of shoe design and techniques for mass production and give you a firm grasp of shoemaking terminology, shoe patterns, and construction. Our shoe making tutorial takes just a few hours to read.  Of course, we have books for shoe designers.

Welcome to the Sneaker Factory Online shoe school, let’s get started!  We have taken great care to make learning easy! Throughout our articles you will see many shoemaking terms like “last” and “eyestay,” are highlighted in blue.  Simply move your mouse over the highlighted terms to see the definitions. So easy! You can also see all the shoemaking terms together in our Shoe Terms Dictionary.

Part 1:  Learn The Basics of Shoemaking

In this part of our shoemaking course, you will learn the basics of shoemaking and construction step-by-step. You will learn what a shoe last is and how it determines the shape of your shoe. More importantly,  you will learn the parts of a shoe. If you want to learn how to make shoes…you are in the right place!

What does it really take to make a sneaker?
How Does a Factory Make Shoes?
The Shoe Last
How Shoes are Made: The Basics
Shoe Parts Diagram
Shoe Pattern Parts
Running Shoe Parts Terminology
How a new Shoe is made: Shoe Development Process
How Shoes are Made Video
How to become a Shoe Designer 10 Steps
Shoe Terms Dictionary

Part 2:   Learn Shoe Construction Techniques

Now that you understand the basics we can move on to the details of shoe construction, shoe lasting, and what is inside the guts of your shoe. We will cover the two most popular styles of shoe construction: Cold Cement and Vulcanized construction.

Shoe Lasting
What’s inside Shoes? Shoe Reinforcements
Cold Cement vs Vulcanized Shoe Construction
How Converse All-Stars are Made: Vulcanized Process
How are Nike shoes made: Cold Cement Construction
Shoe Outsole Tooling
Shoe Construction Techniques


Part 3: Learn How to Design Shoes

Once you have read through parts 1 and 2 you will have enough basic shoemaking knowledge to get started designing your shoe projects. In part 3 of the course, you will learn how to design shoes. In this part, we will review how to go about drawing shoes and how shoe patterns are made.

The Shoe Design Brief
How to Draw Shoes
Shoe Patterns
Shoe Designer Vs Shoe Pattern Maker
How to Become a Shoe Designer: 10 Steps
What is a Shoe Pattern
How to make a shoe pattern
How to Design Shoe Outsole Tooling Part 1
A Shoe Designers Tools
Shoe Design: Logos for Shoes

Part 4:  How to specify your Shoe Design

With your new design drawn up, let’s dig deeper and learn how to make a real factory ready shoe specification. A detailed shoe specification, (or Spec sheet,) will allow the shoe factory to create just what you are looking for. This section of the shoemaking course will teach you the language and give you the tools to create a proper and professional shoe design specification.

Is my shoe design ready for production?
The Shoe Design Specification Drawing
How to Make a shoe production specification
How to Select Footwear Materials
The Designers Guide to Shoe Material Suppliers
How to spec shoe colors……The Pantone Book!
Nike Air Jordan 1 Design Review: Shoe Edges
The Designer’s Guide to Shoe Leather
How to Design shoes – Synthetic Leather
Textiles for Shoe Design
Shoe Design: Know your Footbeds
How much does it cost to make a sneaker
The Designers Guide to Shoe Materials 

Part 5:  Continued  Reading

There is always more to learn in the field of shoemaking!  In this section of the course, we have a few more articles that will help you on your way to becoming a real shoe pro!

Jobs in The Shoe Trades: Working for a Shoe Brand
Download a Shoe Last for 3D Printing
Finding Shoe Agents & Shoe Development Contracts
Can I start a shoe company?
How to Start Your Own Shoe Company
Shoe factory equipment: What do I need to make shoes?
Can I get custom made shoes? Yes!
How Shoe Lasts are Made By Tsubo
What about shoes made in China?
Shoemaking Books On Amazon
Shoe Design Books available on Amazon NOW!
Hand Tools for Shoemaking
How Shoe Lasts are Made
How New Balance Shoes are Made

books for shoe designers shoe design a handbook for footwear designers If you want to learn more we have written three books that every young shoe designer should read.

How Shoes are Made: Covers the basics of shoe design and manufacturing. Everything you need to know if you are starting in a shoe design office. This is a shoe design handbook for footwear designers.

Shoe Material Design Guide: This will complete your shoe design book library. This book is a master class dedicated entirely to the selection and sourcing of shoe materials. An ideal handbook for footwear designers and manufacturers.

How To Start Your Own Shoe Company: This book is written for shoe entrepreneurs young and old. Not just for shoe designers, How To Start Your Own Shoe Company is a perfect training aid for footwear product line managers and shoe company brand managers.

Posted on

Nike Air Jordan 1 Design Review: Shoe Edges

Shoe Construction Review: Material Edges

No doubt Nike makes great shoes, but today we are going to take a critical look at the Nike Air Jordan 1.   Rather than review the styling from “Sneaker Freak” perspective or the performance of the shoe for actually playing basketball, I want to do comparison of the construction, materials and assembly the Original Air Jordan 1, the Retro Air Jordan 1 and the Nike ID Air Jordan 1.

A lot has been written about the Air Jordan 1, but I’m looking at a specific detail.  The edges!
How the shoe designer handles the material edges is critical to the look, costing and construction of a shoe design.   Today we are looking at 3 different versions of the same Classic Nike Air Jordan 1.  Each model of this shoe the Original Air Jordan 1, the Retro Air Jordan 1 and the Nike ID Air Jordan 1, all have a different edge treatments.  These three version of the Nike Air Jordan 1 each show the common material  edge treatments raw cut, rolled or turned out seam.

Raw Cut or Die Cut edges:

original air Jordan 1 design

The most common way to treat a material edge is to do nothing, just cut it.  For real leathers and PU synthetic leathers a clean-cut is usually okay.  If the material backing is color matched to the skin and the backing material is not rough or fibrous a clean-cut edge is perfectly acceptable for high-end performance or fashion shoes.  In fact an exposed contrast color edge can be a neat design element.  The down side is the raw edge is more susceptible to wear or fraying and may show wear sooner.  The die cut edge may also be painted or sprayed to cover a backing material not dyed through.
This original air Jordan 1 is made from PU coated “action” leather.  The edges are die cut clean.  You can see the skin edge is perfectly clean as this is PU material, the backing edge does show shoe fibers from the leather.

In this Nike shoe you can see the White and Red materials are leather based while the Black Swoosh looks to be 100% synthetic material, as the edge is cut perfectly clean.

The raw, die cut edge is the least expensive way to handle the material edges.  Mesh or Fabric edges can not be die cut.


Inspect Shoes
Like a Pro

Learn how to inspect and authenticate shoes like a professional. We give the Nike Air Jordan 1, Vans old SKool and Yezzy a complete quality control shake down. Piece by piece we will study every part. Don’t get burned! Learn more On Sale $39.99

Rolled Material Edges:

For a more finished looking treatment the material edges can be rolled.  Fabric, Leather and PU material edges can be rolled.  Extra labor is required and great care must be taken to insure the process results is a neat and clean edge.   Not all shoe parts can be rolled neatly.

Retro Nike Air Jordan 1 Design

In the case of this Nike Air Jordan 1 Retro edition you can see almost all the material edges are rolled. This is very well done, the curving eyestay parts with tight corners are neat and even without bumps or wrinkles.  This fine work is done with the aid of a machine.

To get clean edges like this Air Jordan you need two operations.  First, the material edge must be skived to reduce the thickness.  This leather maybe 1.2mm to 1.5mm – the skived edge, maybe 5mm wide will be .5 to .7mm thick.  This will allow the edge to be rolled without making a huge fat edge.  Once the material is skived down the cut parts will be taken to an edge rolling machine.

Screen Shot 2015-08-08 at 12.20.24 PM


The edge rolling machine neatly folds and glues the edges, then a pressure roller flattens parts for clean look.  The glue holds the edge until the stitching department can make the shoes.


New Course
Sneaker Authentication

13 Authentication lessons.
3 hours of video instruction.
In-depth study of footwear inspection techniques.
Authentication Text Book included.
Learn more On Sale $199

The Tuned edge or Turned seam:

The last shoe is the Nike ID Air Jordan 1.  This model is made with different materials and uses different techniques. Made of synthetic panels this shoes is entirely “turned out”.
The shoe parts are cut, laid down face to face then stitched.   The resulting seam is then hammered flat to remove wrinkles.

The turned seam may also require skiving, depending on the material thickness. This Nike shoe has some many turned out seams I expect the are not all skived.

This shoe is so neatly made you would think some parts may be welded on.  Like the logo

Nike air Jordan 1 shoe design review

Over all when you design a shoe you need to consider how to handle the edges, What materials will require special finishing, skiving, glueing or hammering?

Leather parts can be die cut, fabric parts can not.   Synthetic material cut clean but may not handle the skiving operations.

Rolled seams and turn out seams can make crisp pattern lines line a die cut pattern part.  Rolled and turned seams require more equipment, time and labor making them more expensive.  You will have to find the technique suits for design, material and price.

Are these Vans Real?

Learn how to authenticate shoes. We give the Vans Old Skool a complete shake down. Piece by piece we will study every part. Don’t get burned! Learn more On Sale $199
Posted on

How to Design Shoes

How to design shoes

How to Design Shoes: Drawing Technique

How to design a running shoeIf you want to learn how to design shoes you must first learn the names of the basic shoe parts! Secondly,  You must learn how to draw shoes.  Drawing by hand or by computer is how you will detail and communicate your shoe design.

Shoe sketching How to Design Shoes

This is the most important part in learning how to design shoes.  For your shoe to come to life you must be able to describe every detail.  If you can’t show what makes your shoe design unique and special it will always be just an idea in your mind and not a shoe.  A drawing will also help you discover the details of your shoe design.

Shoe-Rendering How to Design ShoesA highly detailed shoe drawing will show design features and flaws, allowing your shoe design evolve.  Your shoe drawings must also communicate the design details to your co-workers, managers, buyers, customers and shoe factory technicians.  From start to finish in the shoe design process, many people will need to understand your ideas if they are going to help you make your shoe idea into a real shoe!

How to design shoes

Once you have the design compete it’s time to create the product specification.  All the details that turn a  shoe drawing into a shoe are required.  Materials Specs, color numbers, foam density, rubber hardness need to be defined.

How to Design Shoes: Footwear Materials

Designers Guide to leather
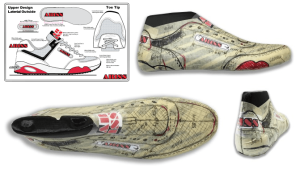
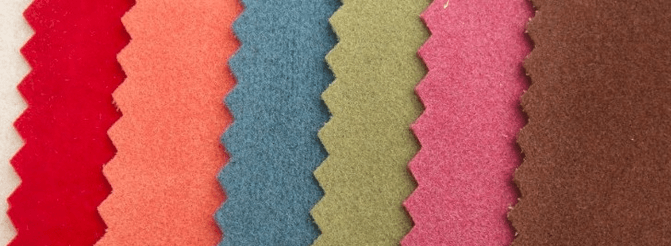
For your new shoe design to really come to life you will need to specify  the shoe materials.  A huge part in learning how to design shoes is understanding how and why to select particular materials for your shoe.   Your material choice will decide how expensive or inexpensive your shoes will be in the store.  Your material choices will also effect flexibility, durability, comfort and import duties.   You will need to understand the design qualities and limitations of leather, textiles, synthetics, foam and rubber as they relate to shoe design.   The material you select for your shoe design will have an impact on the fabrication techniques, stitching procedures, reinforcements, and even the type of glue used to assemble the outsole to the upper.
You can learn more here The Designer’s Guide to Shoe Leather, here How to Design shoes – Synthetic Leather , here Textiles for Shoe Design, here Importing Shoes : HTS Shoe Import Duty and Shoe Tariffs and here How much does it cost to make a sneaker?

How to Design Shoes: Shoe Lasts

shoe lasts
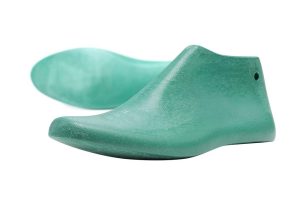
The shoe last is the most important part of your shoe design.  The shoe last is the form used to create the 3D shape of your shoe design. The shoe last can be made of wood, plastic or metal.  In the design phase, the last is used to transform your 2D line art in a flat pattern that can be assembled, then stretched into a 3D shape. The shape and adjustments to last dimensions are where the art and science of shoe making collide.  The perfect last will make your shoe look, fit and flex great!  The wrong last will make a great shoe design into a wreck.  In production, the last is used to stretch the sewn upper into shape, then hold it in place while the outsole is bonded.  The last must be a strong material to withstand the lasting pressure and hydraulic pressure used to secure the outsoles.  The shoe last must also be smooth and clean so the shoe lining is not damaged during the assembly process.

Posted on

How to Design Shoes – Synthetic Leather

Synthetics For Shoe Designers

Whatever you call it, synthetic, synthetic leather, PU leather, pleather or just PU this material is another must have for modern sport shoes.  If you want to learn how to design shoes you must have an understanding of modern synthetic materials.  This class of material offers the shoe designer a huge variety of colors, textures and features at a range of prices.  While synthetics were once considered to be cheap junk not suitable for high quality shoes, times have changed!

These synthetic materials are now high performance and are  often a composite made of two layers.  A backing layer made of woven or non-woven polyester fibers combined with an external surface by “dry” lamination process or by liquid “wet” processes.  The least expensive synthetics have a fibrous woven backing with PVC skin made by wet process.

This shoe has a mix of synthetic PU materials

The high-end PU leather starts with a water-resistant micro fiber PU backing.  This backing has a smooth surface, cuts cleanly, and can be dyed to match the surface materials. The micro fiber style backing can be ordered in .5 to 2.00mm thicknesses, has some stretch, and can have a water-resistant treatment.  On top of this backing the skin can be applied.

Polyurethane plastic film .2 to .5mm thick is made in a separate operation and the two layers are then rolled together with heat and pressure.  The PU outer skin is then printed, embossed, scuffed or polished to create one of the millions of surface options.  The largest PU maker has hundreds of different emboss patterns that can be applied to hundreds of different surfaces. If you can meet the order volume required, you can pick any color you want!

So lets look at some other features of synthetic leather.  There are four common surface materials, PVC (Polyvinyl Chloride) is the cheapest, PU (Poly-Urethane) can be of higher quality with many surface options, TPU (Thermo-Plastic Urethane) and there is also a class of materials made of PU fibers without a surface skin. Of these four types PVC and PU are similar in construction, a skin with backing.  The TPU material tends to be single layer material with a finer emboss.  PU materials are also offered as a solid, skinless material, this can have a brushed surface to look like suede or nubuck.

Inexpensive PVC with woven backing

PVC leather is the most basic synthetic leather, made by wet process the surface is a sealed skin usually embossed.  Liquid PVC is poured on a textured release paper then a cloth is rolled on while the surface is still wet.  PVC leather will often have a woven backing with limited stretchability. This no problem for shoes with pieced together toe and vamp construction but not so good for smooth toe lasted shoes. This material is the cheap stuff found on inexpensive shoes. When it’s pulled tight it may wrinkle and the backing surface will X-Ray through the surface.   Perfect for cheap shoes and can be found mixed on some shoes used as a cost cutting feature.  I would never spec PVC leather for shoes that retail for more than $75.00 USD. Thickness ranges from .8mm to 2.00mm depending on the backing layers and surface treatment.   Surface texture is limited due to the release paper process.

PU_material-with-Non-Woven Backing
PU material with high quality non-woven backing

PU leather is another miracle material for shoes. Available in almost any color, surface finish, and can be treated with many special features. Thickness ranges from .8mm to 2.00mm depending on the backing layers.  PU leather is made with a sealed skin like full grain leather but can be brushed to look like nubuck or fine suede.  The PU skin is made by release paper process but is dry when combined with the backing. A heated steel roller with the emboss pattern is used to laminate the skin and backing. This allows for a deeper, crisper emboss pattern. The PU surface readily accepts embossing and printing effects. The PU skin is stretchable and durable so it can be combined with a lastable backing material.  This allows PU to be used on toe caps of sports and casual shoes.

High Abrasion PU leather
High Abrasion PU leather with emboss

PU leather is also made in high abrasion versions and can have water-resistant backing.  PU material with micro fiber backing cuts cleanly and looks great when perforated. Backings can be color matched so cut edges look clean – they can even be ordered with accent colors for a neat “TRON” effect.

Synthetic suede- how to design shoes
Synthetic suede- in many colors

The PU fiber backing materials are also made without the skin layer.  This material has a brushed surface and is known as “Ultra suede,” “Alcantara™,” Hi-skin Chamude or Amara Microfiber Synthetic Leather.  These high quality micro fiber suede materials can be expensive but they are great for use on shoes, gloves, linings and trim.  Being colorfast and waterproof ultra suede quickly replaced suede in sports shoes that will be exposed to water.

TPU sheeting for seamless welding

The TPU materials are used for accent parts and for RF welding applications.  The TPU materials are not for use in structural parts of the shoe.  TPU can be transparent white the PVC and PU must be opaque.  TPU is also offered very thin.  .3mm to .8mm.

Posted on

Download Shoe Last for 3D Printing

shoe last download file

Download a Sneaker Last for 3D Printing:

Can I 3D print a shoe last
3D printed Last Shoe size 9 MakerBot Z18

I’ve had many requests to offer a shoe last for purchase (sorry we don’t have this ready yet).  So, while we are working on a way to cost effectively supply you lasts and outsoles, we have put together a .STL 3D printing file of a great shoe last for you to download.
This last is great for your DIY shoe projects.  This last has a standard athletic outline with a well curved arch, plenty of toe space and is relatively thick on the lateral side so its fit is accommodating.  Heel lift is 6mm and the last has a toe spring of 8mm.  The feather edge is in the middle between sharp and round so you an make a stobel pattern or board last without difficulty.
The file is a Men’s size 9 last.  You can make your own size with a little creativity.  The .STL file can be scaled in X, Y and Z.  While a technically perfect last grade is not made by direct scaling, this size 9 can be graded into a 8 or 10 without getting too far off the standards for last making.
If you have access to a decent sized 3D printer you can print this last full size in about 5 hours. We have a really slick MakerBot Model Z18 on hand so we tested the file.  We printed the sneaker last with 0% fill, 2 shells and scaled to 275MM Long USA size 9.  With 0% fill the last is fragile but perfect for filling with expandable foam, casting resin or plaster for a more durable last.

[purchase_link id=”4886″ text=”Purchase” style=”button” color=”blue”]

Posted on

The Shoe Design Brief

A design brief for a shoe design. How Shoes are Made

The Shoe Design Brief:

How does the shoe design process really work?  Does a brilliant young shoe designer just create the new Adidas Power Boost shoe design out of thin air?  Not really, our designer can’t do it all alone. Our brilliant young shoe designer is just one part of a team of professionals that may include the Product Line Manager (PLM), the Product Manager (PM), Footwear Developer, pattern maker and Engineer.  The Design brief is the document the entire team will use to create the new shoe.

The footwear design brief is the instruction sheet and road map the product team will follow as they create the shoe. The design brief has information that each of our team members will need to get the job done right and to make the shoe a success. The design brief is often submitted to the company’s management for review before a project starts. With the manager’s approval, the design brief becomes a written record of the shoe development teams goals for the project.

how high heel shoes are madeWho makes the shoe design brief?  There are no rules to this process, every company has their own process. In many companies the shoe Design Brief is a collaboration. The Product Manager is usually tasked with creating the brief, but he may meet with the designers or his design manager to collect style ideas, the PM should also be talking to his sales manager and sales reps for any price information or market intelligence about competitors.

A design brief for shoes can be a 1 page document, a 20 page report or pasted up concept board. The format I have used has the design brief broken down into two parts. The first part covering the price, demographics, competitors and technical details. The second part is the “Visual brief” and it can detail stylistic direction for the shoe.

So what questions should the shoe design brief answer? The answer is…it depends on the type of shoe you are working on. The running shoe design brief will be different from an army boot. So lets look at the basics.

What is the function of this shoe?
Running, Basketball, Snowboarding, Tennis or Skating

Do the shoe have a special feature?
thick midsole, thin midsole, fat tongue, no tongue etc.

Who is this shoe for?
Men, Women, a new Professional athlete, mall rats

What retail price is planned for the finished shoe?
Price point, Mid range, Deluxe or High end

When will it arrive in stores?
Spring , Summer, Winter, Fall or holiday selling seasons

What is the silhouette?
Ultra low, Low cut, Mid cut, High top

What is the target environment for this shoes?
Forest , Office, Desert, track, school, mountains?

What trends are up and coming?
Neon, earth tone , transparent, plaid

What countries will this shoe be sold in?
USA, Canada, China, Europe, Australia

What materials should be used?
High tech synthetic or classic leather

This there a competitor’s item doing well?

How many different color ways are required?

 Is there something new technology your engineers are working on?

 Is there a plan for import duty?

 Are there existing outsole molds that can be or must be used?

 Is there a particular new design element or material to try on this new shoe.

A design brief for a shoe design. How shoes are Made A simple Visual Design Brief

The Visual Design Brief
The visual brief will include photos of other shoes, cars, clothing or anything the PM thinks can help the footwear designer set the style or specific design details.  In some cases if the shoe is for a pro athlete, you may be inspired by the athlete’s personal style or something they like.

This information should all be in the designer’s mind when pen hits the paper.  First step the rough concept drawings.  Just get the idea first.  Once the design direction has been set the designer may create a CAD drawing to refine the concept.

Step by Step Guide
Footwear Brand Building

Learn more about the cost to make a sneaker and the rules for importing shoes by checkout How To Start Your Own Shoe Company. 195 pages, 330 color photos.
Buy Now
On Sale $39.99

Posted on

The Cost of Shoe Parts

what do shoe parts cost

What is the cost of shoe component parts?

When a designer draws a new shoe or a footwear product line manager starts a new line plan, it is important to have an idea of what the different shoe parts cost. To meet the target selling price and avoid high import duty categories it is critical to get your price right.  Here is quick cost breakdown of the standard parts of a sports shoe.

What do shoe parts cost shoe materials list

Shoe Materials List:

Toe Cap Suede Leather $0.82 Vamp MESH+4MMKF329+24GT/C $0.16
Quarter/Eye row Suede Leather  $.85
Quarter 220D Nylon +4MMKF329+24GT/C $1.20
Quarter logo ACTION $0.15
Collar 220D Nylon +4MMKF329+24GT/C $0.20
Heel Counter Suede Leather  $0.69
Heel logo Screen Print $0.15
Tongue 220D Nylon +4MMKF329+24GT/C $0.15
Tongue Lining 180G PU +4MMKF329+24GT/C $0.12
Collar Lining 180G PU +4MMKF329+24GT/C $0.28
Tongue Foam 20mm KFF $0.13
Collar Foam 20mm KFF $0.13
Inner Lining 180g Cosmo $0.12
Toe Box .8 Syrlin $0.03
Counter PVC injection Counter $0.10
Eye row Reinforcement Supertuff $0.03
Tongue Straps 40mm Elastic $0.13
Tongue Logo Woven Label $0.03
Lace 8mm Flat Lace $0.20
Upper Stitching $0.04
Outsole #67-w34 $1.50
Midsole Two color wedge EVA $1.50
Sock liner Standard molded Eva $0.85
Insole 1.5mm insole board $0.09
Outsole Lamination $0.50
Cement & Thread $0.50
Standard shoe packing is around $.77

Here is a list of shoe material suppliers 

The Ultimate Shoe Material Guide Book

Start with In-depth study of material types available in modern shoemaking. Learn the Technical details of shoe material specification. 195 pages or 300 color photos.

Buy Now

on sale $39.99

Posted on

Running Shoe Parts Terminology

Running Shoe parts Diagram

The Running Shoe and its Parts:The Anatomy of a Shoe


erminology of a Running Shoe Parts: Toe Box, Upper, Lacing, Pull Tab, Heel Counter, Midsole, Insole, Foxing, Insoles, Outsole.
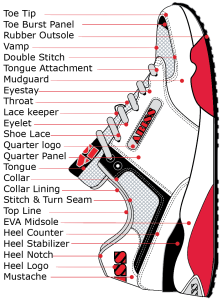
Running Shoe Parts Terminology:

The Toe Tip:
Thin rubber strip from the outsole with a stitch grove to hold it on to the upper.
Rubber Outsole:
Compression molded in a flat mold
Toe Burst Panel:
Reinforces the vamp to prevent the big toe nail from tearing the vamp
Vamp:
The running shoe vamp should be soft, flexible and breathable.
Tongue Attachment:
A double row of stitching that anchors the base of the tongue to the vamp.
Mudguard:
The Muguard is the shoe .elementor-divider__svg:first-of-type{-webkit-box-flex:0;-ms-flex-positive:0;flex-grow:0;-ms-flex-negative:100;flex-shrink:100}.elementor-widget-divider--element-align-left .elementor-divider-separator:before{content:none}.elementor-widget-divider--element-align-left .elementor-divider__element{margin-left:0}.elementor-widget-divider--element-align-right .elementor-divider .elementor-divider-separator>.elementor-divider__svg:last-of-type{-webkit-box-flex:0;-ms-flex-positive:0;flex-grow:0;-ms-flex-negative:100;flex-shrink:100}.elementor-widget-divider--element-align-right .elementor-divider-separator:after{content:none}.elementor-widget-divider--element-align-right .elementor-divider__element{margin-right:0}.elementor-widget-divider:not(.elementor-widget-divider--view-line_text):not(.elementor-widget-divider--view-line_icon) .elementor-divider-separator{border-top:var(--divider-border-width) var(--divider-border-style) var(--divider-color)}.elementor-widget-divider--separator-type-pattern{--divider-border-style:none}.elementor-widget-divider--separator-type-pattern.elementor-widget-divider--view-line .elementor-divider-separator,.elementor-widget-divider--separator-type-pattern:not(.elementor-widget-divider--view-line) .elementor-divider-separator:after,.elementor-widget-divider--separator-type-pattern:not(.elementor-widget-divider--view-line) .elementor-divider-separator:before,.elementor-widget-divider--separator-type-pattern:not([class*=elementor-widget-divider--view]) .elementor-divider-separator{width:100%;min-height:var(--divider-pattern-height);-webkit-mask-size:var(--divider-pattern-size) 100%;mask-size:var(--divider-pattern-size) 100%;-webkit-mask-repeat:var(--divider-pattern-repeat);mask-repeat:var(--divider-pattern-repeat);background-color:var(--divider-color);-webkit-mask-image:var(--divider-pattern-url);mask-image:var(--divider-pattern-url)}.elementor-widget-divider--no-spacing{--divider-pattern-size:auto}.elementor-widget-divider--bg-round{--divider-pattern-repeat:round}.rtl .elementor-widget-divider .elementor-divider__text{direction:rtl}.e-container>.elementor-widget-divider{width:var(--container-widget-width,100%);--flex-grow:var(--container-widget-flex-grow,0)}

Start Building Your Brand

A must-have for anyone serious about launching a footwear company. 4 text books, shoe business documents and downloadable content not available anywhere else! The Shoe Company Start-Up Pro Pack is all you need to get your shoe business off the ground.
Learn more
Download Today

Posted on

Nike Air Jordan Imminent Shoe Review

Air Jordan Imminent Back View

Nike Air Jordan Imminent Shoe Review:

No doubt Nike makes great shoes, but today we are going to take a critical look at the Nike Air Jordan Imminent.  Rather than review the styling from “Sneaker Freak” perspective or the performance of the shoe for actually playing basketball, I want to do a “tear down” to study the construction, materials, assembly, value and production costs.

Our review  will start with what it costs Nike to make the Air Jordan Imminent.  The retail price of the Jordan Imminent is on the high side at $120.   Based on the selling price of $120 for an 8% import duty shoe,  with ocean shipping included,  I calculate the shoe factory build price to be around $25.00.  In 2012, Nike paid Michael Jordan over 60 million dollars, so I figure there must be a royalty payment of maybe a dollar per pair?  So let’s figure it’s around $24.00 to make the shoe.  Of Nike’s build price we can estimate 25% to 35% for the factory LOP,  maybe $8.00.   That leaves between $16.00 to $18.00 dollars for the materials, upper, leather and outsole parts.
Learn about shoe design The Nike Air Jordan Imminent upper pattern is not complicated.   Only 7 panels to make the upper, so the stitching make or cost is not very high. The Jordan Imminent is very well put together. The stitching is clean and straight and all the upper stitching is a double row. While I’m a little surprised to see that none of leather edges are skived and tuned, the exposed edges are solid black, by drum dyed leather or painted edges.  The full grain leather vamp is smooth and well-formed, evidence that the leather is well backed, I would expect Imminent’s upper parts are assembled with hot melt glue and carefully pre-molded before the lasting operations to make such a nice shape.
Nike Air Jordan Imminent ReviewFor the logo treatments, Nike has gone with a very simple look for the Air Jordan Imminent.  Only 2 embossed logos made by RF welding process.  The heel side logo on the lateral side and tongue logos are both cleanly and deeply embossed, this leads me to believe that Nike has swapped in a matte finish synthetic material for these panels instead of full grain leather.  Full grain leather doesn’t melt so it will resist deep embossing.  The synthetic leather logo panel is showing white backing on the edge…could be better.

The double row of stitching around the tongue logo is super clean and perfectly round, definitely made by a computer stitching machine. The embossed stitch flange is a nice touch also.

The 3D air mesh with black over red for the tongue and heel pad is a neat and subtle accent. All the tongue seams are turned out so there is not a stitch to be seen, very nice.

The upper materials in general are nice but nothing exotic or expensive.  The waxed laces are simple and clean.  Red webbing covers the heel seams, a great way to hide ugly seams and a good way to increase the cutting yield without the shoe looking like a puzzle.  The collar topline is neatly rolled into the lycra lining.  I did notice a small kink where the eyestay reinforcing ends, maybe a little extra skiving inside could smooth that out.  A word about the eyelets, there is none.  Just punched holes for all the positions.   Okay…but not great.

Air Jordan Imminent Back View        Heel View  How nike shoes are made

Following the ultra clean theme for the Air Jordan Imminent outsole, Nike has gone with a very simple design for the midsole and outsole parts. The injection molded EVA midsole is a single color with three contour breaks.  I did see some waves in the midsole top line,  I do expect there will be waves where the uppers leather panels overlap, but my pair  has a few small waves on flat panels, not the best workmanship but a very minor issue.
Jordan Imminent Heel air BagThe midsole is solid EVA in the forefoot with a small heel air bag.  The Nike Air bag is blow molded with 10 stabilizing pillars.  After molding,  the air bag is painted silver to add an accent.   A closer look shows the Air Jordan Imminent air bag has the blow mold seam hidden by the outsole bottom or midsole.

The rubber bottom is a simple color blocking with an EVA break showing in the forefoot. The rubber parting lines are thin and super clean, well-trimmed.  This is evidence of high quality tooling, as you would expect on any Air Jordan shoe.
SIde View of Outsioe


Overall this is a clean shoe, simply built, nice materials.  An efficient, labor-saving design, lacking the extra nice touches that you would like to see in a shoe which costs $120.00.  I like the shoe.  It’s well made, with high quality materials, a basic clean shoe.