The Shoemakers Academy.com is pleased to announce reduced book and pro-pack shipping to Europe and the UK. Our publisher is now offering direct shipping from printing plants in Europe! At the Shoemakers Academy.com our goal is help educate shoemakers not profit off shipping charges. We are passing the shipping reduction directly to you!
Shipping cut from $22.50 to $12.00
Order directly from Shoemakers Academy.com or Amazon
What tooling do I need to start shoe production? The tooling required for production varies greatly depending on the design of the shoe. A simple moccasin style shoe requires almost no tooling, just a single cutting die, but a complicated high-tech running shoe will require dozens of different tools to make production quantities.
Here’s a basic list of the Shoe Tooling for Mass Production of a modern athletic shoe.
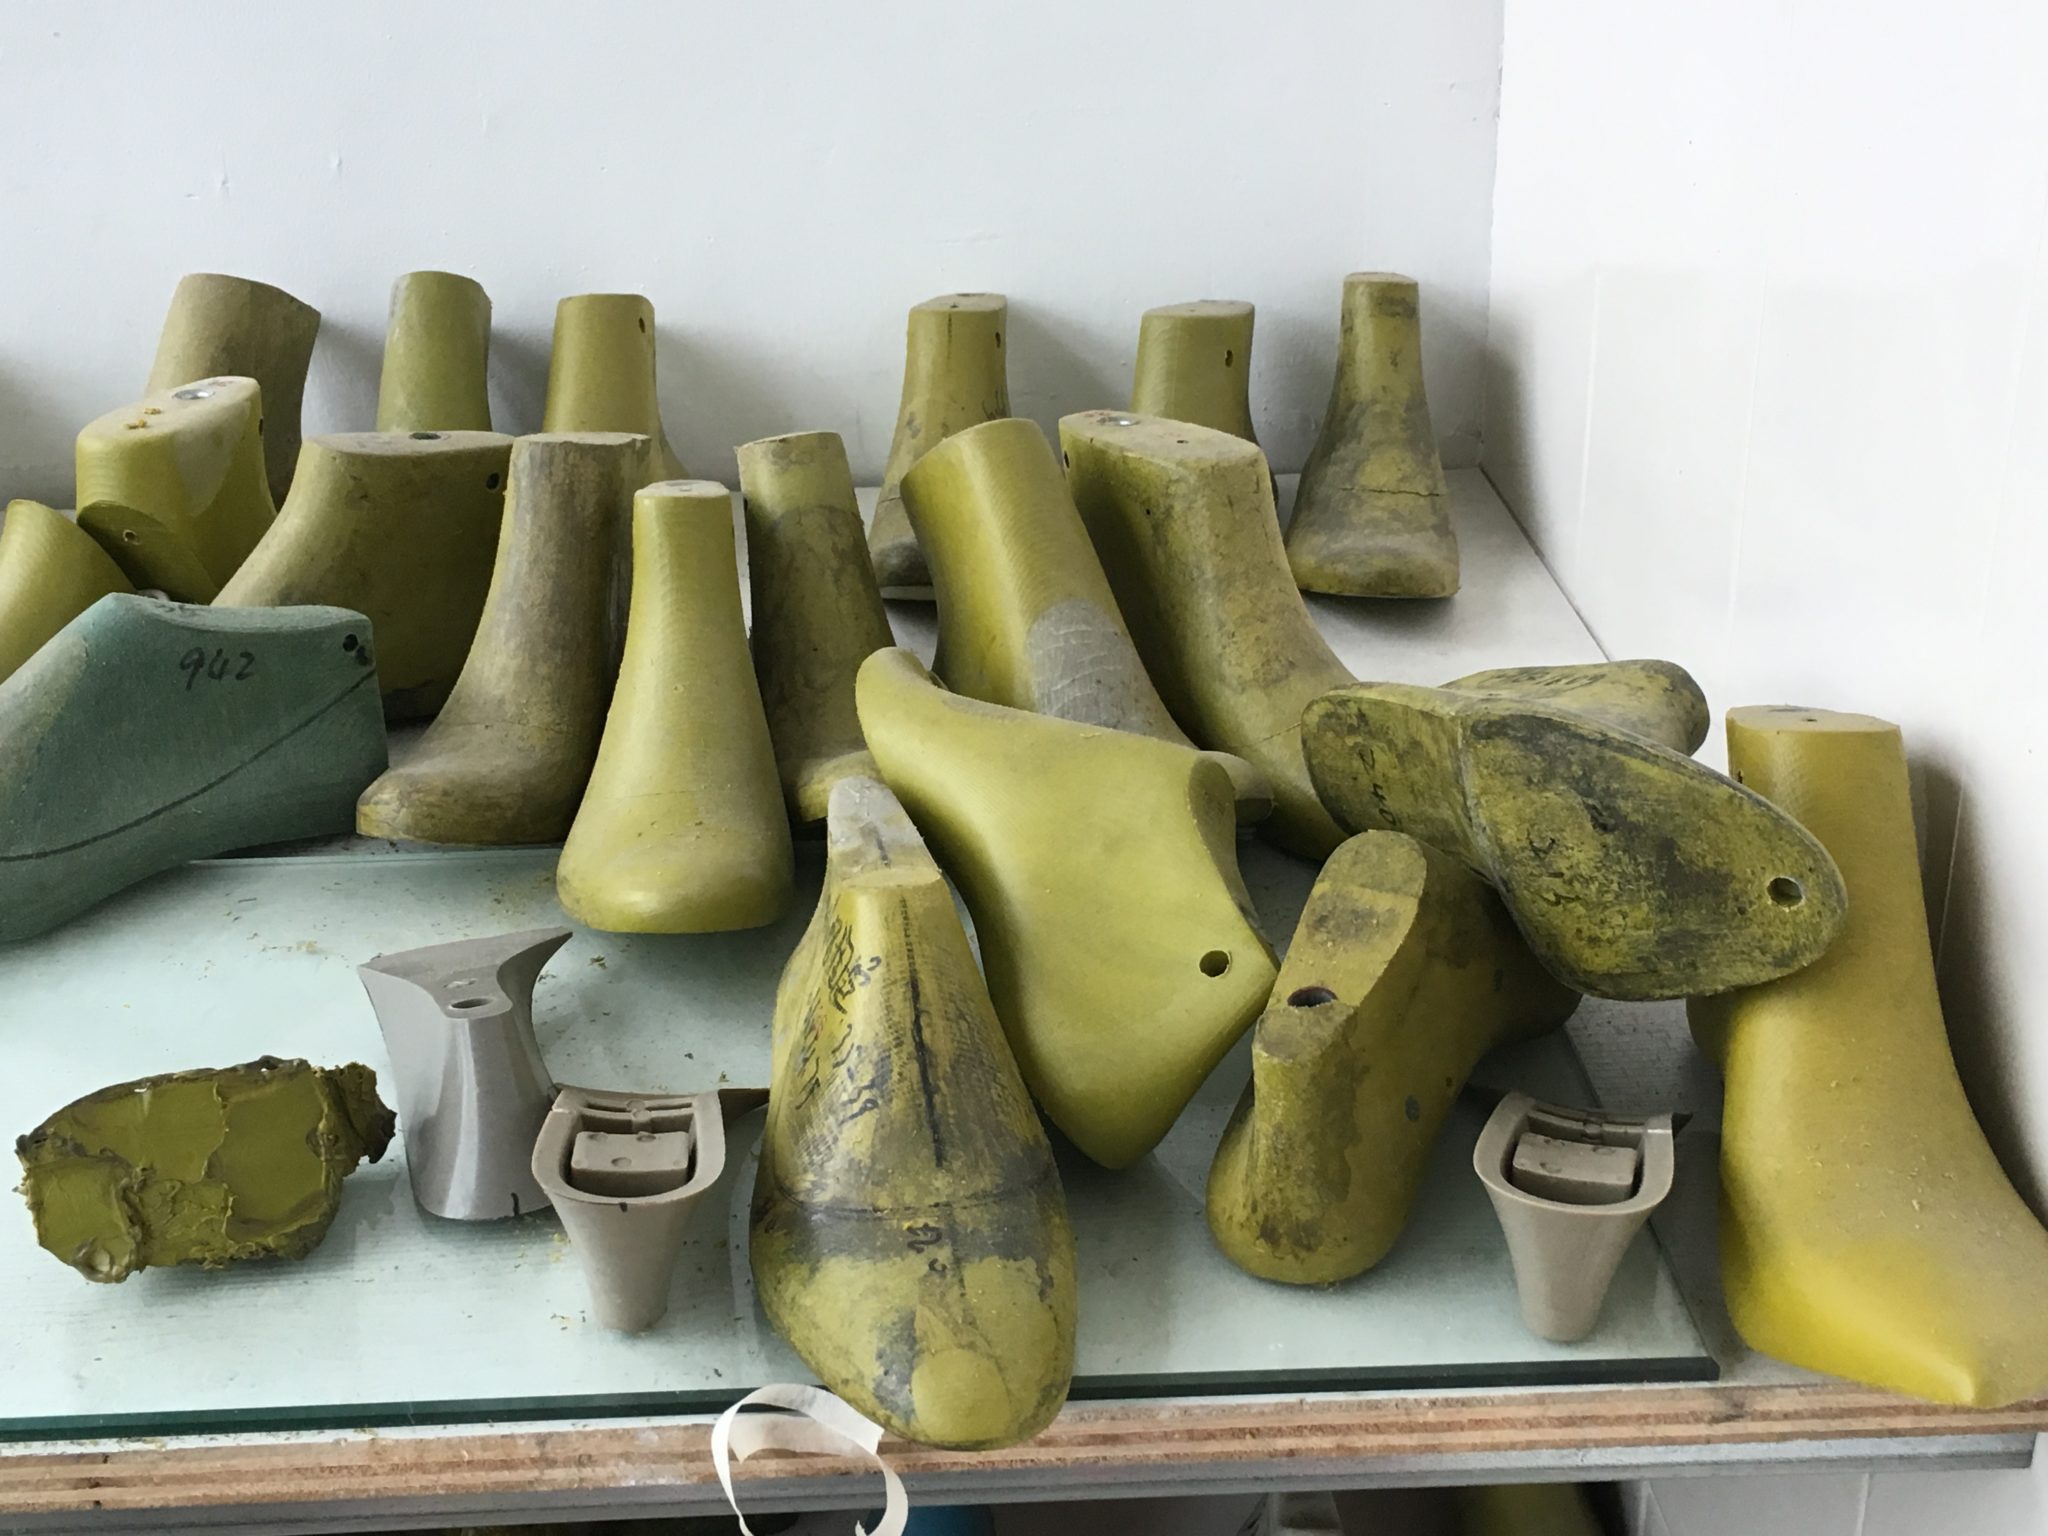
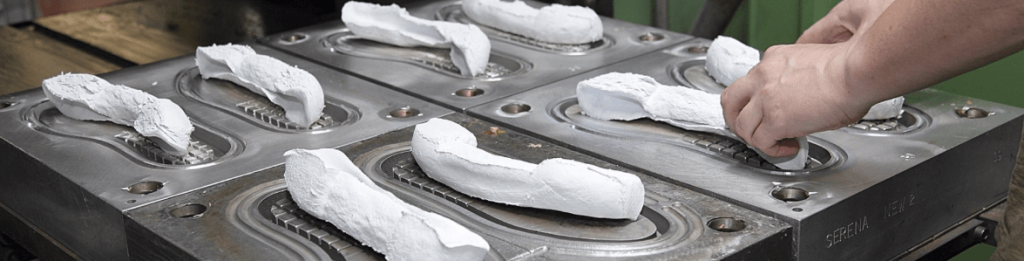
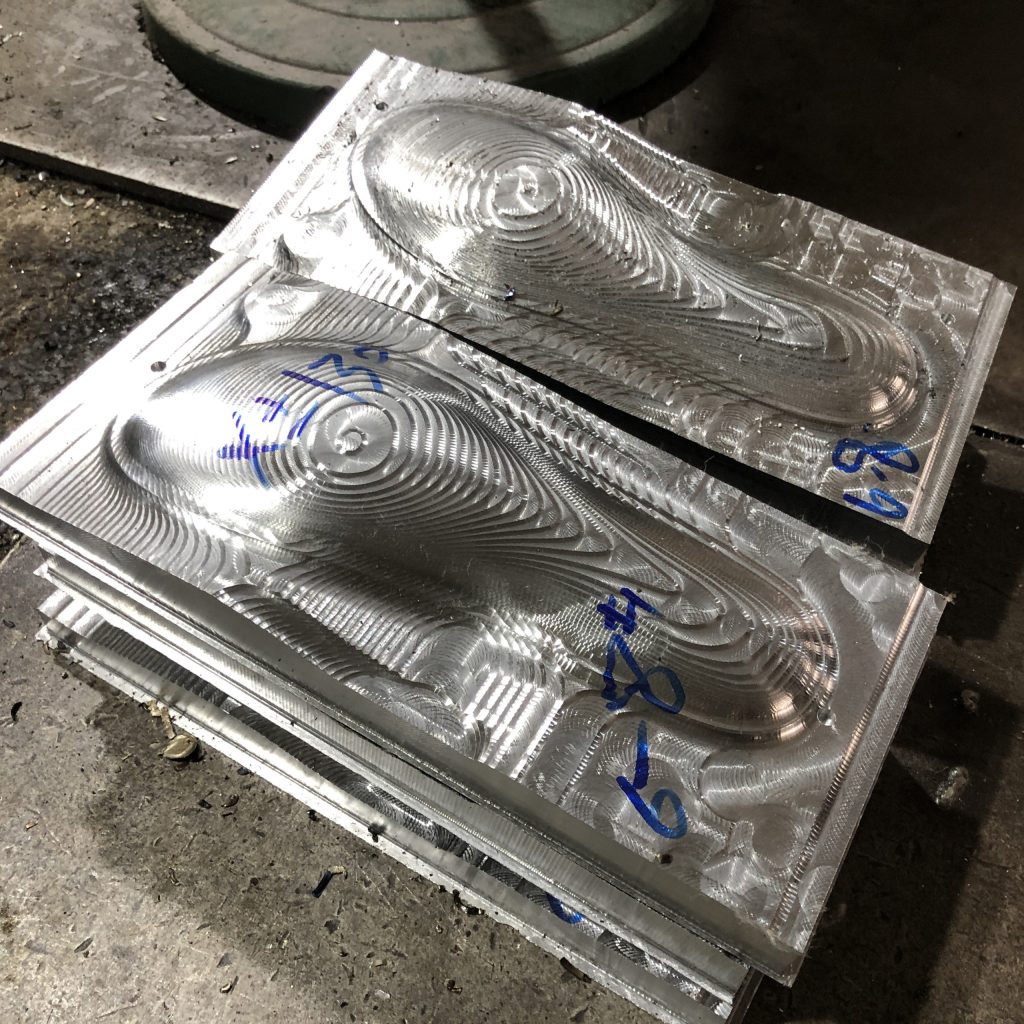
Shoe lasts
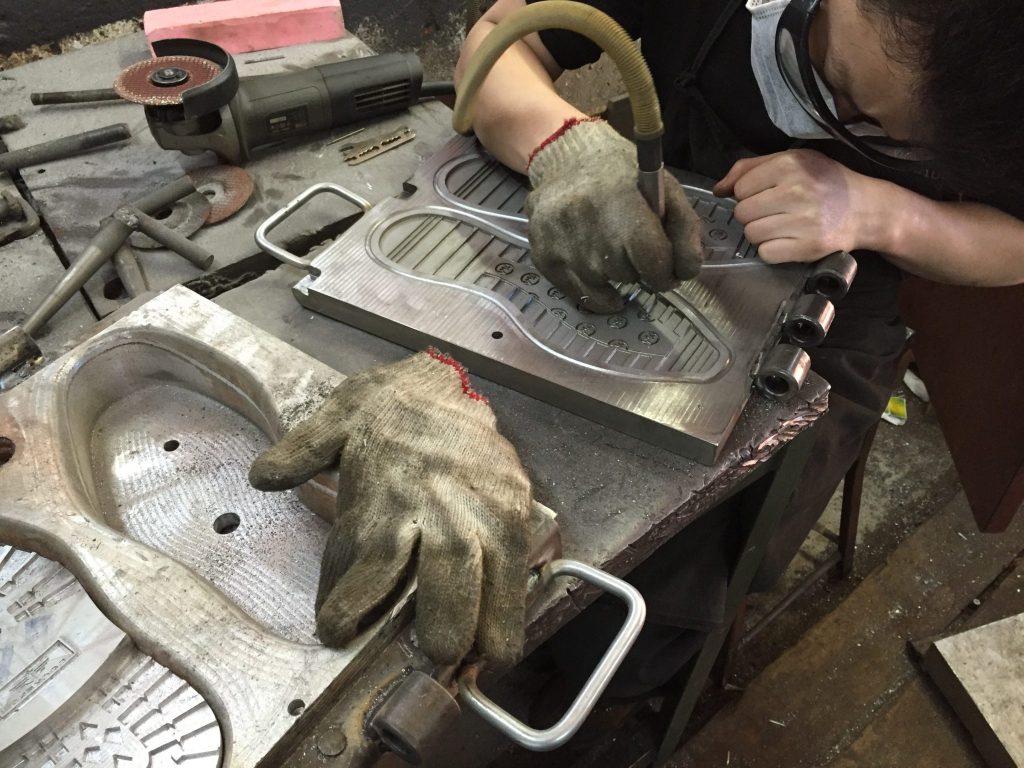
Development and Last Making
Lasts made of metal or plastic are required to produce shoes. One last for each shoe size and both left and right are required. A full-size grade for normal shoe production requires 14 sizes and you’ll need about 750 lasts in total to support mass production of 1500 pairs per day. Last Options: Shoe factories have a stock of lasts on hand. If you get lucky, you may find a last that is suitable for your shoe design without having to make a new set. You can often develop a new last by visiting the last shop or factory. They will have a library of lasts you can select from to start.
Production cutting dies
Cutting dies getting a coat of paint
Each shoe design requires its own set of cutting dies. Each shoe part needs its own cutting die. Again, if you have 14 sizes of shoes, you will need 14 sets of cutting dies. A set of cutting dies may have a dozen different pieces. The number of pieces depends on how complicated the shoe pattern is. The factory will need cutting dies for all the hidden reinforcement pieces too.
Pattern cutting die options: To save the cost of opening new cutting dies for small orders, shoe factories are investing in automatic cutting machines. These cutting machines use water, laser, or vibrating blades to cut shoe pattern shapes by computer control. The new CNC cutting machines have vacuum conveyor belts and can cut thousands of parts per hour.
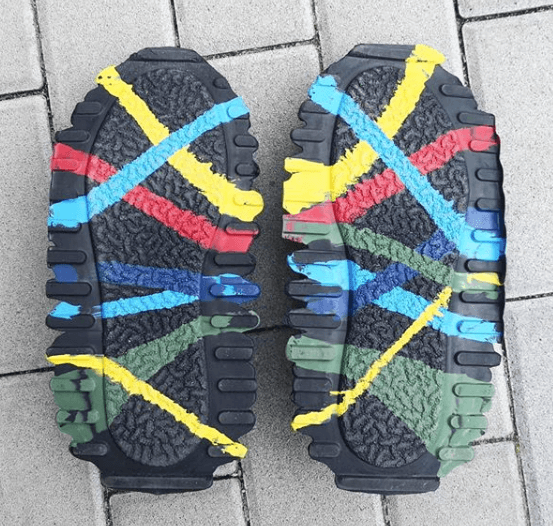
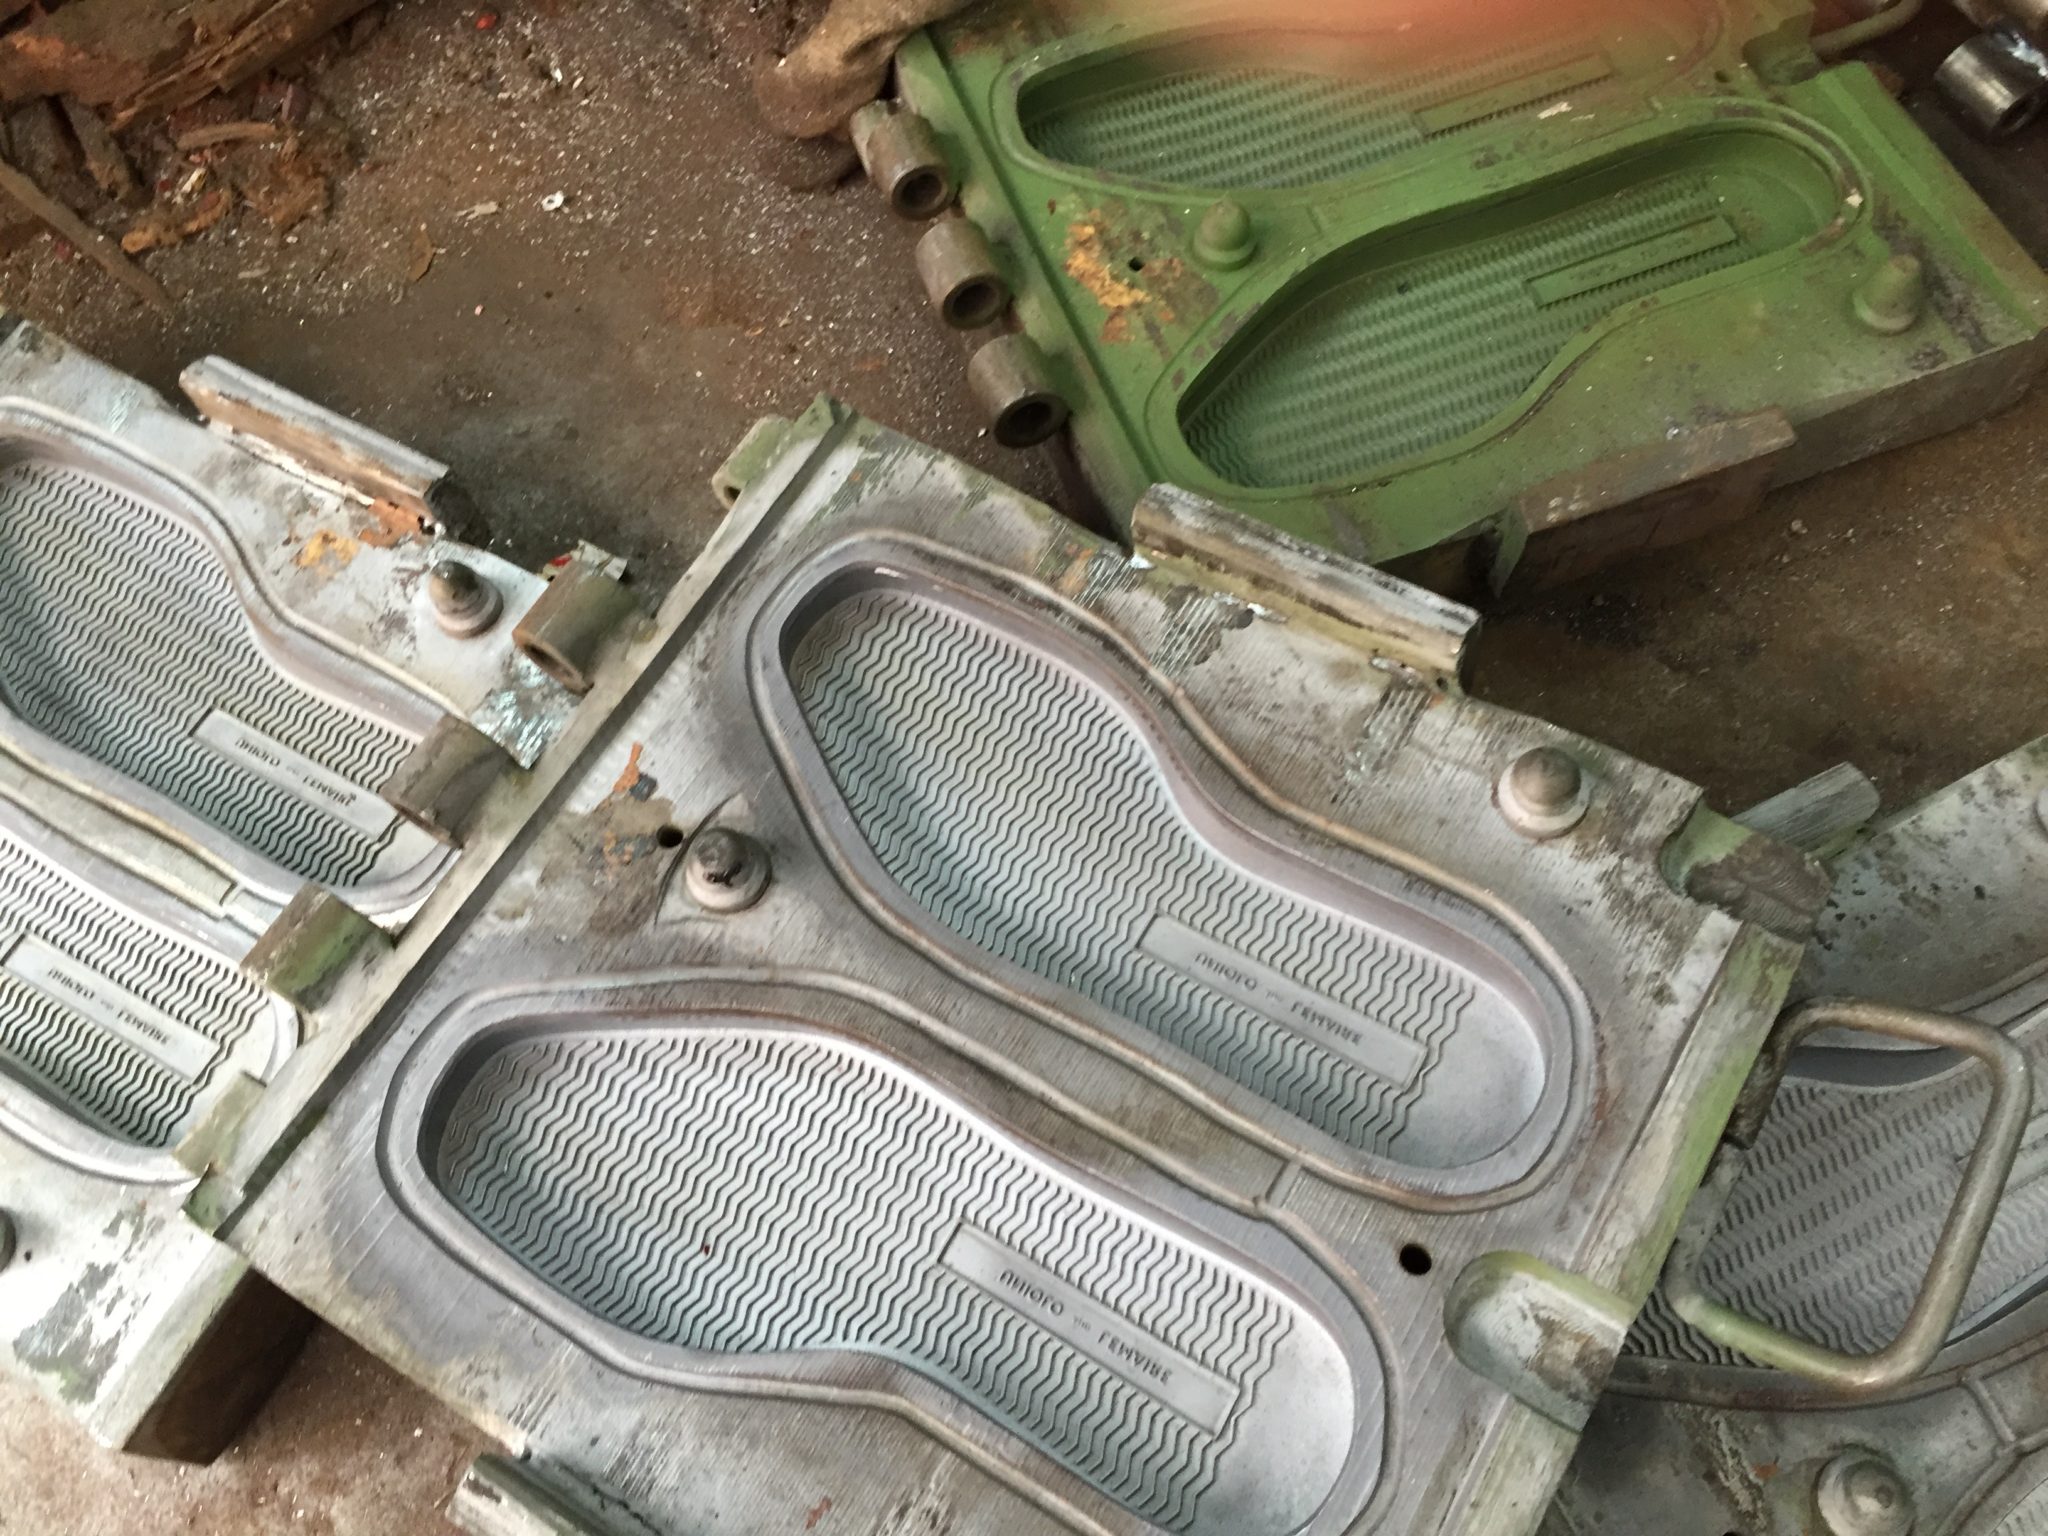
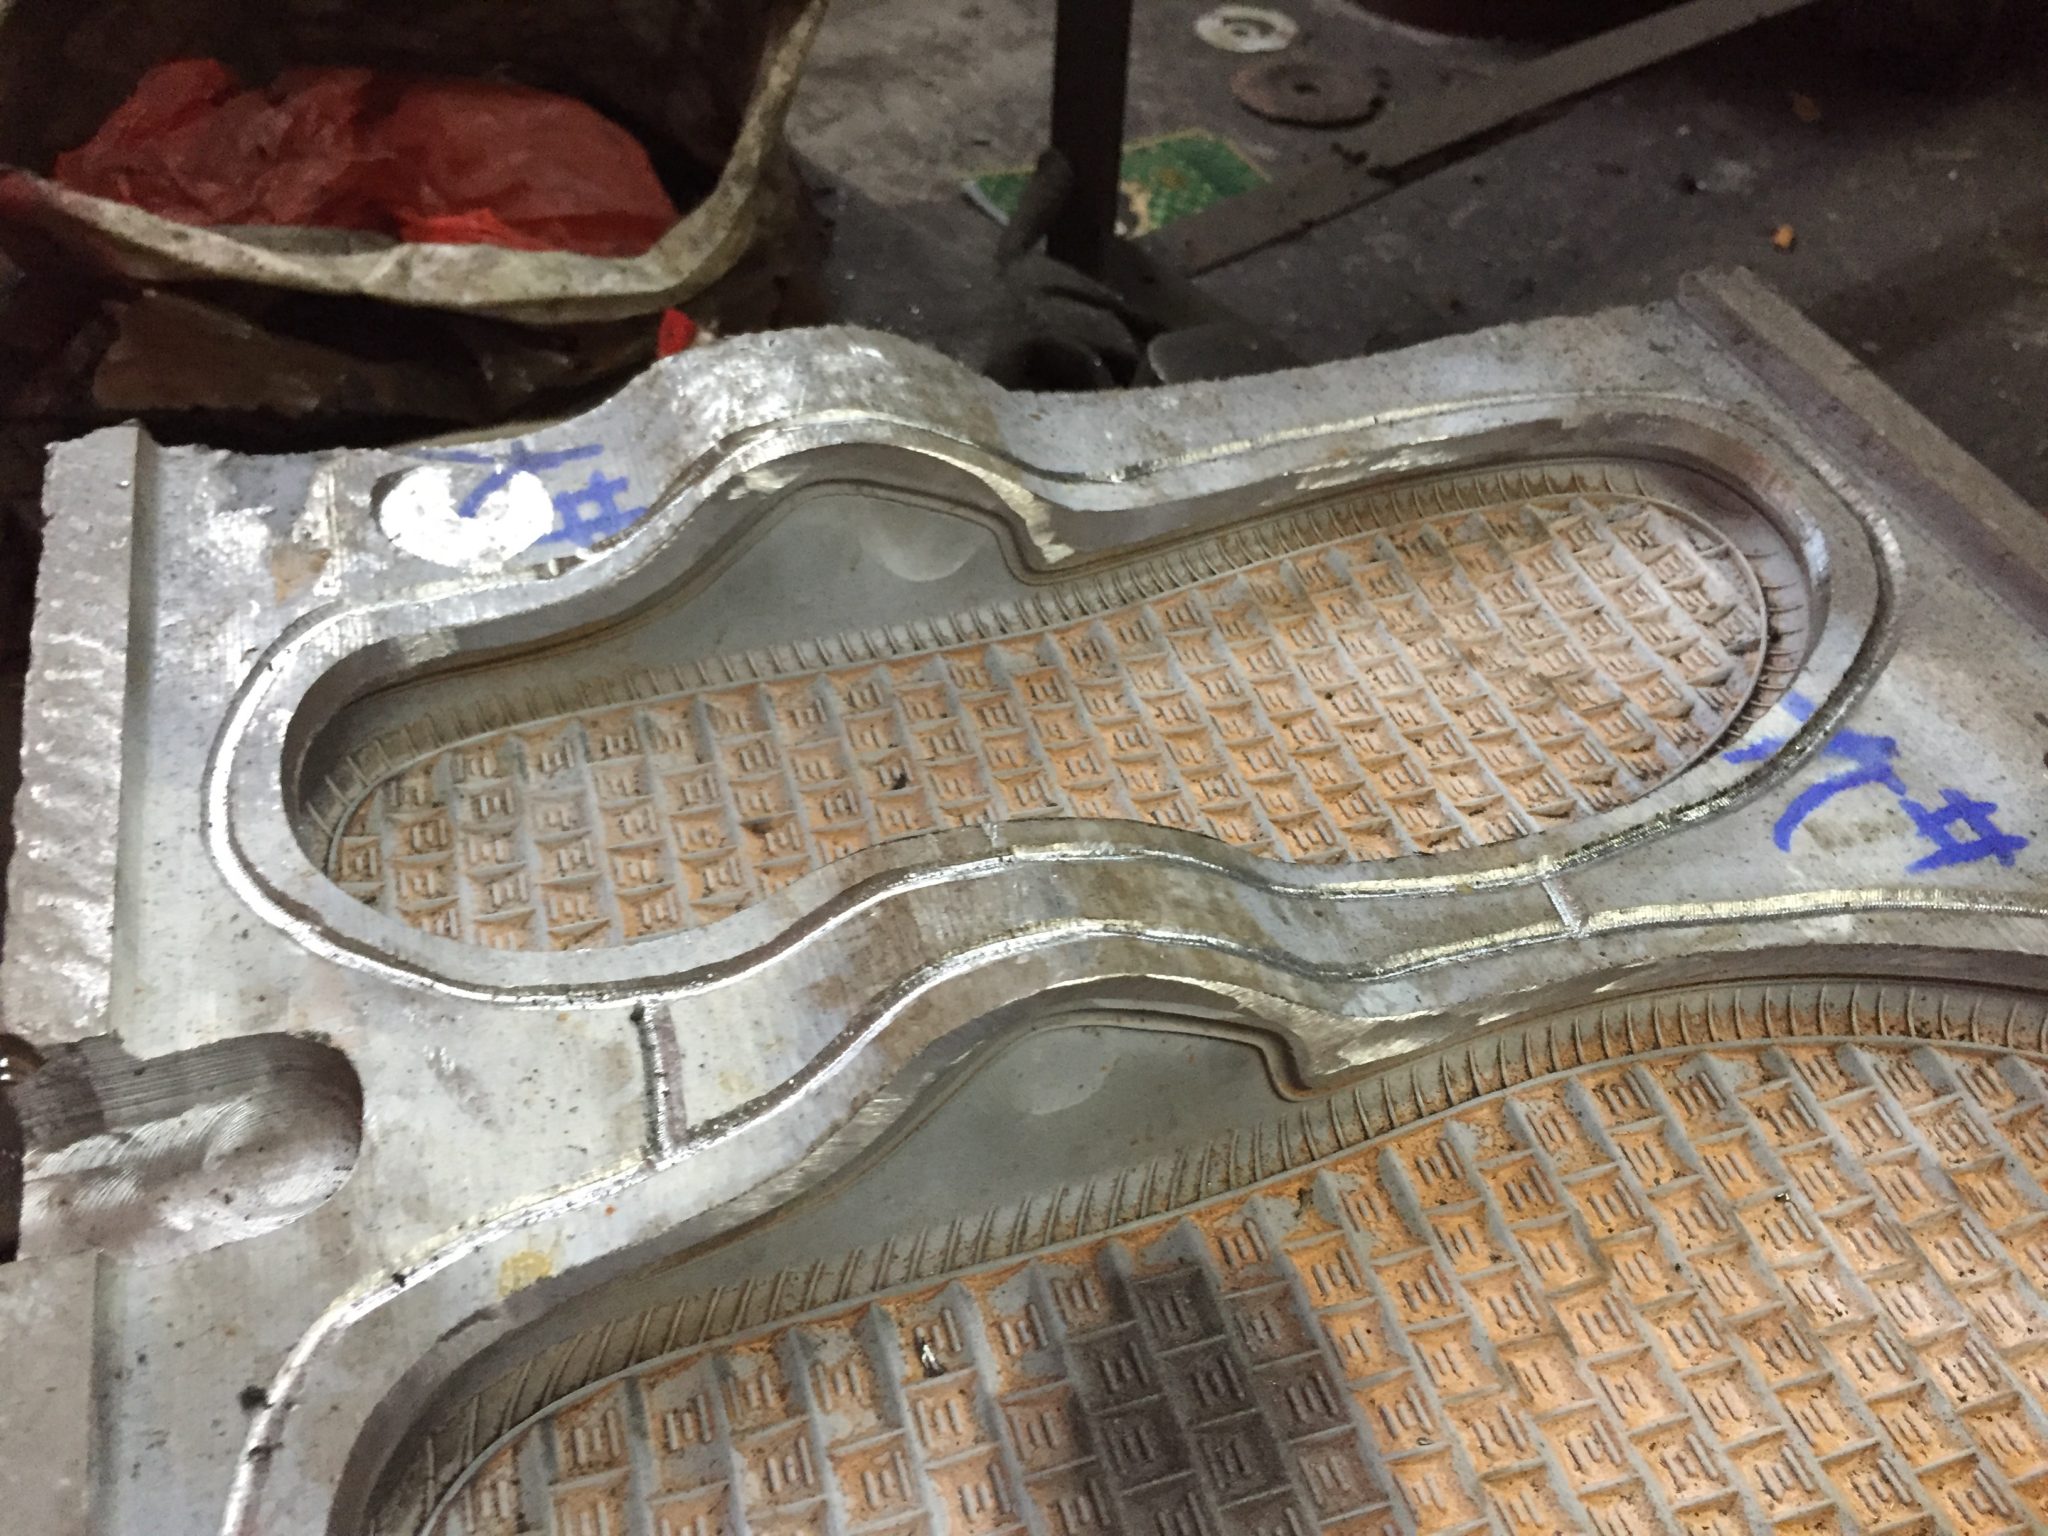
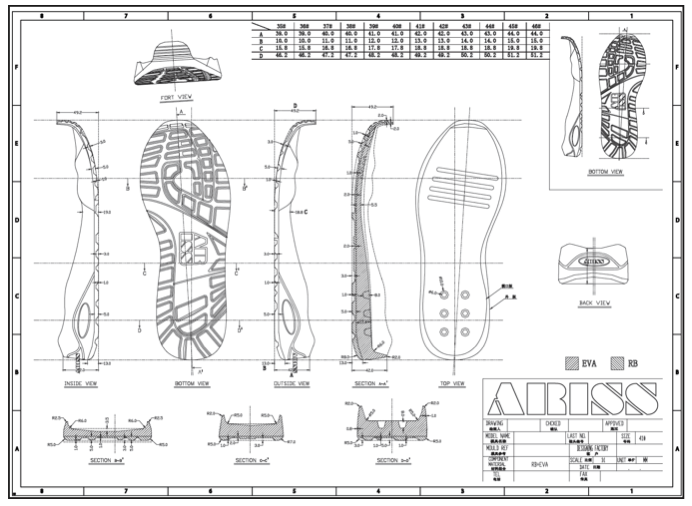
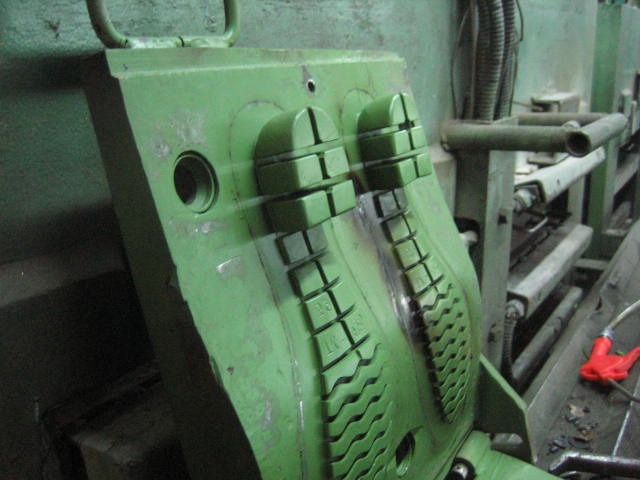
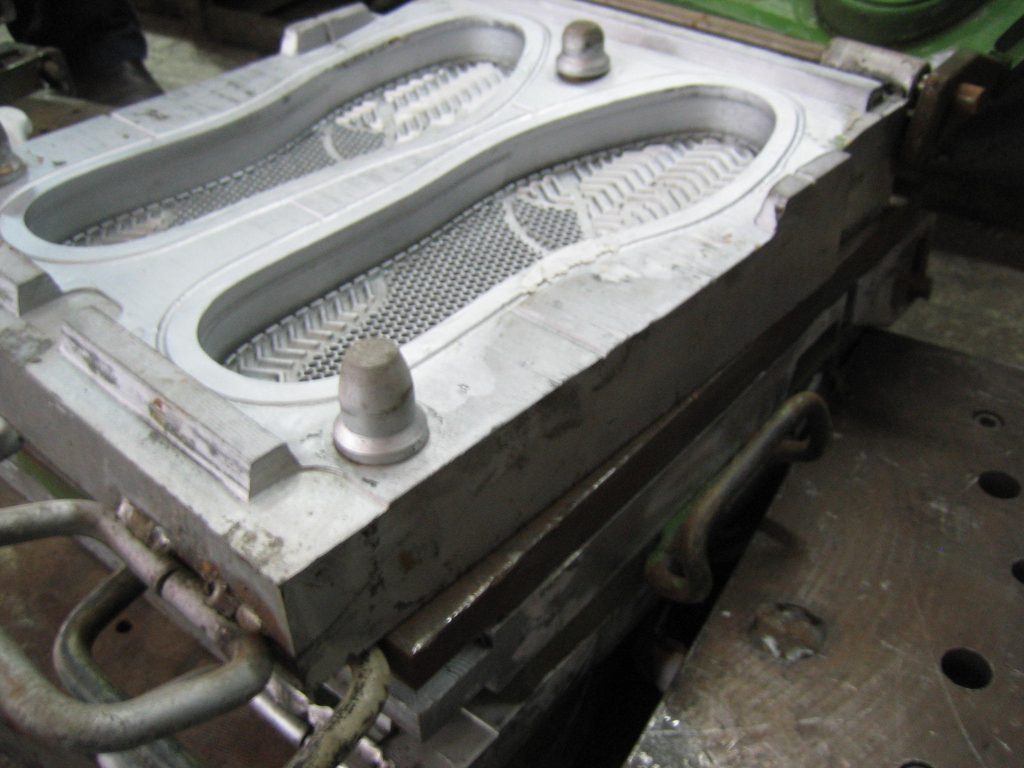
Outsole tooling for shoes
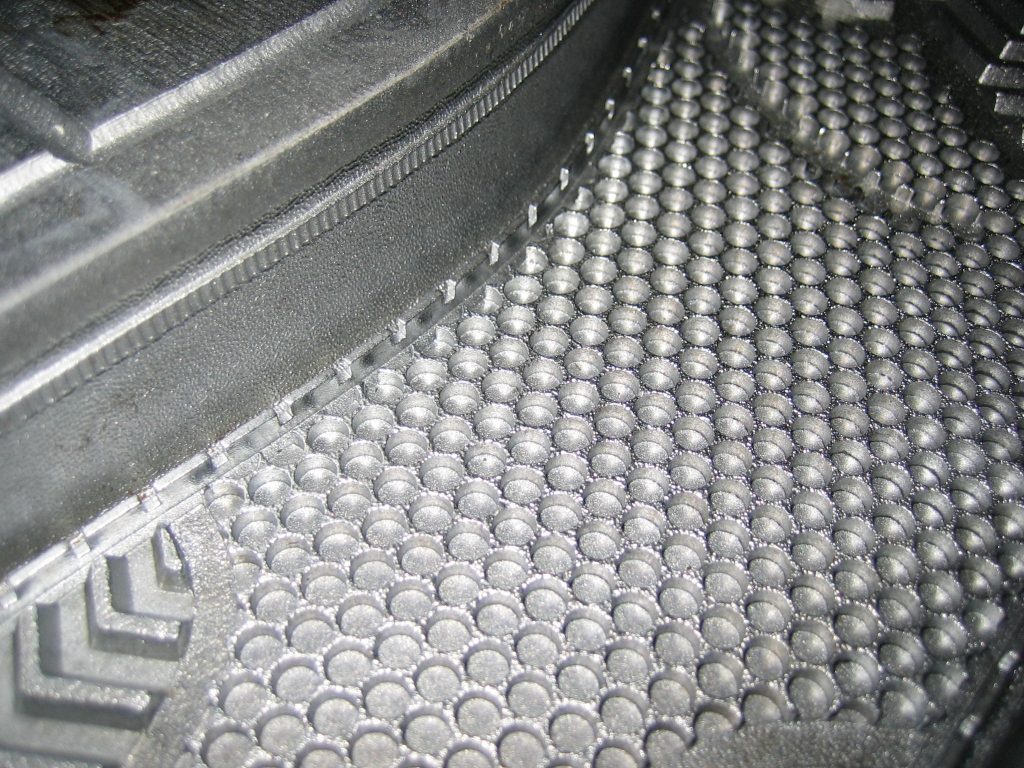
Outsole tooling is like a big waffle iron
Depending on the construction of your outsole unit you may need another set of tooling. Once again, the set would include 14 sizes, left and right. A cupsole is the simplest outsole and can have the left and right outsole built into the same mold. More complicated two-part soles will require molds for the EVA parts. Plastic shanks will require injection molds, etc…
Outsole tooling options: In China, many factories have “open” molds. These sole molds are free to use by any customer. The designs may not be cutting edge but you can’t beat the price. Many of these open molds are made with removable logo plates so you can add your own logos.
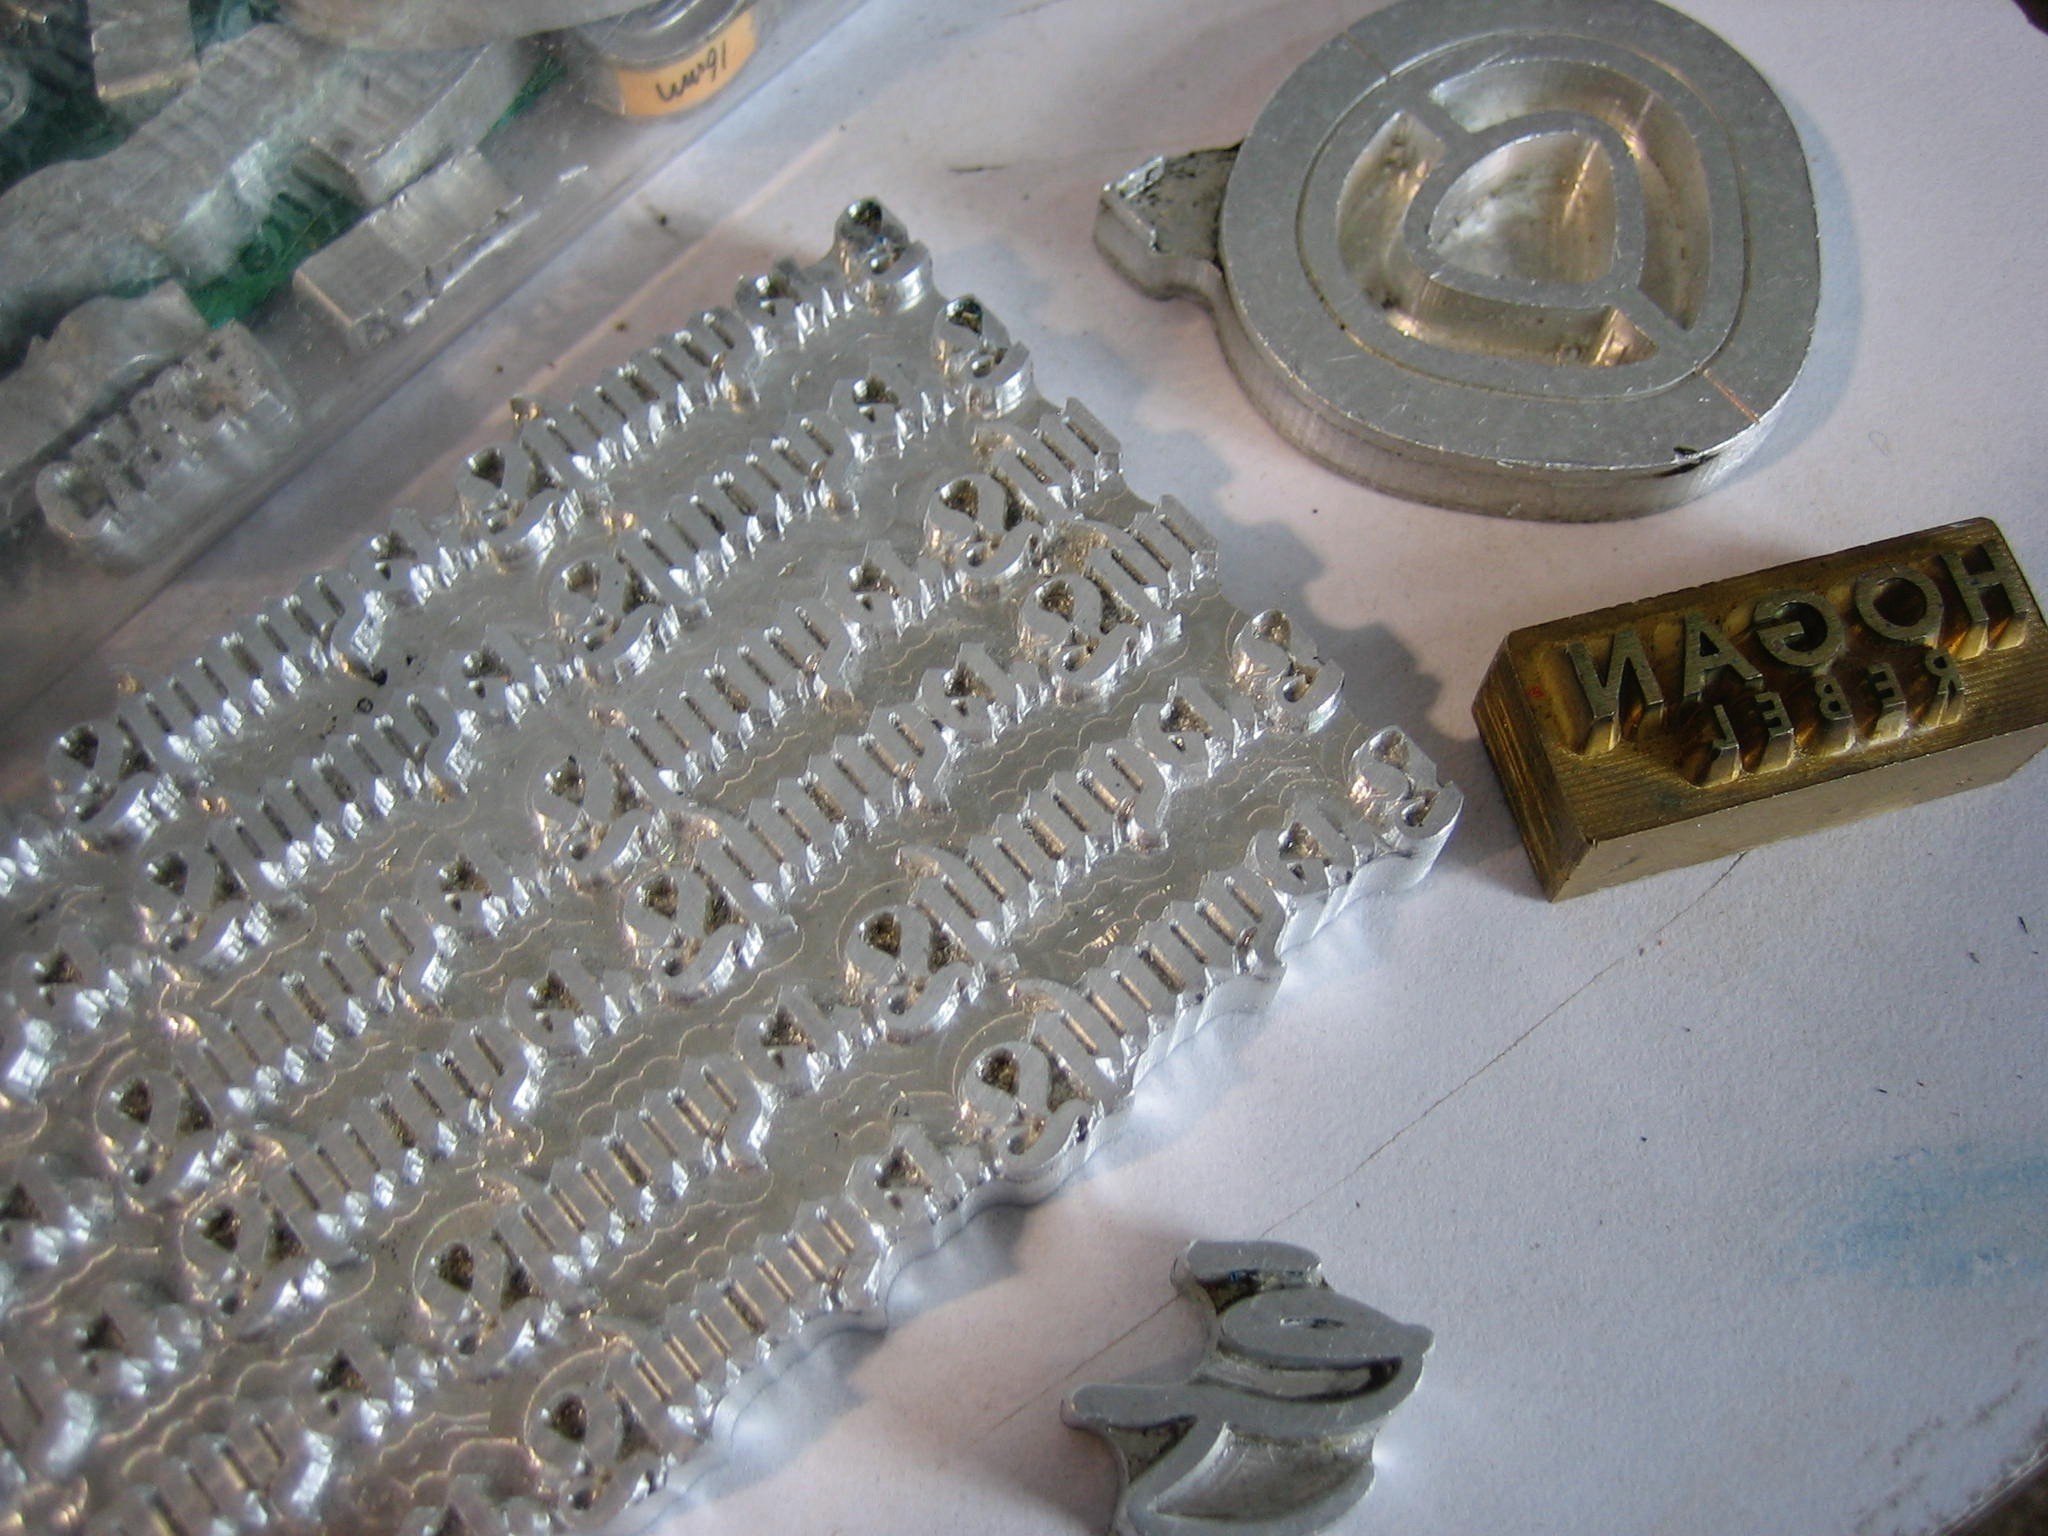
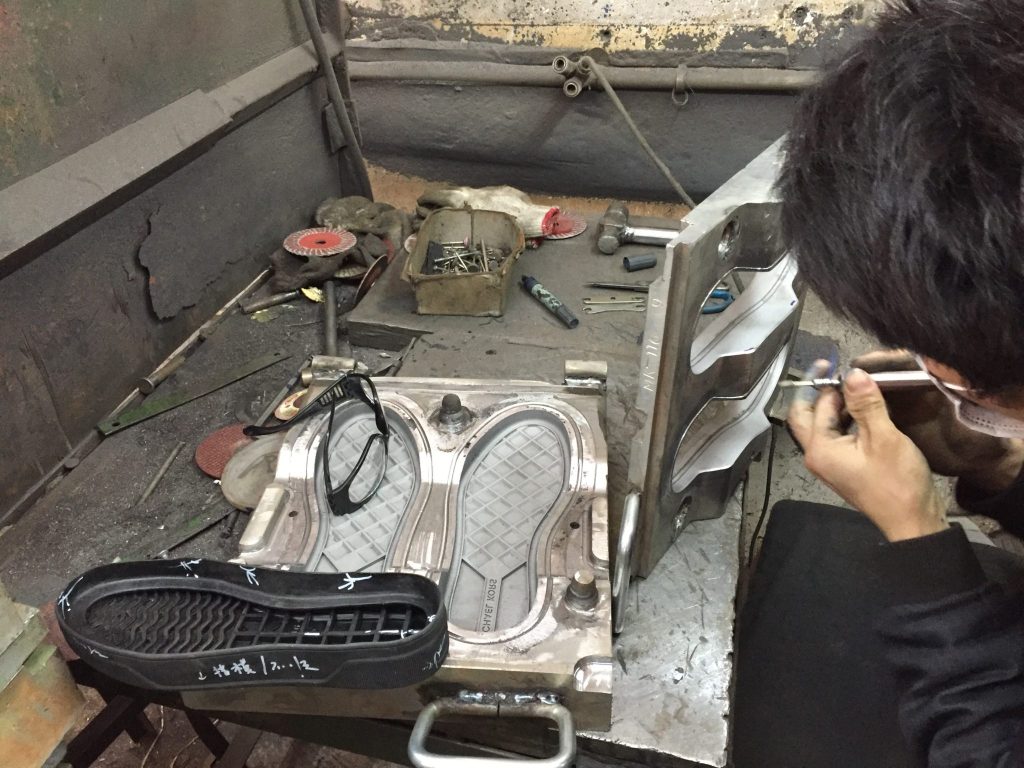
Logo Tooling
Shoe Logo Tools
Aside from the major tooling requirements for lasts, outsoles, and cutting dies, a shoe design may require some welding, embossing, or rubber logo micro injection tooling. To make a size run of shoes with logos you may need two or three logo sizes depending on the design.
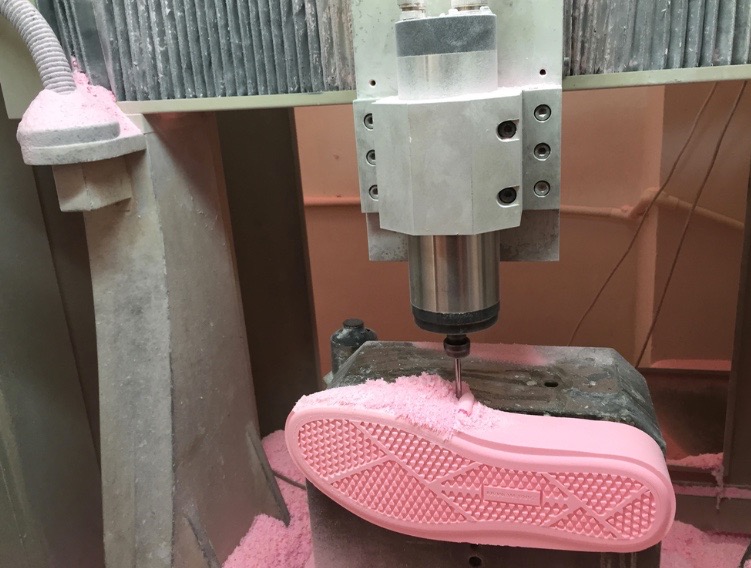
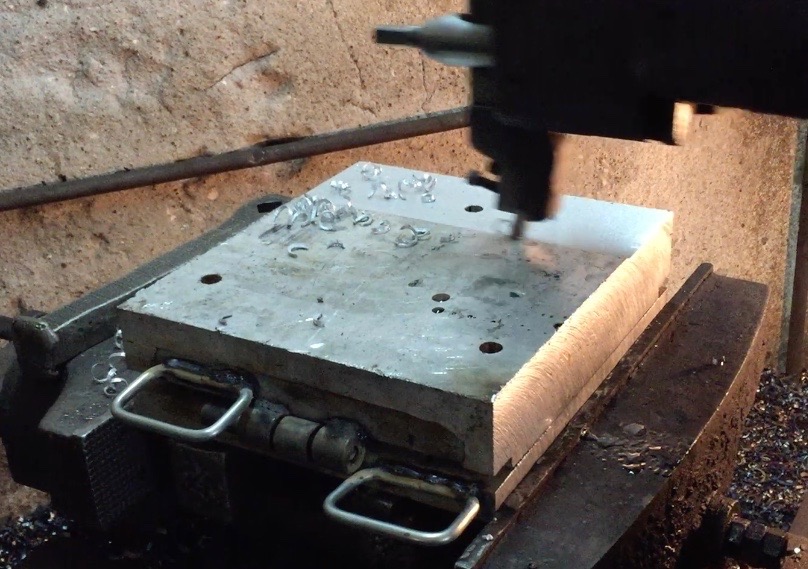
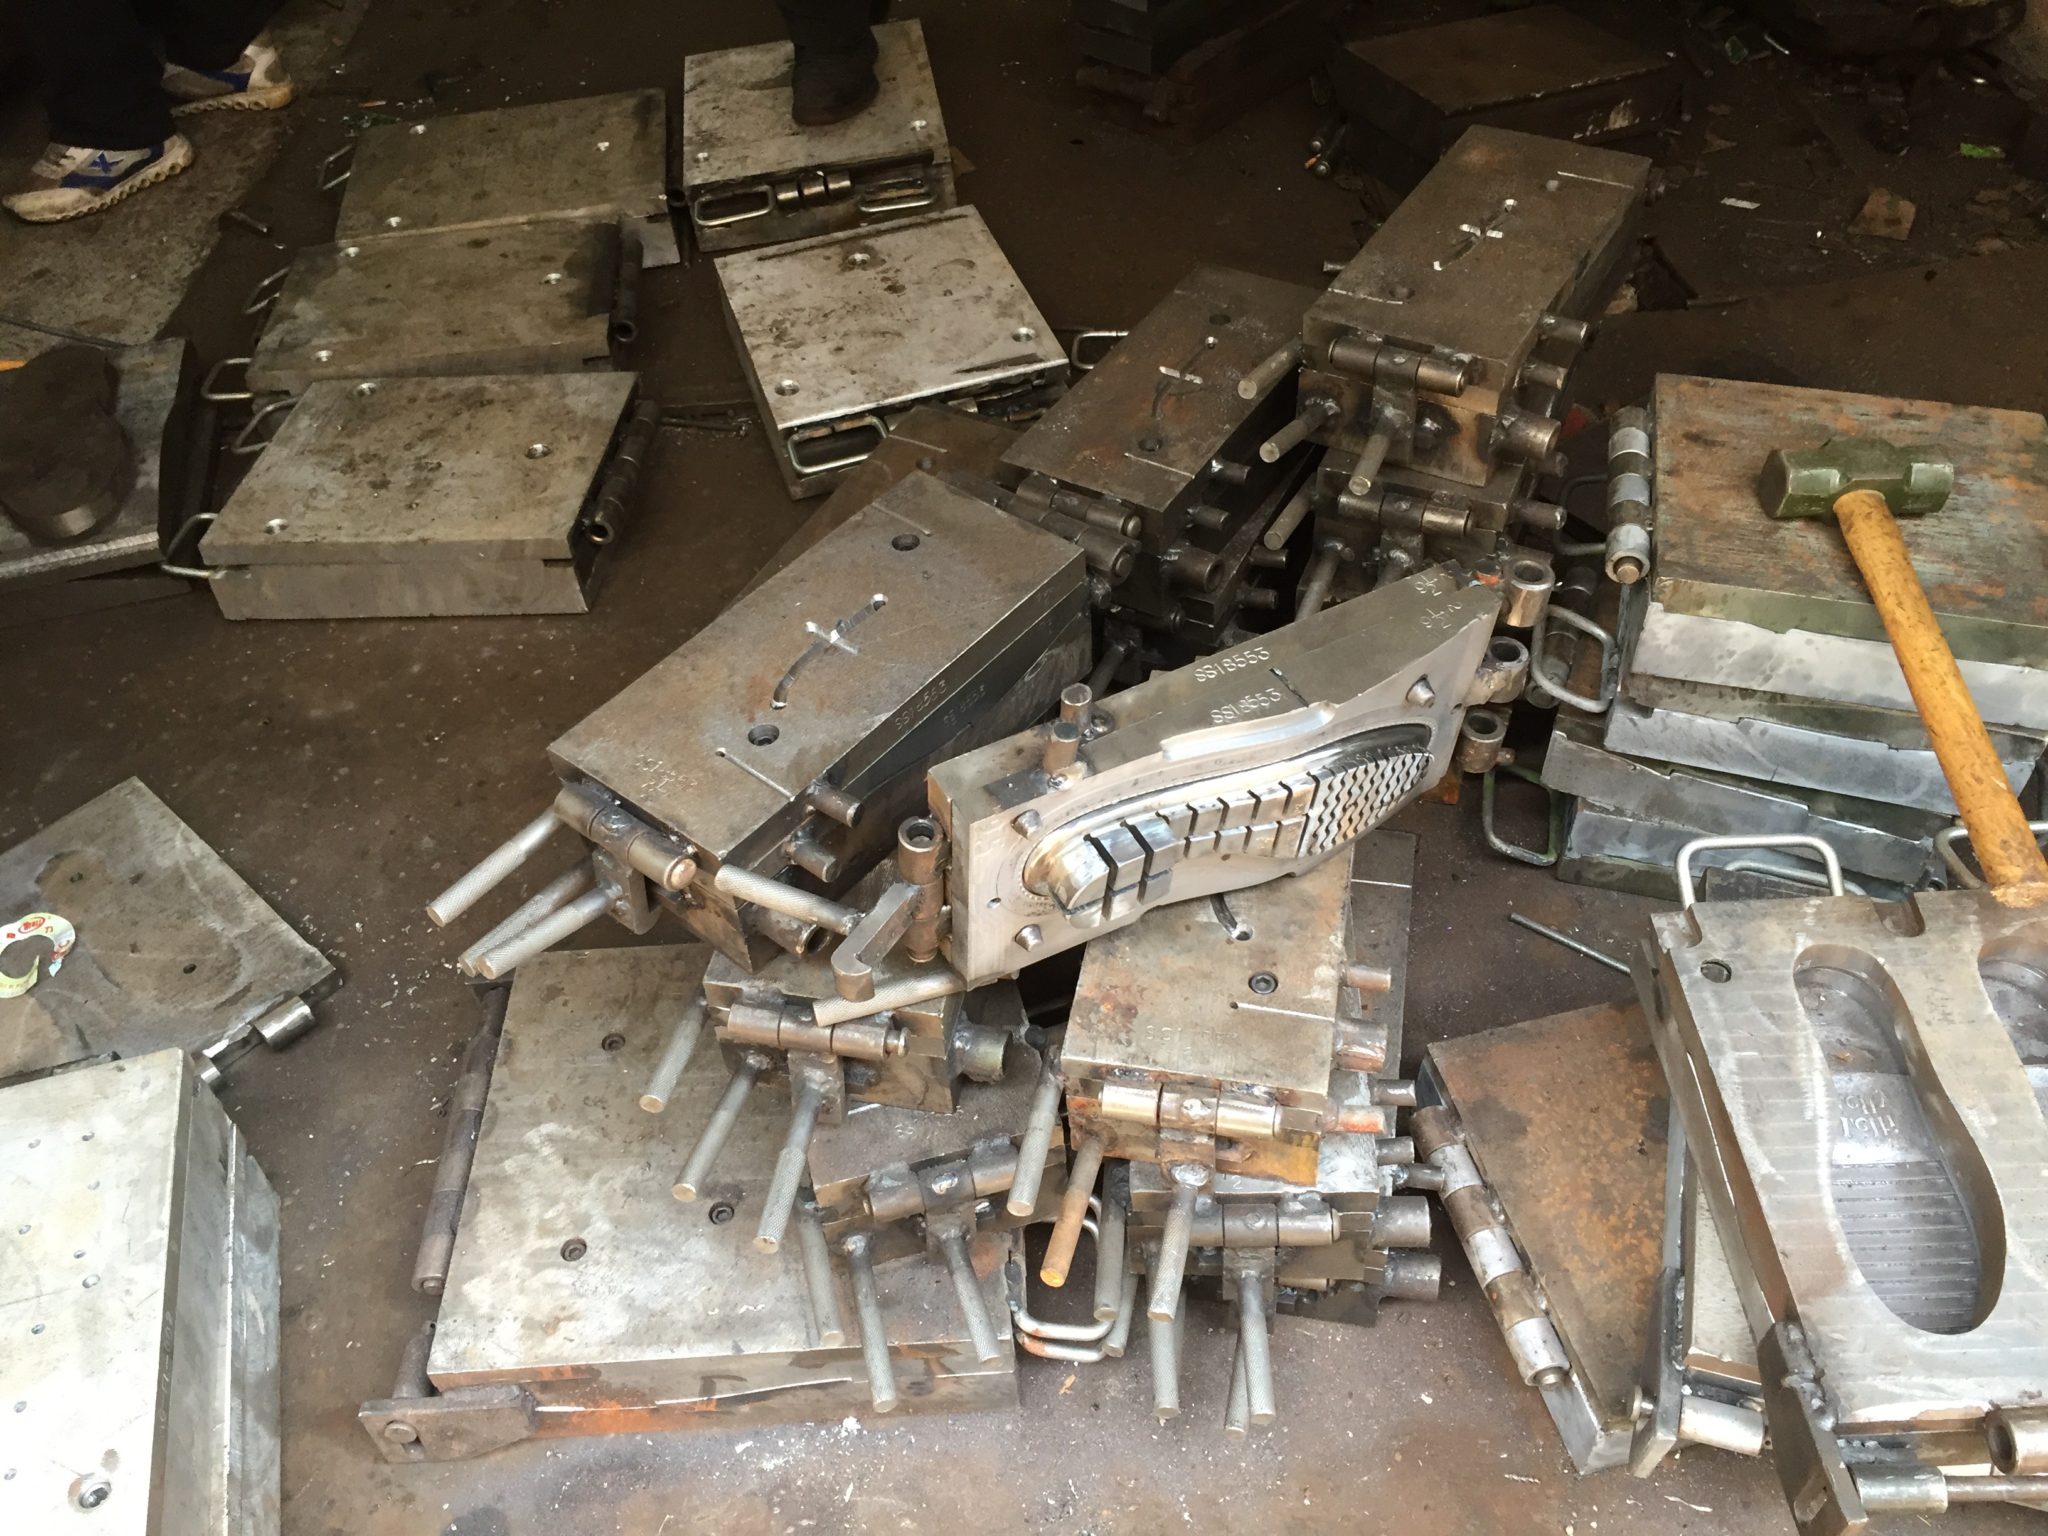
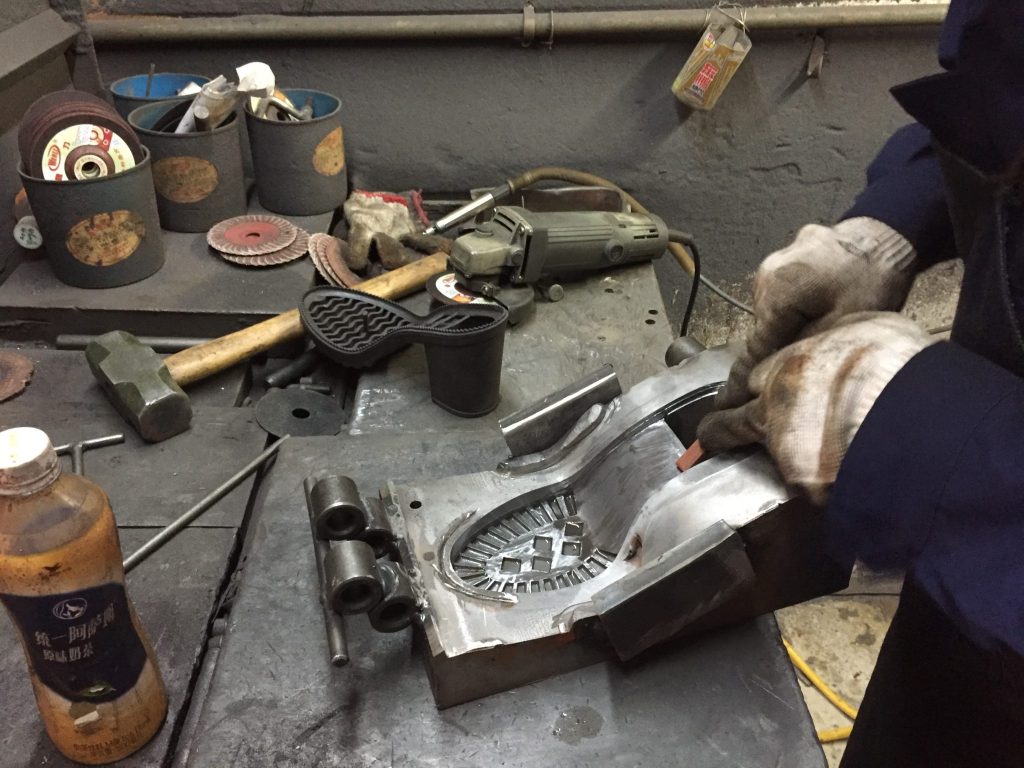
The cost of shoe tooling
Sneaker rubber outsole tooling being made
The tooling can add up pretty quickly! 14 midsoles, 14 outsoles, 14 sets of cutting dies, injection shanks, a dozen logo molds for uppers and you could easily have $85,000 worth of molds before you even start the production run, and that’s not including the last. Lasts may cost $3 to $7 each, and multiply that cost by 750 pieces.
A set of cutting dies may cost $3000-$5000. The factory will generally add the cutting die charge into the price of the shoe if you place a sizeable order. If you order less than 5000 pairs you will likely see a bill for lasts and cuttings dies.
The tooling expense explains why you often see the same outsoles and lasts used on several models. Many small companies use “open” molds. The open molds are outsole designs that have removable logo plates. While the designs may not be exactly what you are looking for and the last may not fit exactly as you want…They are open, available, and free to use.
Warning: After you learn the skills of footwear quality control you will never look at shoes the same way again. Shoe quality inspection is a critical skill for a shoemaker to master, as footwear construction quality is a very important feature of any shoe you may make, buy, or sell. In this article, you will learn the basic process of footwear quality control in the shoemaking industry
Knowing how to run a shoe quality inspection is a critical skill for shoe designers, developers, and product line managers. When a new sample arrives it’s critical to inspect the materials, assembly technique, and workmanship. You must know the correct footwear inspection procedure.
How to check the quality of sneakers in a store
Knowing how to inspect a shoe is also a great skill to have as a shoe buying customer in a store. You don’t need any special tools or lots of time. In just a few seconds you can quality check a new pair of sneakers in a store without damaging the shoe or hassling the store employees. If you see a problem pick a different pair. Here is how to grade and inspect a shoe like a professional.
Definition of Shoe inspection quality “A”, “B”, “C” – Grades
A grade shoes: Shoes without any functional defects or cosmetic defects that will impair the marketability of the shoe are A grade. These are high-quality shoes, they look good and fit correctly. An A grade must follow the production specifications and match the approved confirmation sample.
B grade shoes: Shoes without any major functional defects and which will not cause injury to the person wearing the shoes are B grade. B grade shoes may have cosmetic defects, production mistakes, or workmanship issues that cannot be properly repaired. These B grade shoes will be discounted and/or diverted to markets more tolerant of cosmetic defects.
C grade shoes: C grade shoes have major functional defects that could cause injury to the wearer or major cosmetic defects that cannot be repaired. Shoes are also considered C-grade if they have poor workmanship or material defects that could shorten the normal life expectancy of the shoe, or damage the companies reputation. These shoes should be destroyed.
Shoe quality checklist: How to inspect a shoe:
The main points in a shoe inspection are as follows: #1. Is this the correct shoe, a matched pair? #2. Is the shoe clean? #3. Does the shoe follow the specification? #4. Is the workmanship of high quality? #5. Is the shoe damaged in any way?
How to check the quality of a sneaker
The first step of your shoe quality inspections will be to review the shoe packaging. Is the shoe in the correct inner box for its model? Is the box presentable? You should inspect the box to ensure it is not damaged or dirty. Is the box the correct size? The shoe should not be crushed inside a small box. Confirm the information on the box end label matches the shoe Color/Model/Size. Check any hangtags to make sure they are correct for the shoe.
Remove the shoes from the packing box. Do you have a left and right? Are the shoes the same size and color? Check the shoe tongue label information – I know this sounds crazy but in the factory, it’s not hard to put a right size 7 and a left size 7.5 into the same box. Holding the shoe, place the pair of shoes bottom to bottom. Check them for symmetry. Does the pair really match in length? The size marks match but are they the same length?
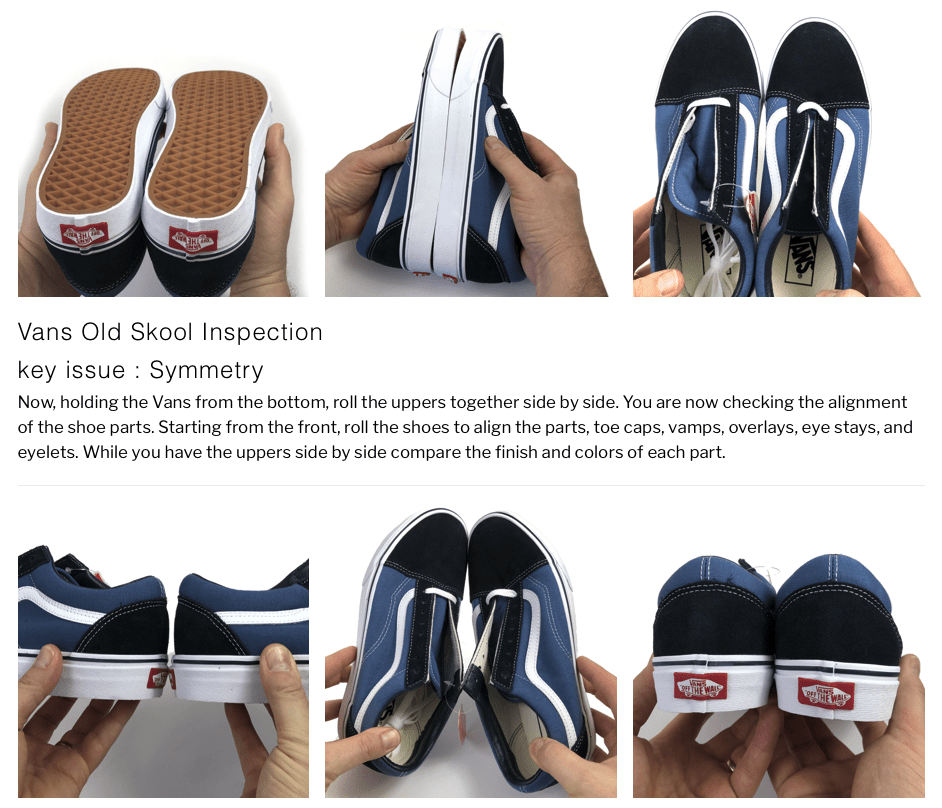
Key shoe quality issue: Symmetry
Now, holding the shoe from the bottom, roll the uppers together side by side. You are now checking the alignment of the shoe parts. Starting from the front, roll the shoes to align the parts, toe caps, vamps, overlays, eye stays, and eyelets. While you have the uppers side by side, compare the finish and colors of each part.
From the book How Shoes are Made
Next, hold the shoes up, looking at the heels. Make sure the shoes sit on the outsole straight. A shoe inspector checks to confirm the upper is not rotated off-center.
Now, rolling the heels together, check that the back height and collar lines match.
At this point, study the shoe bottoms. Do they match? Are the color blocks in the same location? Look over the midsole sidewall for wrinkles. Check the seam joining the upper to the outsole. Look out for any extra glue on the upper. 2mm is the limit for “over gluing.” Also, look for over buffing of the upper. On the shoe bottom, check for color bleeding between color blocks. Look for any paint covering mistakes. Check to make sure the outsole parts fit together neatly without any extra glue.
Shoe Anatomy: The Basics On Quality Footwear Construction
Complete shoe quality inspections check each side inside and out. Now that we looked over the outside, it’s time to dive inside because a great looking shoe with defects inside is not salable. Look inside the shoe opening, is the lining clean and without wrinkles? Run your hand around the collar, feel for any lump, bumps, or glue. For leather shoes, be on the lookout for any lasting nails or staples. For sports shoes, make sure the footbed is straight, level, and fitting correctly. If the footbed is too small, it may slide around, too big, and the footbed may wrinkle or curl.
Next, inspect the tongue lining for wrinkles and lumps. Run your hand down inside to check the vamp and toe cap from inside. Feel around the toe along with the footbed for lasting wrinkles. Feel for any rough stitching inside.
Finally, make a quick check of the laces. You need to adjust the shoelaces if too long or too short, too long is much better than too short.
Common Shoe Quality Problems
Quality Problems from “How Shoes are Made”
When you run shoe quality inspections, there are everyday things you should be looking for. You can call this the common shoe quality defect list. Is the shoe clean? (White shoes can be hard to make inside a dirty factory.) Is the color matching of shoe parts correct, (suede and natural leathers can be tricky.) Material quality? Is the suede hairy? Rough trimming or rough cutting? Upper wrinkles? Make sure to check around the collar foam.
Final Word on Shoe Quality Inspections
When inspecting, it’s critical to decide if the problems you see are a “one-off” mistake or a systematic problem that will affect every shoe. It’s vital to know that inside the factory, the same worker completes an entire operation. If the vamp stitcher is having a bad day, you may see lots of crooked stitching on a vamp.
Finally, when you check shoe quality inspections “inbound” inside your warehouse, you already own the problem. Ask yourself, how did this shoe get this far? What is the footwear final inspection process? Who missed these problems inside the factory before the shoes shipped? Heads should be rolling! Your factory has a quality control system flaw. Can you “fix” your factory? Maybe you need to find a new one?
You can learn more about shoe quality and shoe inspection procedures! Check out Chapter 25 on quality control in the book How Shoes are Made. You will learn how to check the quality of the sole of a shoe and how to inspect uppers. The book includes a footwear inspection checklist. How Shoes are Made.
Check the quality of sneakers
If you want to see a detailed quality inspection of an original Nike Air Force 1 Mid, Nike Air Max 90, or Vans Old Skool, check out these articles. You will see we have cut into the real and fake shoes to show you what quality looks like inside and out.
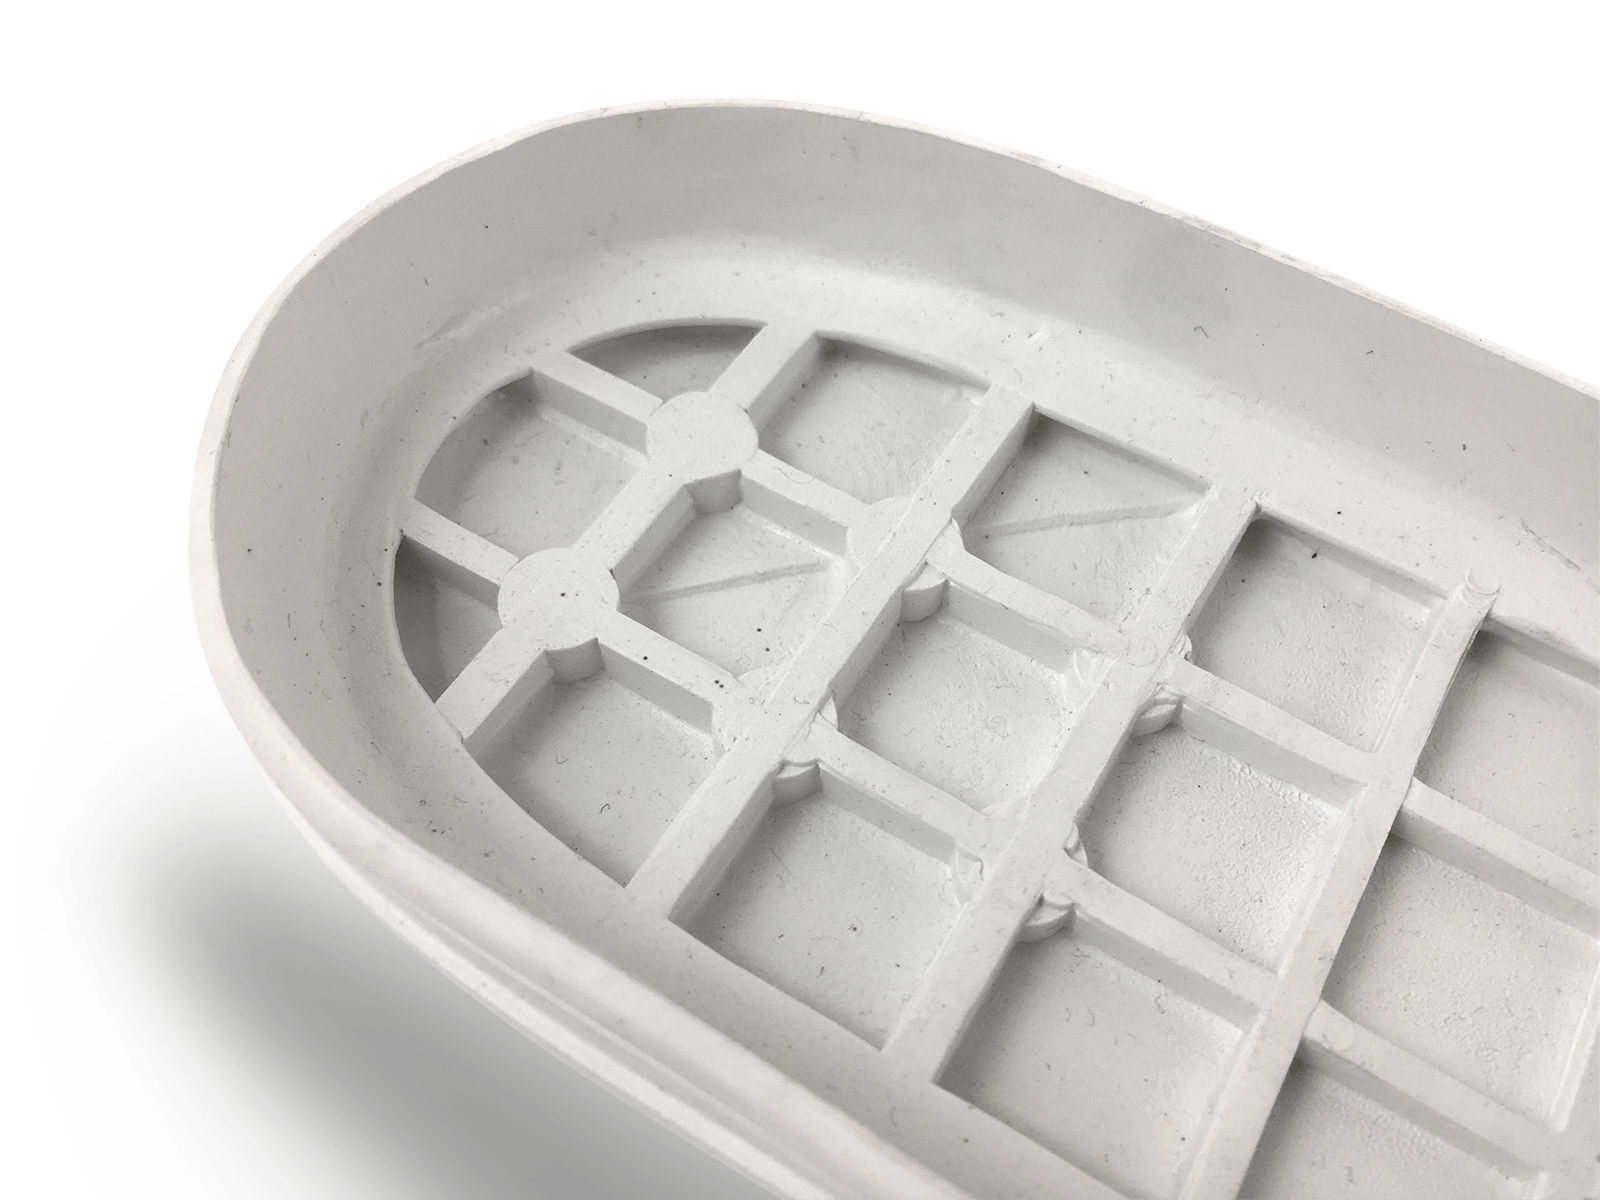
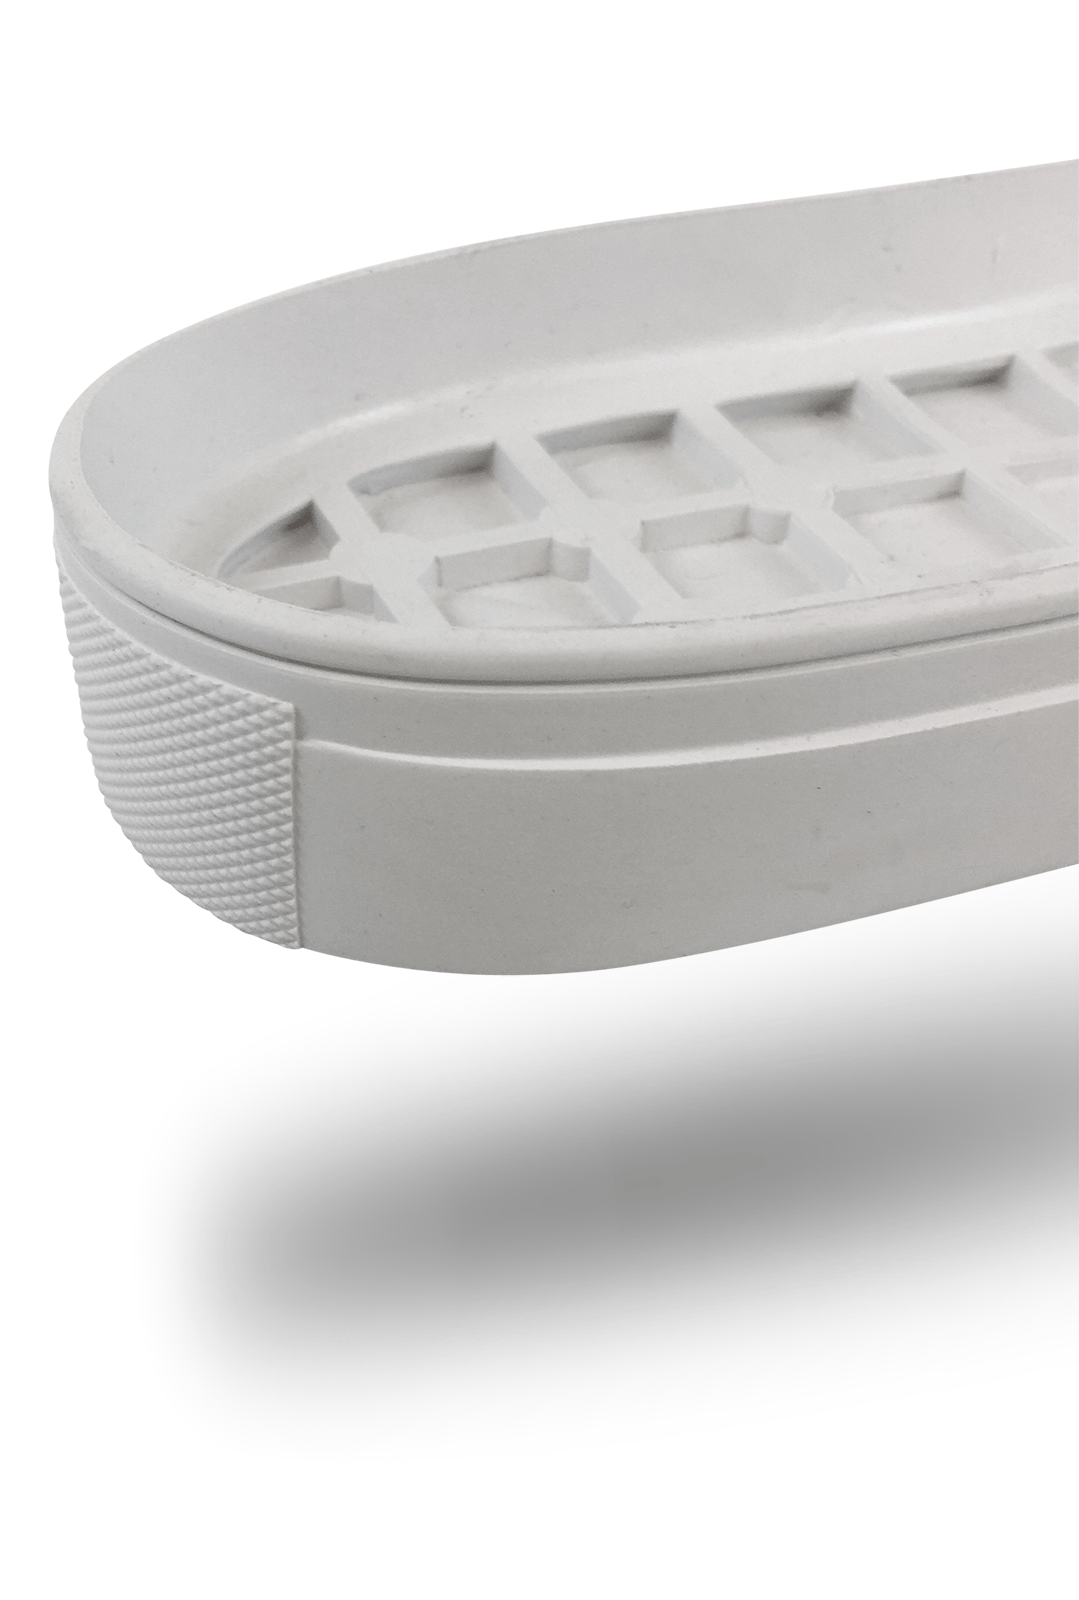
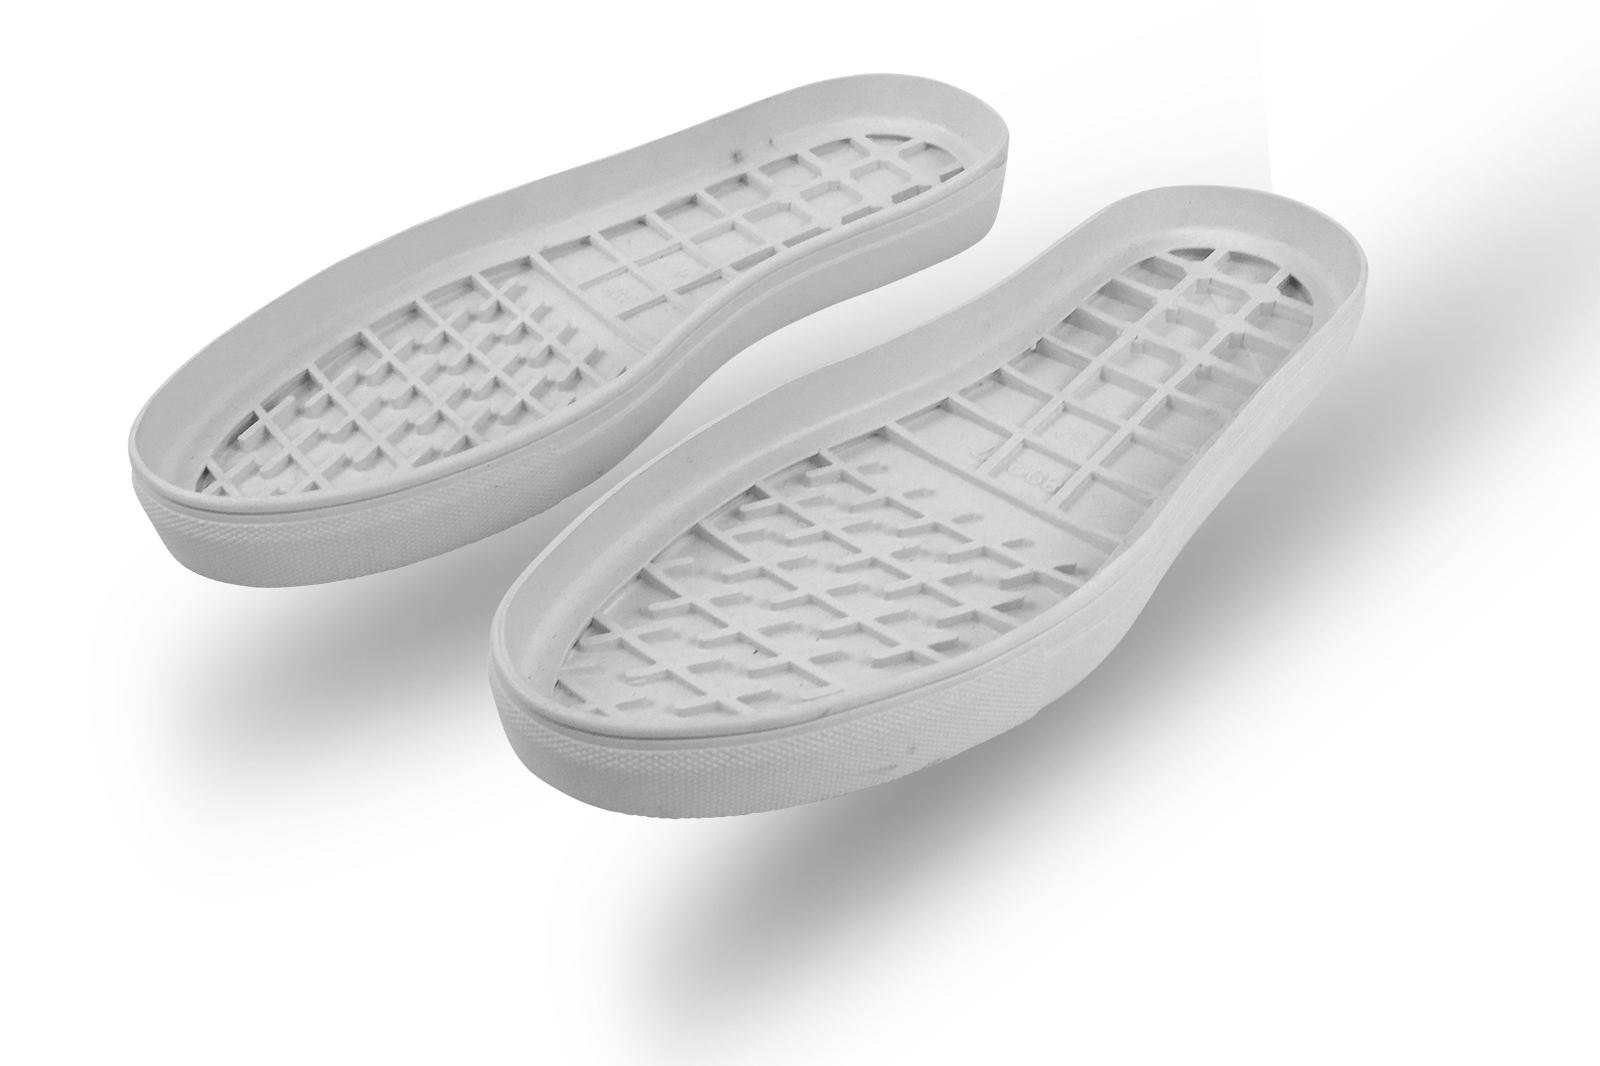
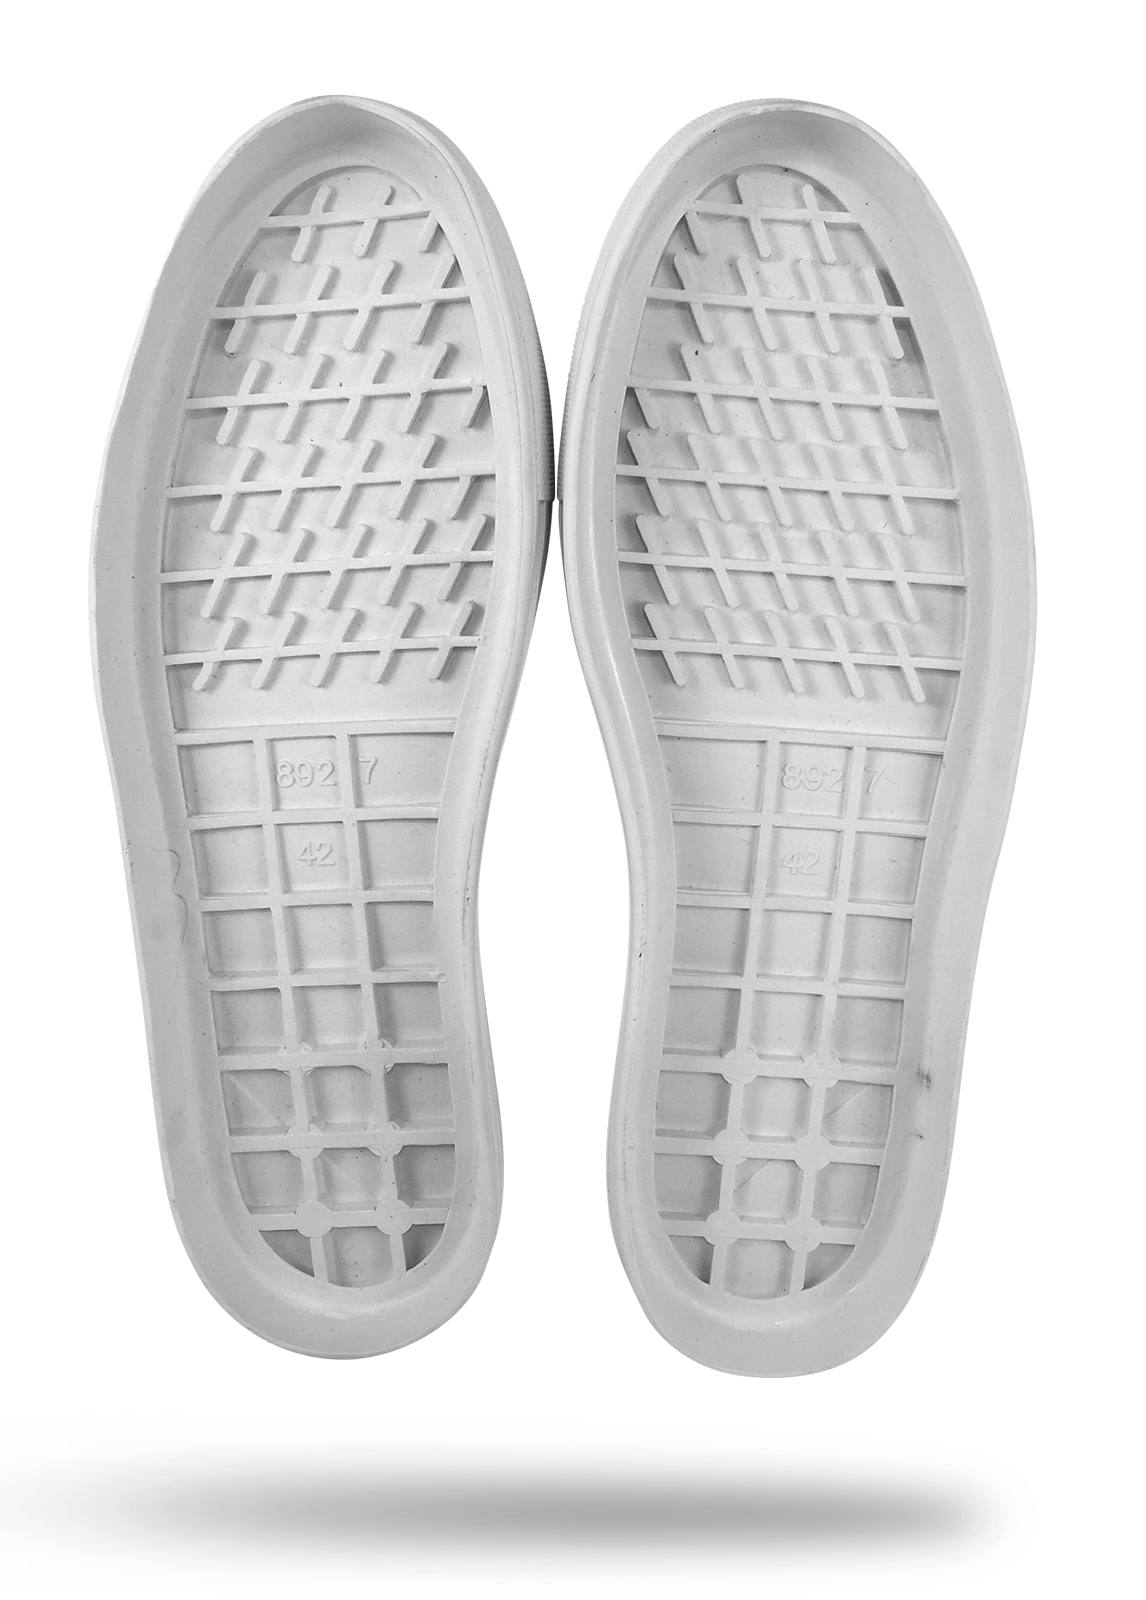
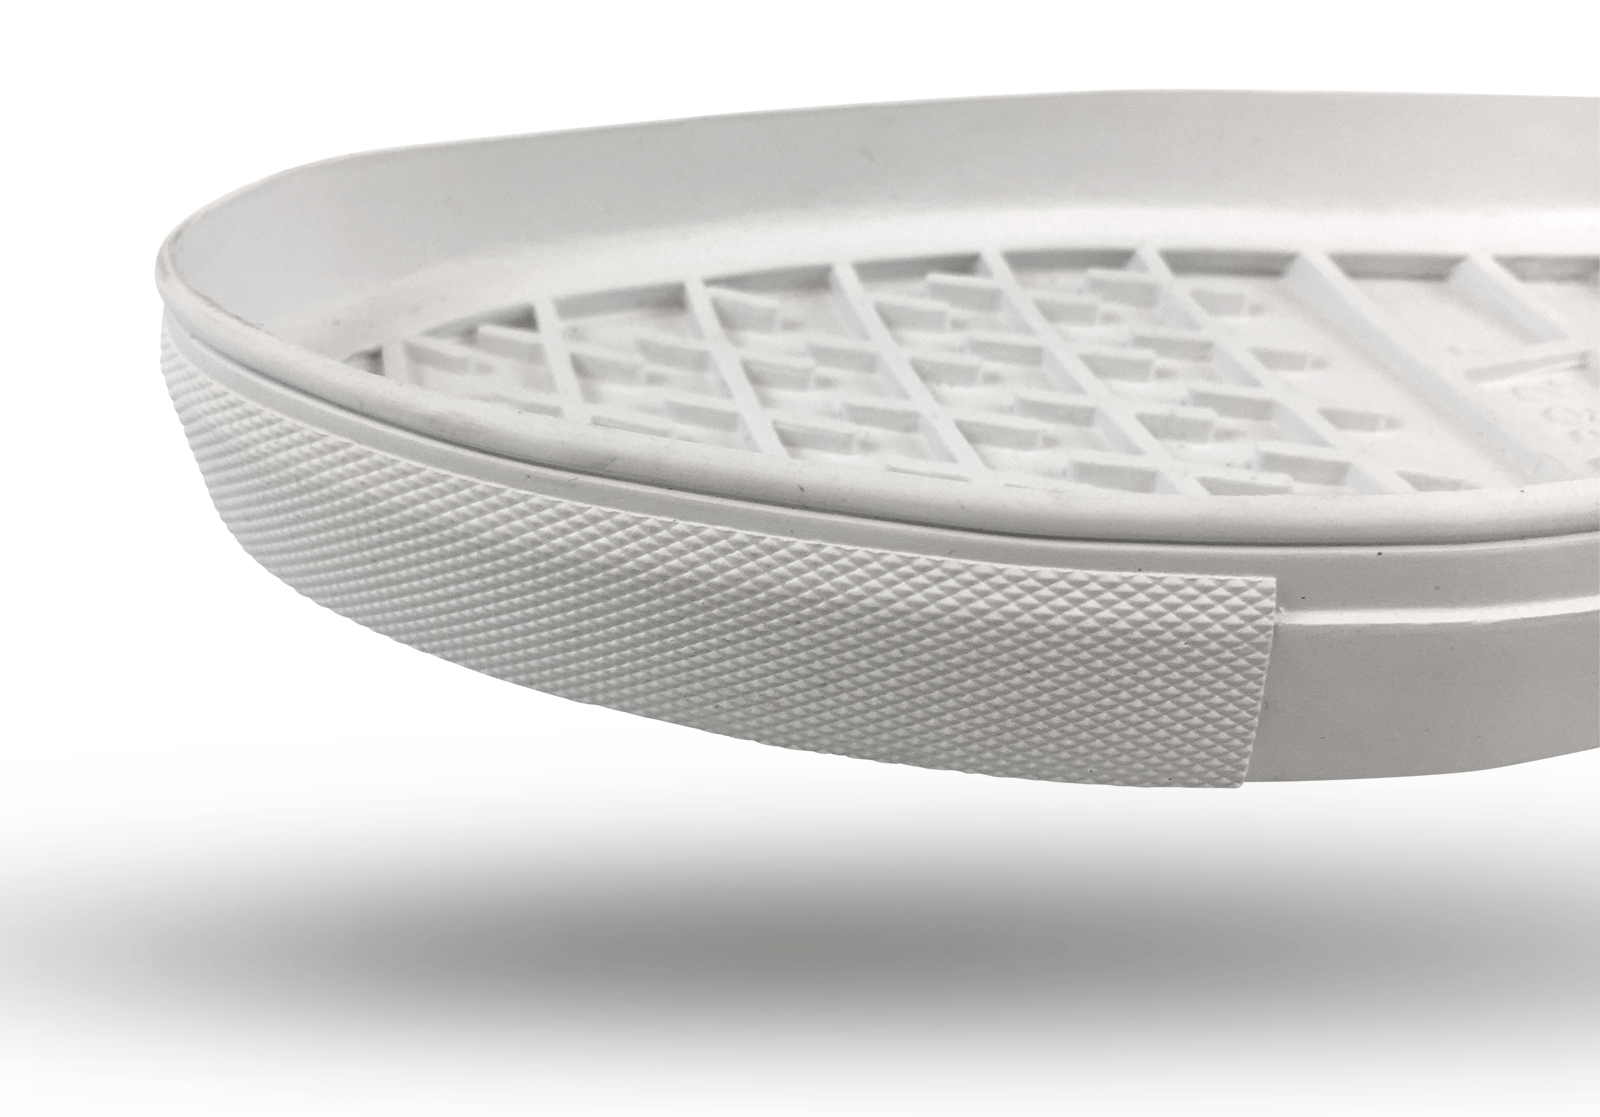
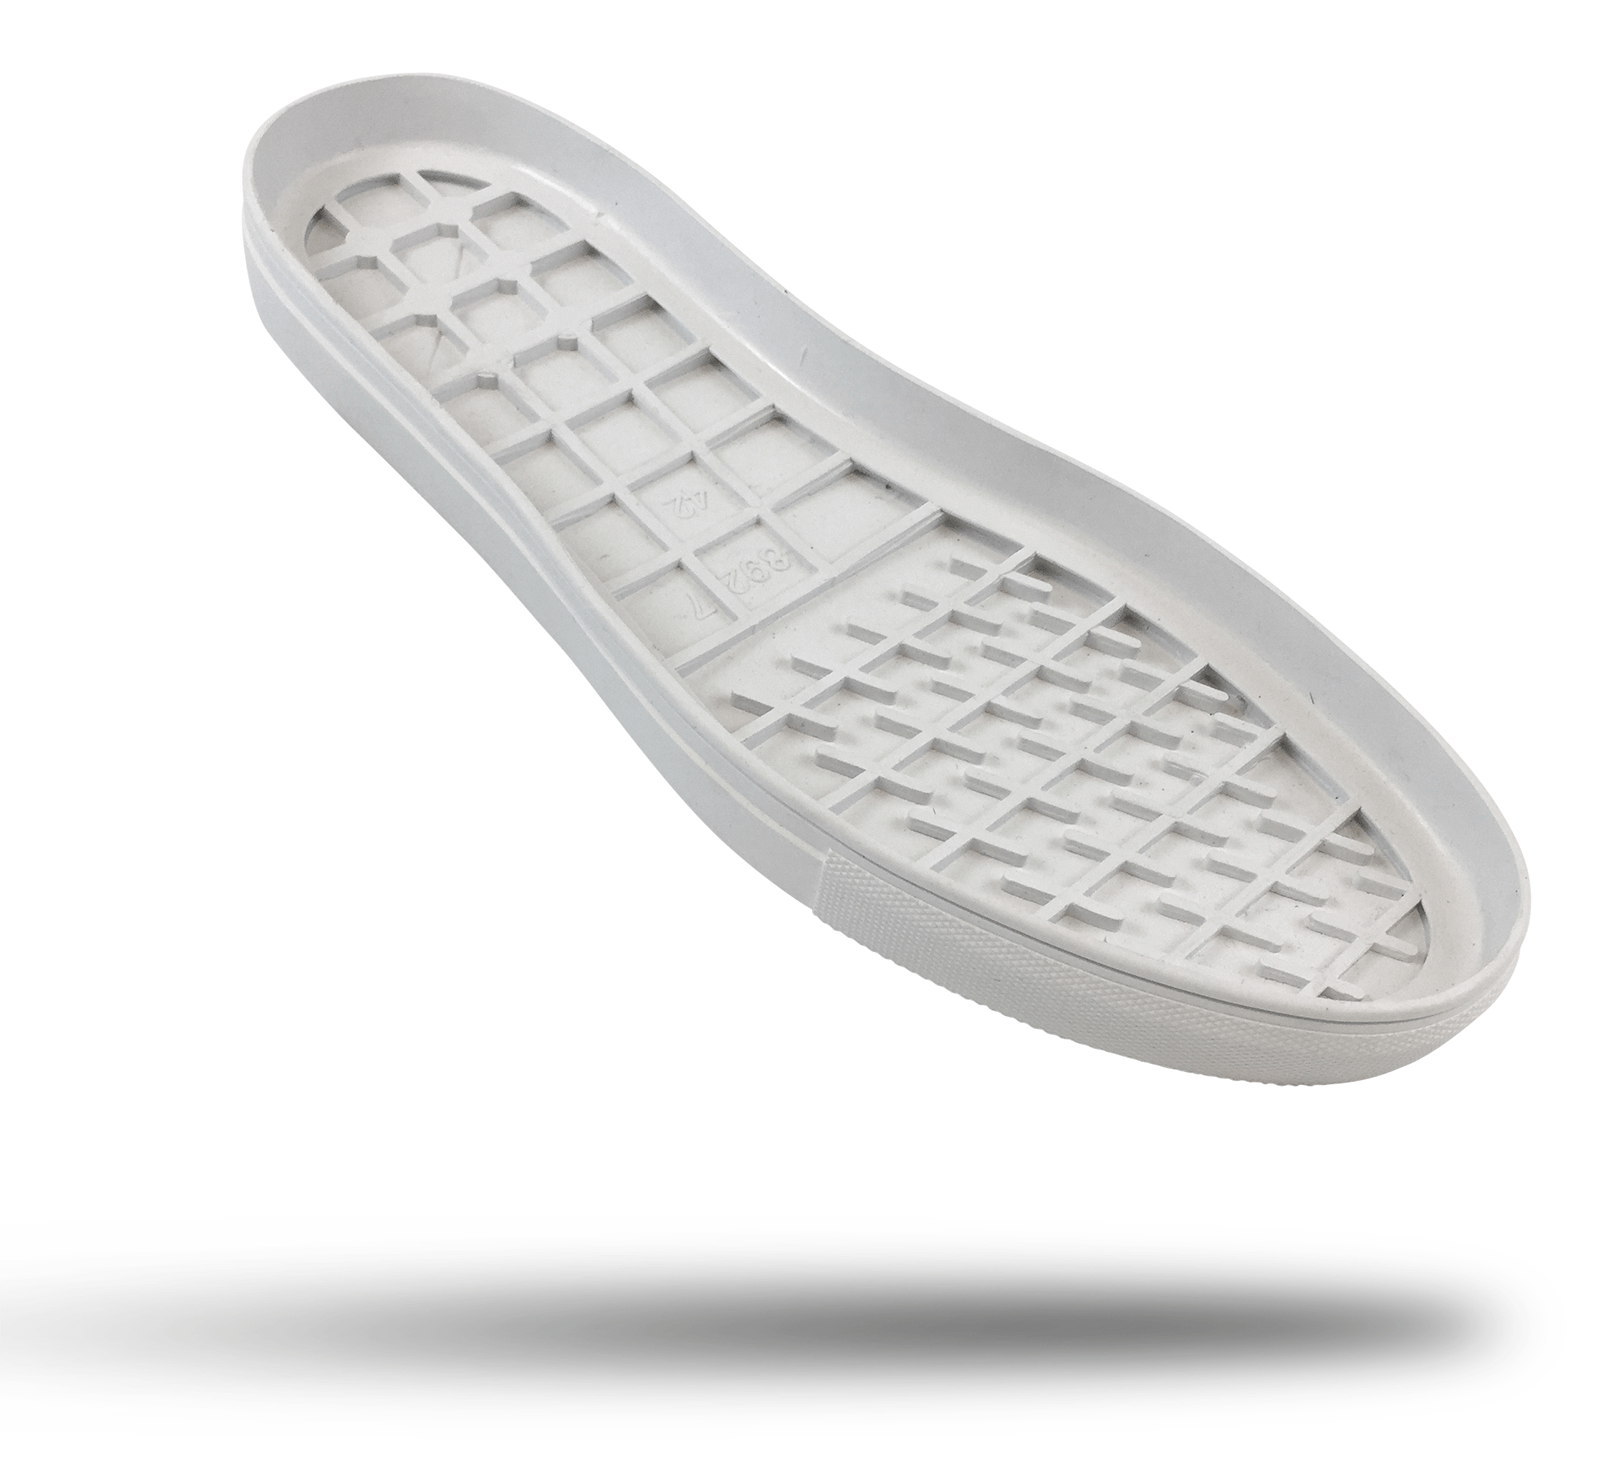
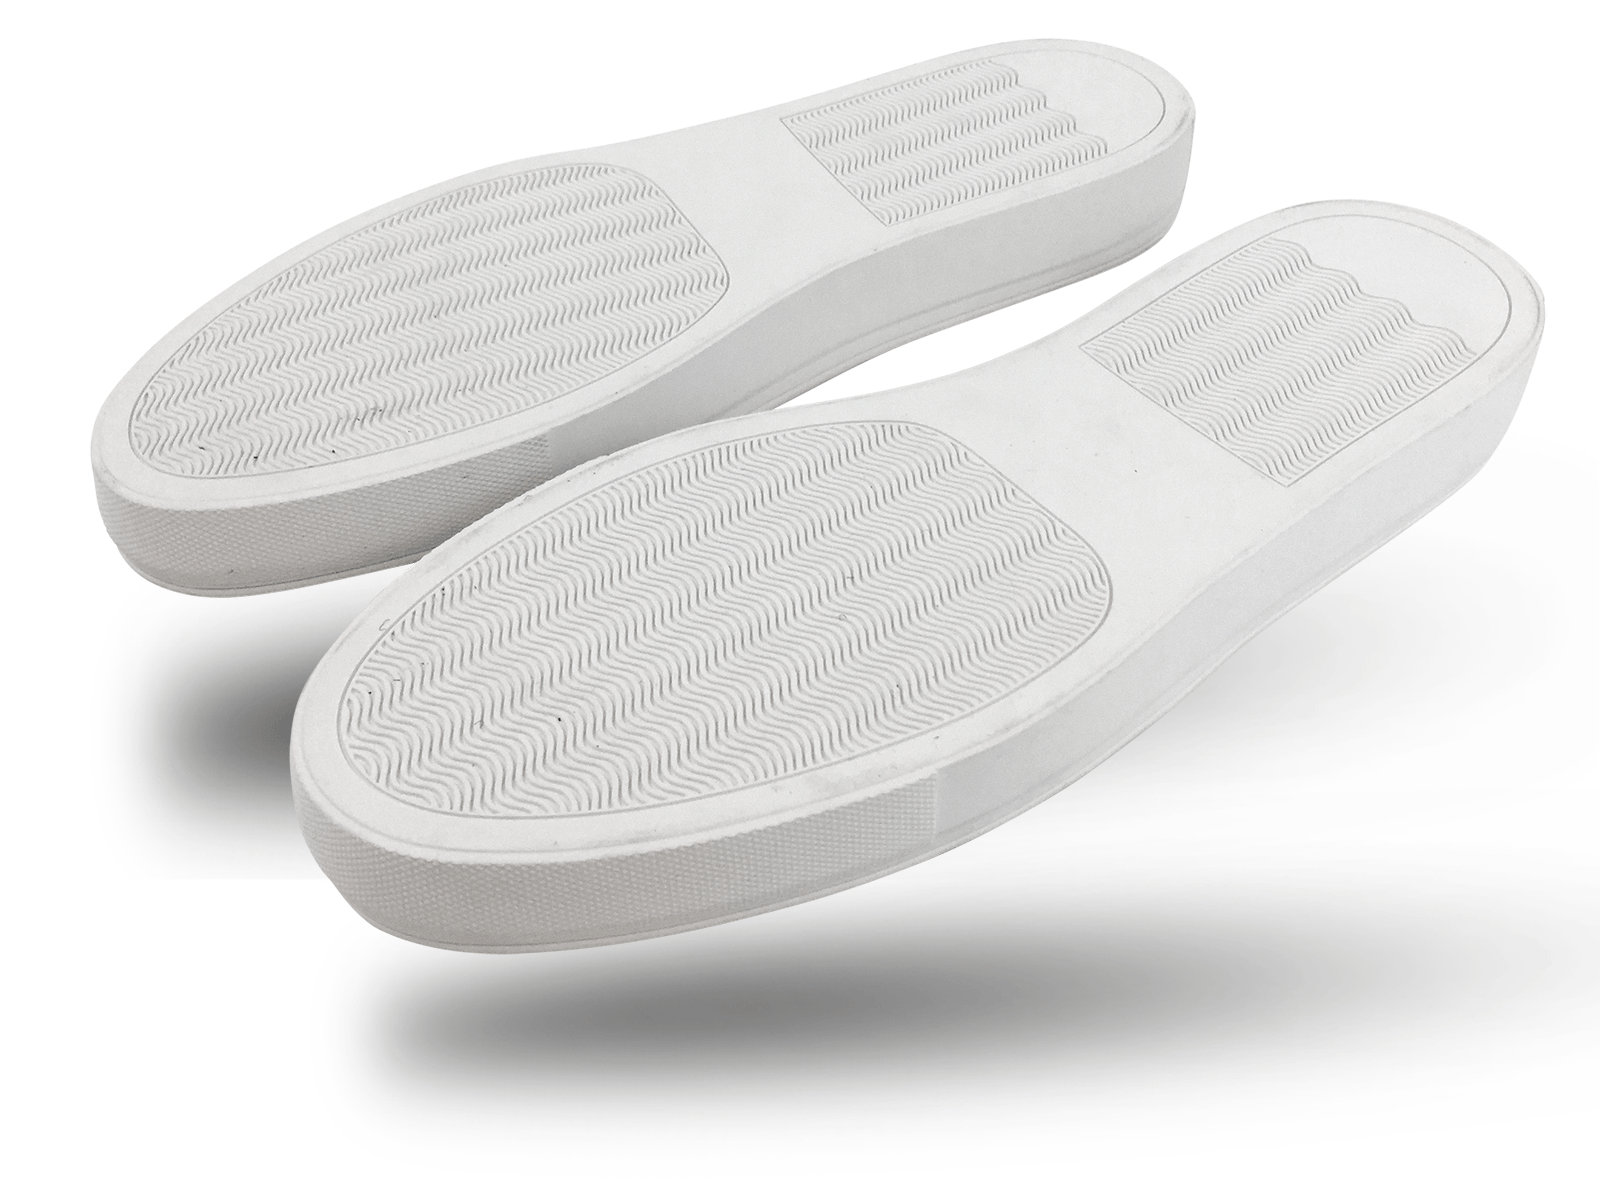
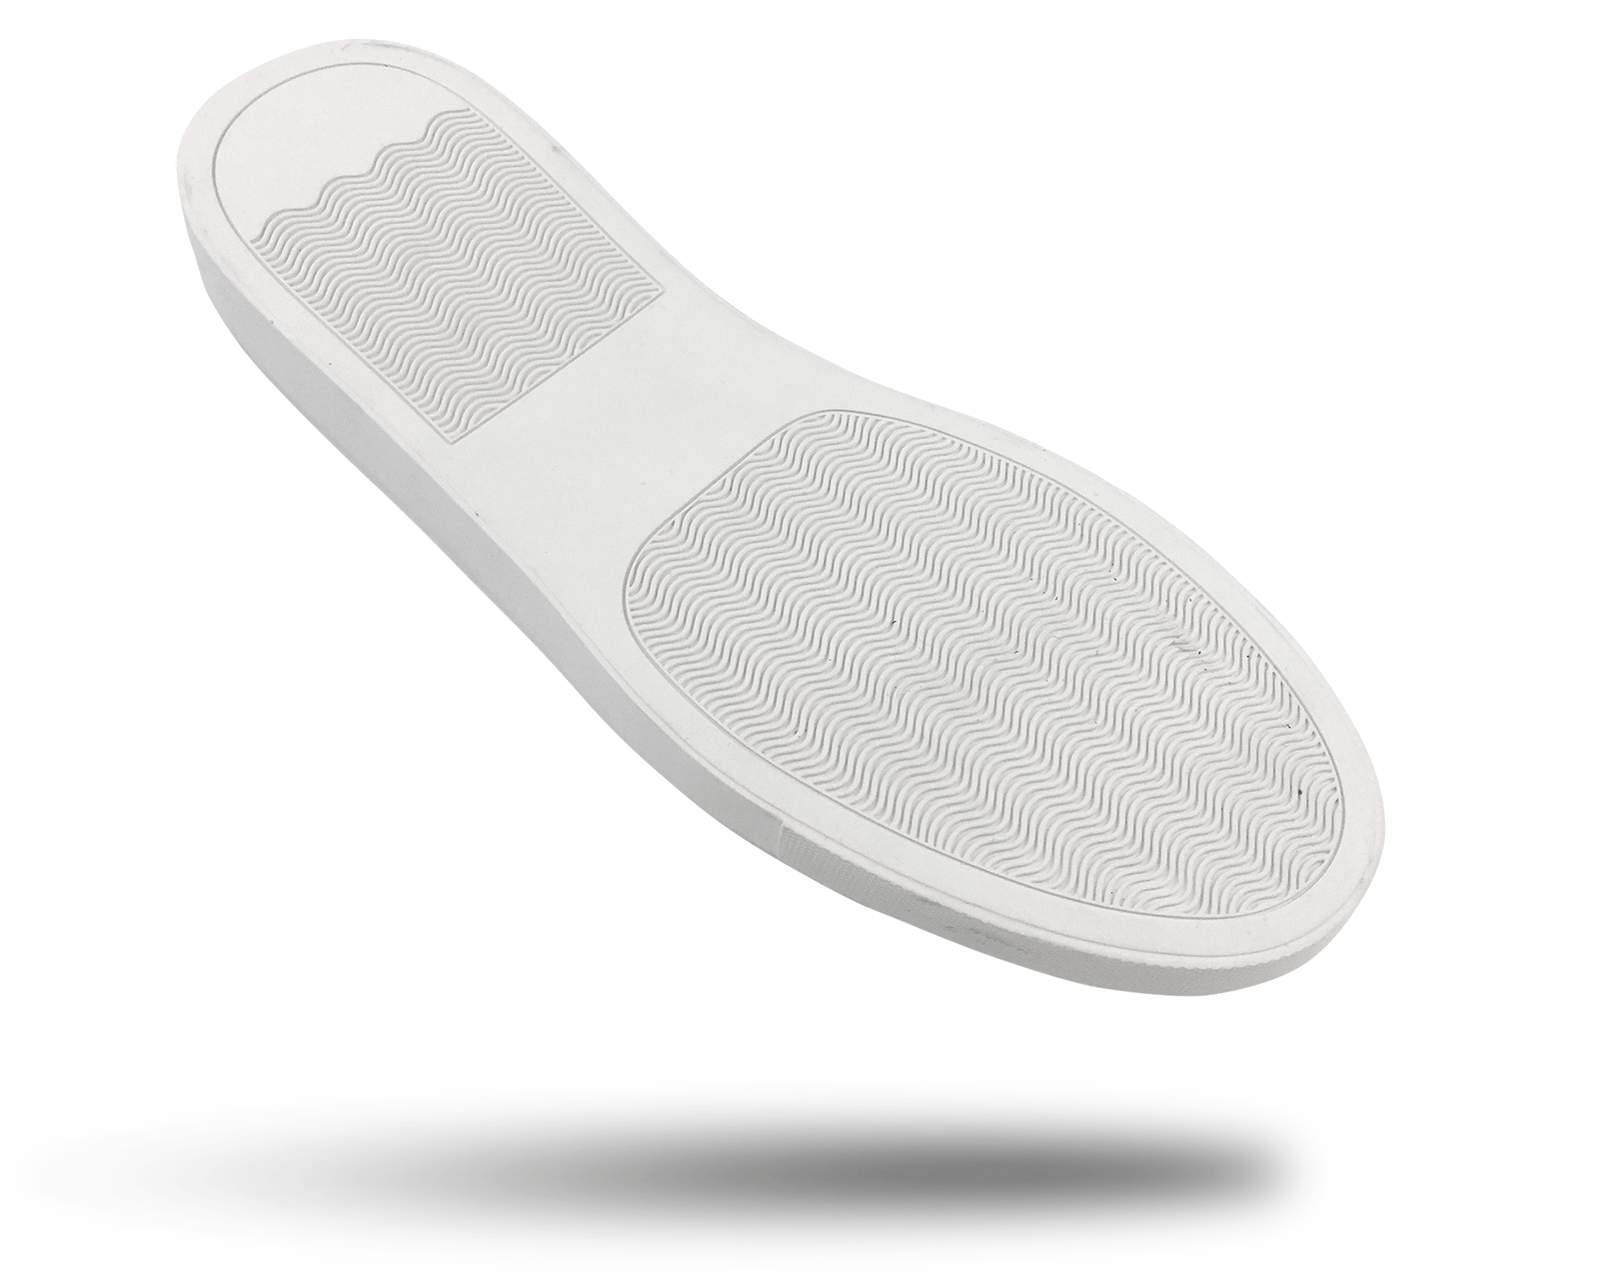
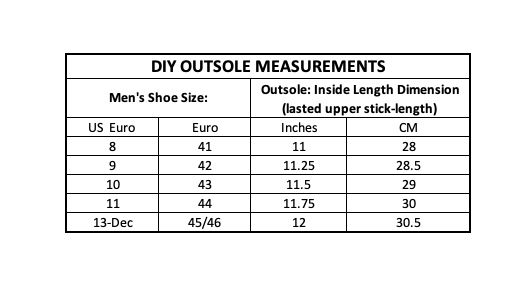
Men’s or Women’s White Rubber Sport Shoe Casual Outsole
Great for DIY Shoemaking
This casual rubber outsole is durable, comfortable, and easy to work with. Faux vulcanized styling. Egg crate cushioning, stitch groove for firm and easy upper attachment. Sizes are marked on each outsole. Sold in pairs.
29mm sidewall height with 4mm bottom web thickness 16mm to 19mm inside wall bonding margin Rubber hardnes 65˚ Shore “A” Forefoot egg crate 3.5mm Heel egg crate 7.5mm (4mm Heel Lift) Micro diamond toe and heel bumper texture Bottom texture “Wave” grip 1mm deep Available in men’s full sizes: 8-13 (US Sizes), 41-46 (Euro Sizes) Color: White, Cost: $29.99, Ships from California, USA. Made in China
Do you want to be a shoe designer or work for an outdoor products company? There is now a college program exclusively for outdoor gear design and development, including shoe design school courses.
The first hands-on college degree program in Outdoor Product Design and Development is deep into its third year at Utah State University in Logan, Utah. This one-of-a-kind program is training our future designers, techies, and gear-heads for successful careers in the outdoor industry. According to Chase Anderson, the Development officer at the university, “We already have students interning for Patagonia, Helly Hansen, Browning, Klim, Columbia Sportswear, Altra Footwear, and many others.”
Sneaker Factory.net is proud to donate our books How Shoes are Made, How to Start Your Own Shoe Companyand the Shoe Material Design Guideto be a part of the school’s design library. We hope the shoe design students and professors will find our books a valuable resource. Let us know if could use our materials for your shoe design classes.
Today we are taking a break from shoe design. We are going to look at some sneaker restoration tips and tricks. The crew here at the Sneaker Factory is always looking out for collectable shoes. While we don’t have any rare OG Nikes, we do keep our eyes open for collecting and restoration opportunities.
In the workshop, we have a pair of Nike KD VI Kevin Durant’s from 2013. Normally we would be cutting into these to show you the Nike Zoom air midsole and laminated fly knit reinforcements, but these are looking more like a diamond in the rough, ready for a good clean, and a quick flip. We picked these up for $10.00 at the Alpine Village swap meet in Torrance, California. Let’s see if we can restore these into sellable kicks.
Sneaker Restoration: Is the shoe worthy?
Here are some questions to consider. Is the shoe worth any restoration effort? Is the shoe valuable as a collector’s item for reselling? Is the shoe valuable to you because you like it? In this case, we know the Nike KD VI is worth $50.00 at the most if it’s in good condition. Not big bucks but why not give it a roll as a basic sneaker restoration project.
Sneaker Restoration Step One: Assessment
This pair of Nikes is pretty dirty, but besides the dirt, we can see the shoe is in nearly new condition. The bottom sole unit is showing minimal wear. Just a tiny amount of wear on the heel. Rubber outsoles are difficult to “rebuild” unless you plan to replace them. Sneaker sole replacement is major surgery and not worth the effort for most shoes.
The upper material of this KD VI Orange is made of PU and welded TPU. If the surface is not scratched up the dirt should come right off. For fabric and leather uppers you will need to study the shoe. Stains, cuts, and tears can be difficult to restore.
Linings can be soiled and pilled; these problems are not difficult to repair. Torn linings will be a problem requiring surgery. Our shoe is dirty with some pilling, not bad.
Shoelaces? Unless they are a custom pattern, you may toss them if they are worn or don’t come clean. Pick up a fresh pair for a few dollars.
Sneaker Restoration Step Two: Cleaning
Our Kevin Durant’s are made of PU and welded TPU. They don’t have any leather so they can go right into the sink for a hot, soapy scrub. A stiff bristle brush, green scrubbing pad, and a nail to clean rocks out of the tread is all you will need. Question: Can you put the shoes in a cloths washing machine? Yes! But remove the laces, so they don’t tangle. If the shoes have any real leather or suede, then you should NOT use the washing machine.
Remove the laces and put them in a bowl of hot water and soap. Give the shoes a good scrub. I like to work on one side at a time, so I can compare the results. If the shoes are made of suede leather, go easy on the water but do your best to brush out the dirt. Take your time getting the shoes clean; you cannot restore a dirty shoe!
Shoe restoration starts with a good cleaning
Before you restore a shoe clean the uppers and outsoles
Restore with hot soapy water
Clean the outsole bottom
Sneaker Restoration Step Two: Drying and reshaping
Once you have cleaned the shoes, you need to dry them and reset the shape. I like to use some clean dish towels. The towels will do two things; absorb water and help fix the shape as the shoes dry. Work the towels down into the toe area, not too much pressure, just get the shape right. I use a fan to dry the shoes, no heat. After an hour replace the towels with dry ones. Leave the shoes overnight with a fan blowing right on them, and they should be dry inside and out by morning.
Sneaker Restoration Step Three: Finishing
In this case; we don’t need to do any painting, we will cover that later. Our KD’s have two very typical problems. The airbags are a little cloudy, and the EVA midsoles have some wrinkles. First, we will tackle the airbags. Try using a hair dryer, get close to the airbag and work the dryer left to right. Not too close! You don’t want to melt the plastic. Make a few passes to see if the clarity improves. I also like to use a little RainX™ or auto headlight defogger. Give the surface a good polish; this will improve the surface. In this case, we improved the airbags but not 100%. Keep the hair dryer close by; you will need it to restore the midsole.
For a midsole with compression wrinkles, the hair dryer is an excellent tool to improve the finish. Like you did with the airbag, get close and work the dryer over the wrinkles. The heat softens the EVA plastic and re-expands the collapsed air bubbles in the foam structure. You will see the results in just a few minutes.
Take a minute to remove any sock lint from inside the heel lining. To remove these little balls use a disposable razor, lint remover, or tiny hair trimmers. (You can find small trimmers at CVS™- they work like a champ!)
Remove wrinkles with a blow dryer
Remove wrinkles with a blow dryer
Remove airbag fog with a blow dryer
Remove wrinkles with a blow dryer
Remove lint from the heel lining
Polish the airbag window
Polish the airbag window
Polish the airbag window
Sneaker Restoration Step Four: Presentation
If you plan to sell your restored shoes, take some time to re-lace them carefully. Make sure the laces are flat, smooth, clean, even, and don’t twist. Shoelace fuzz and any loose threads can be removed with the small flame of a lighter. Next, get a clean, white sheet of paper to use as a base and shoot your photos outdoors.
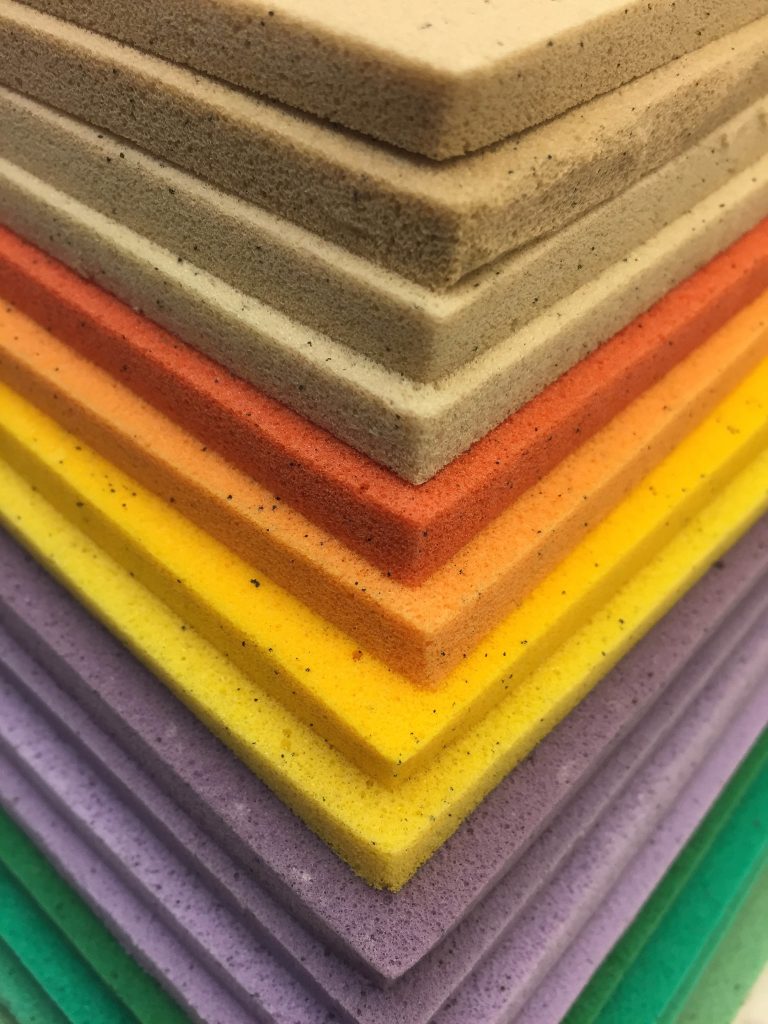
There are many types of foam used to make shoes. We are going to review the foam found in the uppers and outsoles of shoes.
First, what is foam? Foam is a soft plastic that is filled with air bubbles. The properties of different foams are created by using different types of plastic, controlling the size, and controlling the character of the air bubbles.
Generally, foam is divided into two types; “Open Cell” and “Closed Cell” foam. Each foam’s density, compression set, resistance, and breathability are important attributes to understand when selecting foam for your shoes.
Density and Compression Set
Density or Durometer is simply how firm or stiff the foam is. For EVA foam, a density of 25″C” is okay for upper padding but way too soft for the midsole.
Compression set resistance is simply the foam’s ability to bounce back after it’s compressed. A foam with a poor compression set will be crushed flat after just a few days.
Open Cell Foam:
Open cell foam is exactly what it sounds like! The plastic compound that makes up the foam cells is open, so air and water are free to enter and exit the foam just like a sponge.
Open cell foam is generally soft and can be made from Polyurethane plastic. This type of foam is commonly known as “KF” or “KFF” foam. This foam is available in different densities and in almost any thickness and color. This foam is used in the tongues and collars of shoes. Thin sheets of PU foam are used to back fabric in most shoe uppers. The PU foam allows the stitches to sink in and gives mesh some extra support while reducing wrinkles.
Reticulated foam for shoes
Closed Cell Foam:
Closed cell foam is exactly that; the individual cells are closed or sealed, not allowing the foam’s internal gas to escape.
Closed cell foam is generally denser than open cell foam. The stretchability and hardness of the plastic material, combined with the size of the cells, determines the density of the foam. Midsoles of shoes are all made from closed cell foam. (midsole foam is covered further in our article Outsole Design.) The most common closed cell foams include EVA (ethyl vinyl acetate), PE (Polyethylene), SBR (Styrene butadiene rubber), PU (Polyurethane), Latex, and Neoprene. Each has its own useful properties and will be explained below. EVA foam is used for backing mesh materials. A 2mm sheet of EVA will make the fabric waterproof. Neoprene and SBR are used when elastic properties are required. Latex is common for collar linings. PE foam is very light, but not so durable, so its use is limited.
How to Pick Shoe Materials
Start with In-depth reviews of material types available in modern shoemaking. Learn the Technical details of shoe material specification. 195 pages or 300 color photos.
Learn more
on sale $39.99
How to Measure Foam Density:
Measuring the density of very soft foams can be difficult. For soft foam, the density is measured in Lbs Per square foot. Very soft open cell foam is 1.2 Lbs per Sq. Foot. For denser foam, a Durometer tester is needed.
An Asker “C” scale Durometer tester is used to test the hardness of any foam components in your shoe. The Durometer tester will give you a reading of the density of the material. Try to test in flat spots and take several readings for each shoe part you are checking. For foam, try to cut the parts so you can test the center of the foam. EVA foam skin may give you a harder reading. A standard EVA midsole may be 55˚, a soft footbed 35˚. You can see the testing problem on the bottom is larger for softer foam.
When testing the hardness of rubber and plastic shoe parts you need a Shore scale “A” Durometer tester. The Durometer tester’s bottom measuring pin is simply pressed against the material. The Durometer tester will give you a reading of the density of the material. Try to test in flat spots and take several readings for each shoe part you are checking. You can see the testing problem is very small.
EVA (ethyl vinyl acetate): The most common midsole material for sports shoes. EVA is lightweight, durable, easy to form, and resists compression set. EVA can be hot pressed, cold pressed, die cut, injected, and machined to make midsoles or inserts. Available in a wide range of densities and formulations, EVA can be soft and flexible or rock hard and stiff and be made in almost any color. It can be found in all different styles of shoes. EVA is also used to make footbeds, padded Stroble socks, and is often laminated as a fabric backing.
Closed cell PU (Polyurethane): Also a common foam for shoes. PU foam is “blown” into molds. The liquid compound expands and foam air cells fill the molds. PU foams are used to make durable midsoles for hiking boots and can be made into entire sole units, tread, and midsole all in one. Many women’s fashion shoe high heel outsoles are made from high-density PU. Very soft PU is used for footbeds due to its resistance to compression set.
PE (Polyethylene): Expanded into sheets, PE foam is easily die cut and laminated. Parts are then pressed into shape for internal pads and tongues. Due to its weakness in compression set, PE foam is not used underfoot, but PE foam is closed cell and waterproof.
Other common foams for shoes:
SBR (Styrene butadiene rubber): A very soft foam, often laminated between two layers of fabric. SBR is closed cell and is used to make parts waterproof. SBR foam is often used as a lightweight replacement for Neoprene rubber but is not as stretchable.
Open Cell PU (Polyurethane): This may be the most common foam used in sports shoe footwear construction. This PU foam is open cell so you must be careful that it does not absorb the glue. Thin layers of PU are laminated to fabric to provide backing substance. PU foam is also used to make tongue foam and collar foam. Due to its softness, open-cell PU foam cannot be used underfoot.
Latex Rubber foam: Latex foam is easily formed into complex shapes in open-top molds. Latex is used for upper padding but not as a midsole material. High-density latex foam sheets are often used to make die cut footbeds.
¿Te gustaría saber cómo se fabrican las zapatillas VansTM? Las zapatillas clásicas y de skate VansTM están hechas mediante el proceso de fabricación de calzado vulcanizado (también llamado autoclave). Los hermanos, Paul Van Doren y James Van Doren, fundaron The Van Doren Rubber Company en 1966. Durante los siguientes 40 años abrieron fábricas en California, y más tarde contrataron fábricas en China y Vietnam para fabricar las zapatillas vulcanizadas clásicas de Vans.
“Vulcanizado o autoclave: es el proceso de calentamiento del caucho en bruto para poder curarlo. Este proceso crea enlaces cruzados dentro del compuesto del caucho que lo une. Antes de vulcanizar el caucho, este es elástico, gomoso, y es fácil que se rasgue. Después de ser vulcanizado, es muy resistente y estará listo para utilizarse.”
¿Cómo se fabrican las zapatillas Vans?: construcción vulcanizada
En el proceso de fabricación del calzado vulcanizado de VansTM, las piezas de la suela de goma se ensamblan en el corte antes de que el caucho esté completamente curado. Con la suela una vez unida, el zapato entero se calienta en un horno de vulcanizado a aproximadamente a 110 °C durante 80 minutos. El calor requerido para vulcanizar la suela de goma derretirá los tejidos de nylon y de poliéster. Además, ciertos tipos de espuma, como EVA y PE, también se dañarán por el calor. Por lo tanto, esto puede limitar la elección de los materiales para los diseñadores de calzado. Las diferentes piezas, o el corte de la zapatilla deben estar hecho de materiales resistentes al calor, como el serraje, cuero, o lona de algodón, junto con los herrajes metálicos.
El proceso de fabricación de calzado vulcanizado debe realizarse en una fábrica específica equipada con una variedad de máquinas especiales. Este equipo de fabricación es muy diferente del equipo necesario para fabricar zapatos montados. Una fábrica de calzado normalmente se especializará en uno u otro proceso, rara vez encontrarás procesos de vulcanizado y montado pegado dentro de la misma fábrica.
Las costuras del corte, y la construcción de una zapatilla vulcanizada Vans son casi las mismas que las de una zapatilla montada pegada. Los refuerzos internos de los contrafuertes y el tope de la puntera están hechos de finas láminas de goma en lugar de plástico. De nuevo, debido a la alta temperatura requerida para el caucho vulcanizado, se debe evitar utilizar cualquier tipo de logotipos de plástico, PVC, o decoraciones superficiales al diseñar un modelo vulcanizado. El forro de las Vans está hecho de un tipo de lona de algodón ligero.
Mientras que el corte superior se va cosiendo, los componentes de goma para la suela vulcanizada se preparan. Estos componentes de goma tienen una vida útil de solo unos pocos días; si las piezas de goma se fabrican y se apartan, la goma comenzará a oxidarse, a curarse parcialmente, y no se curará correctamente cuando se vulcanicen las zapatillas.
Are you interested in learning more about various stages of the shoemaking process? Perhaps you’d like to see inside bespoke shoe factories? If you want to start your own shoe brand and learn more about how shoes are made and what materials, equipment, and tools are used to make shoes, this is the place to start. We have assembled a list of our 10 favorite “go to” shoemaking blogs.
Visit these shoemaking blogs
Carréducker
James Ducker and Deborah Carré are British shoemakers who studied under John Lobb. Their footwear blog has lots of great pictures of the handmade shoemaking process, shoe school, and shoe tools.
http://carreducker.blogspot.com
Shoes and Craft
Run by Marcell Mrsan of the Koronya shoemaking company. Similar to Carréducker, but with more emphasis on the business side of things and with the added charm of broken English. Shoemaking videos and courses in Savannah, Georgia (USA).
https://shoesandcraft.com
Making Shoes
Online shoemaking blog with step by step tutorials on how to make your own shoes. YouTube channel with video tutorials, online shoemaking courses, great tips and free shoemaking guides. https://www.shoemakingcoursesonline.com
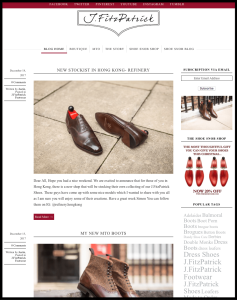
The Shoe Snob Blog
Justin FitzPatrick, originally from Seattle, WA now a shoemaking blogger and business owner in the Soho area of London. See his blog The Shoe Snob Accessories and J.FitzPatrick Footwear range here. Shoe care videos and informative blog and boutique for shoes and accessories.
www.theshoesnobblog.com and www.jfitzpatrickfootwear.com
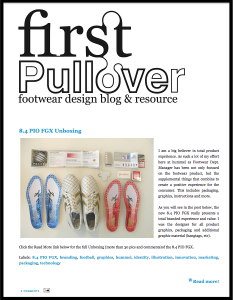
First Pullover Footwear Blog
Footwear design blog and resource with many videos such as Aluminum Last Making, How to Make a Last, How a Football Boot is Made, Leather Tanning, Footwear Photoshop Rendering Tutorial, How to prepare rubber, Sketching Exercise, etc.
http://www.firstpullover.com
The Honourable Cordwainers’ Company (H.C.C.)
The Honourable Cordwainers’ Company (H.C.C.) is a non-profit 501c(3) educational organization, incorporated in 1987 in Virginia, the home of America’s first English shoemakers. Founded in 1984 by a small group of shoemakers and historians, the H.C.C. is dedicated to promoting the study, practice, interpretation, and preservation of historical and traditional shoemaking and allied trades. They provide a forum for the exchange of technical expertise, research, training and material needs.
http://www.thehcc.org
Lord Point Shoe Blog
This is an interesting website with lots of dress shoe tips. Shoemaking walkthroughs, leather, shoe dissections. Shoe diagrams and drawings.
www.lordpoint.wordpress.com
Old Leather Shoe Glen Tippetts discusses all things related to men’s leather dress and business shoes in this blog. How to care for shoes, how to shop for shoes, shoe terminology, and more.
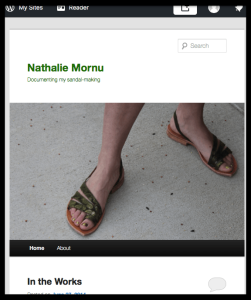
Nathalie Mornu Sandal Blog
Technically, she makes sandals. This shoemaking blog has lots of interesting information and is helpful if you are looking to source lasts.
https://nathaliemornu.wordpress.com
We can thank Charles Goodyear for his perseverance. In 1844, after years of experimentation, Charles Goodyear finally invented the process of heating natural rubber mixed with sulfur to create shoe rubber. He called it vulcanization, and this is still how we make shoe rubber today. With the right combination of mixing, heat, and curing agents, sticky natural rubber is transformed into tough and colorful rubber shoe bottoms.
Vulcanization is how all the big shoe brands like Nike, Adidas, Yeezy, Vibram, Margom, and Jordan made outsoles. The molds and processes are all about the same. Black rubber, crystal rubber, or gum rubber is all a matter of the recipe. Black outsole rubber is loaded with carbon, Crystal rubber is 100% synthetic, while Gum rubber is a mixture of natural and synthetic rubber compounds.
Natural Rubber Processing
Crystal Rubber
Colored rubber
How Rubber Soles are Made for Shoes
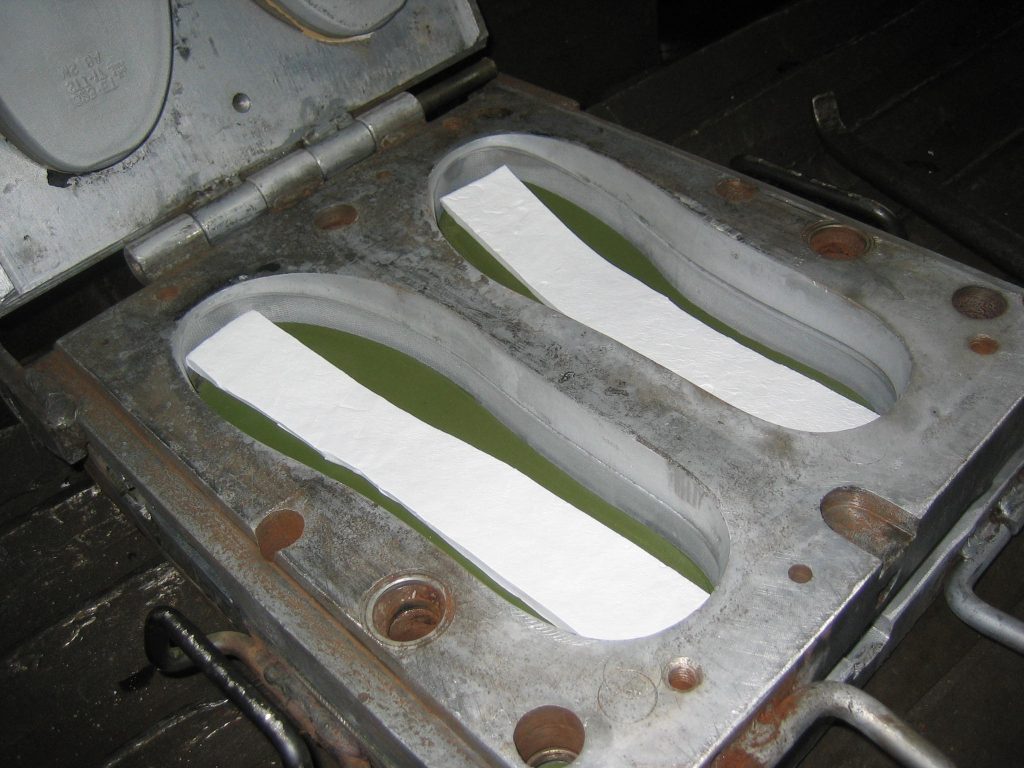
To make a rubber outsole you need a sole design, metal outsole tooling, a heated hydraulic press, and rubber compound.
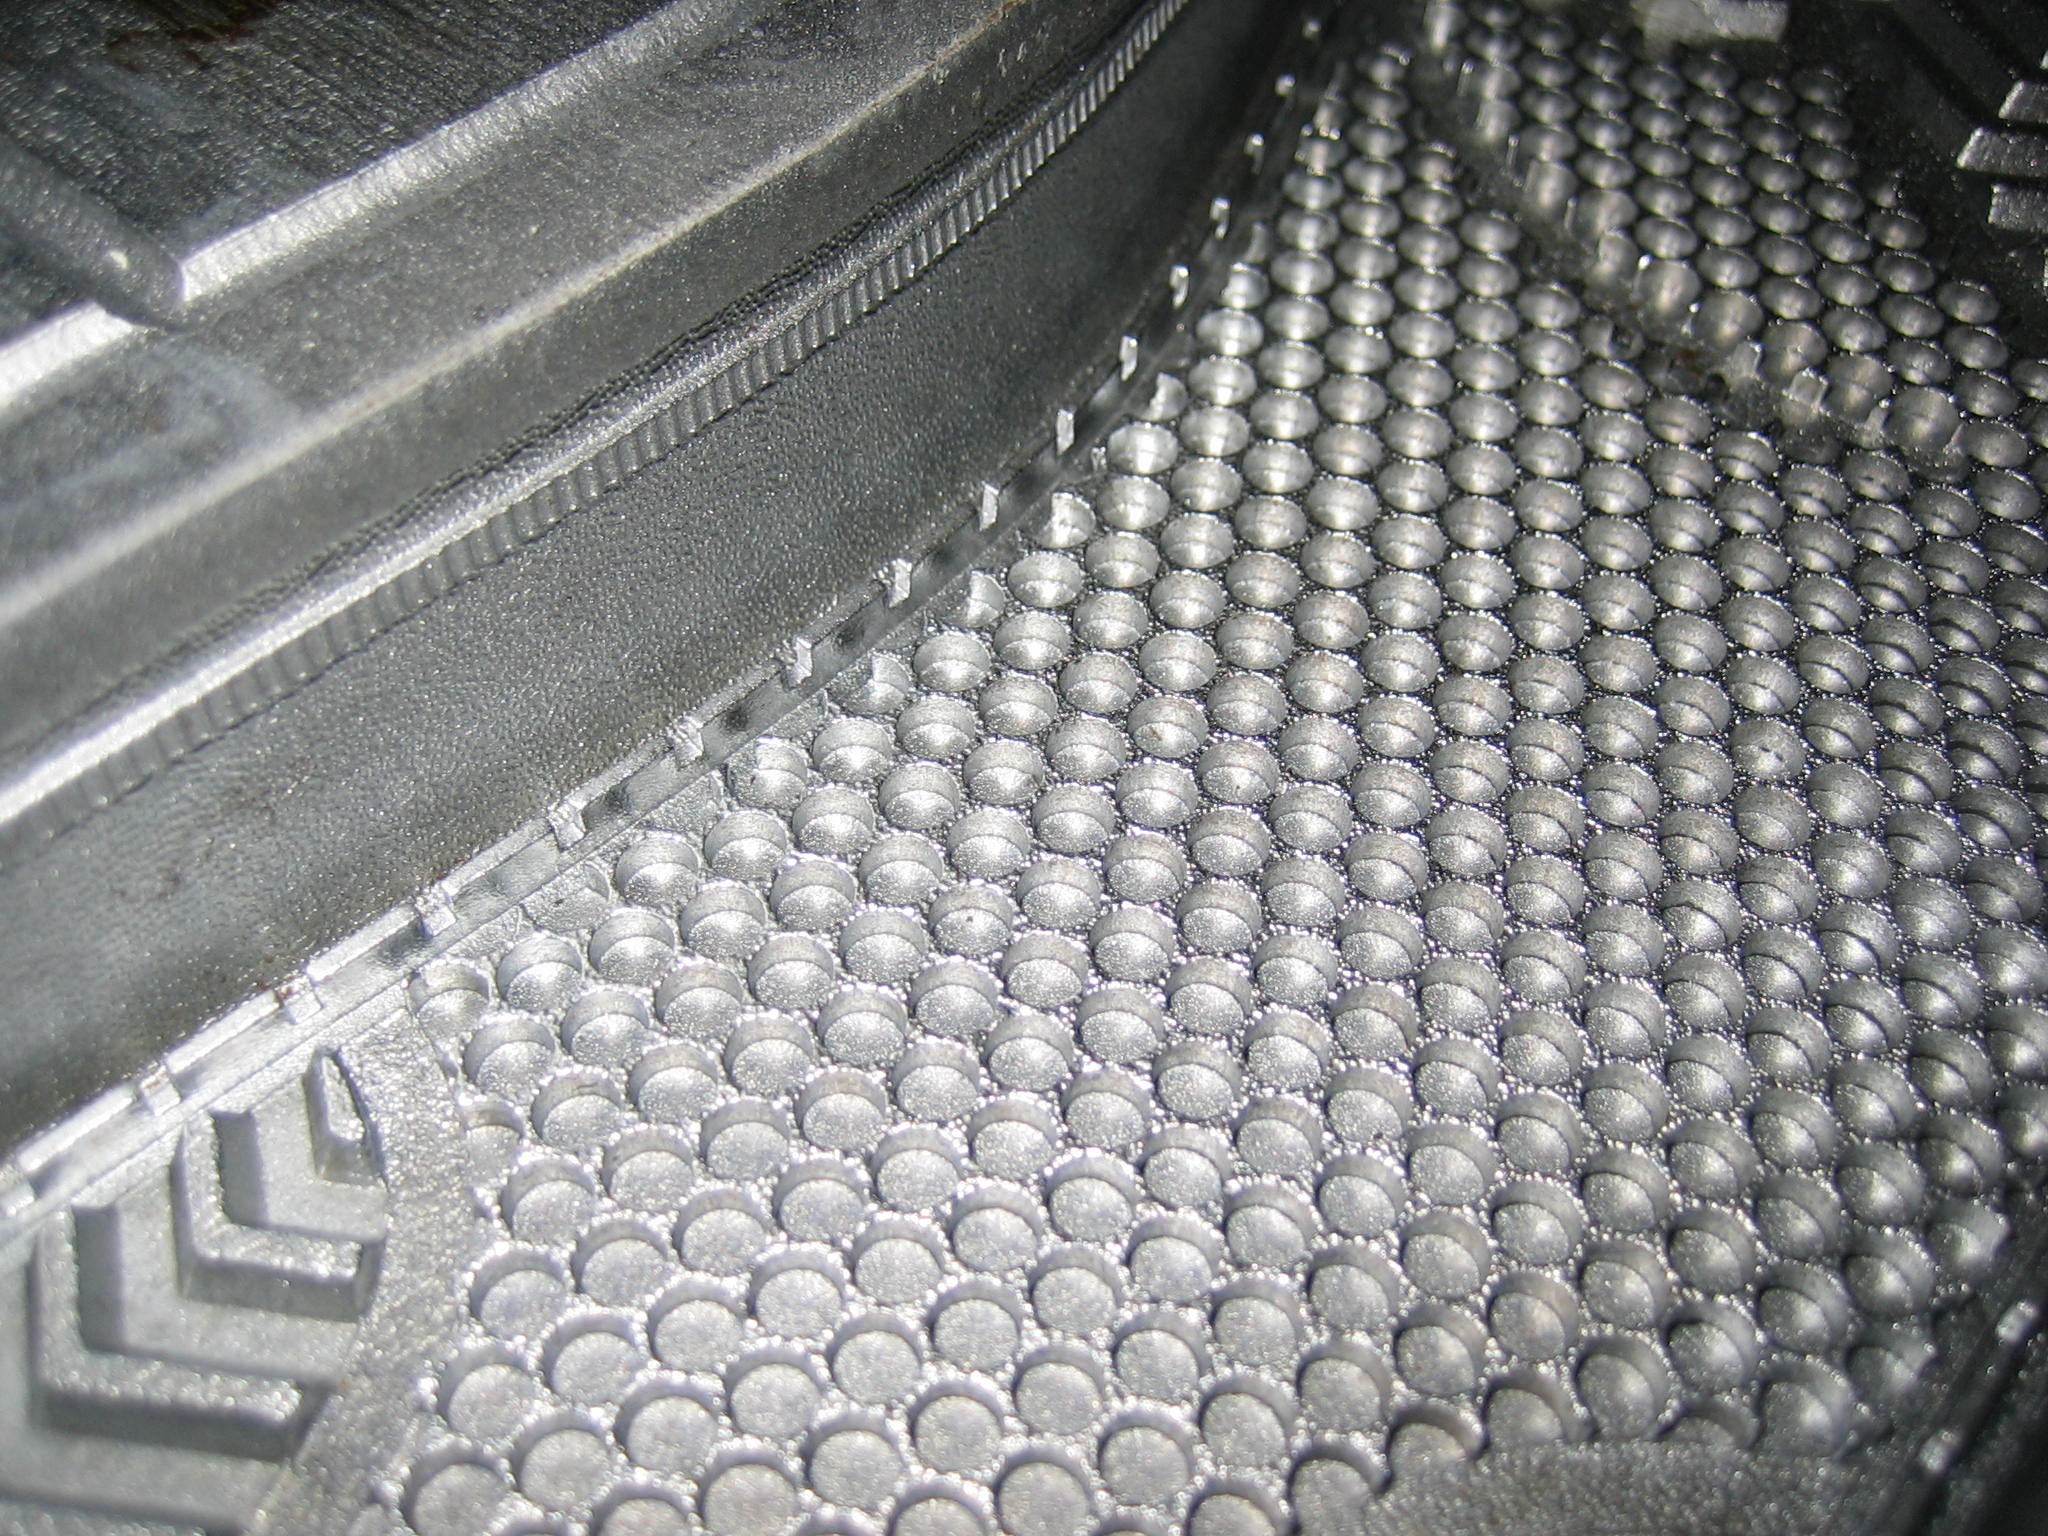
Fine detail can be cut
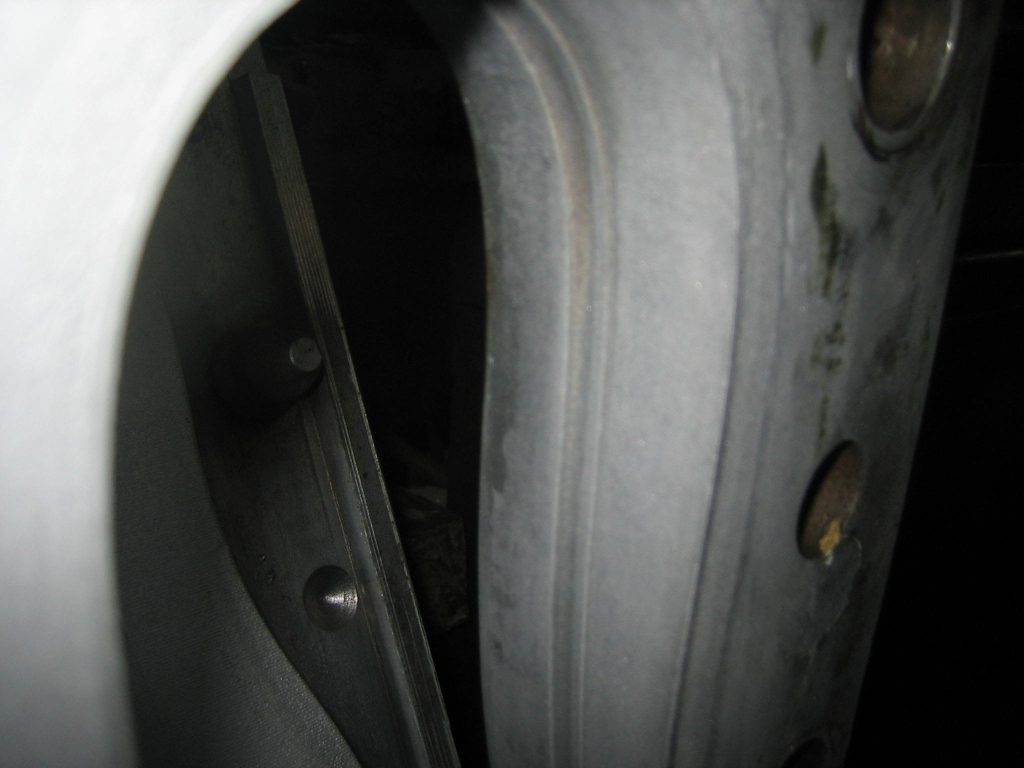
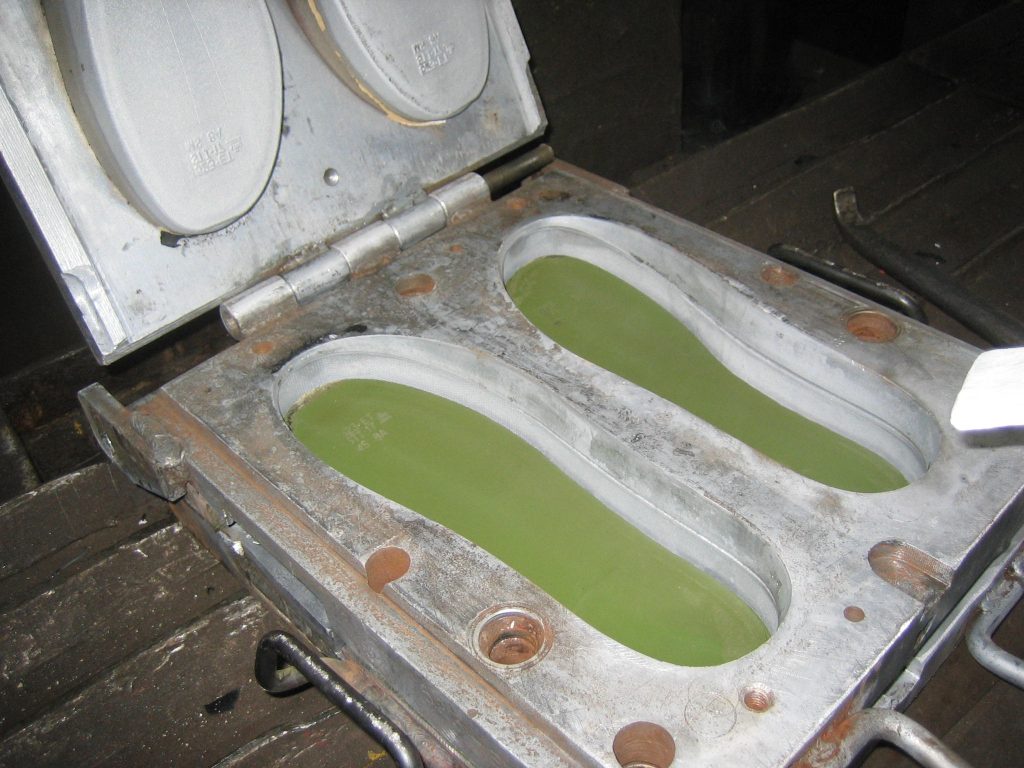
Here is a hot press rubber outsole mold before and after Teflon coating
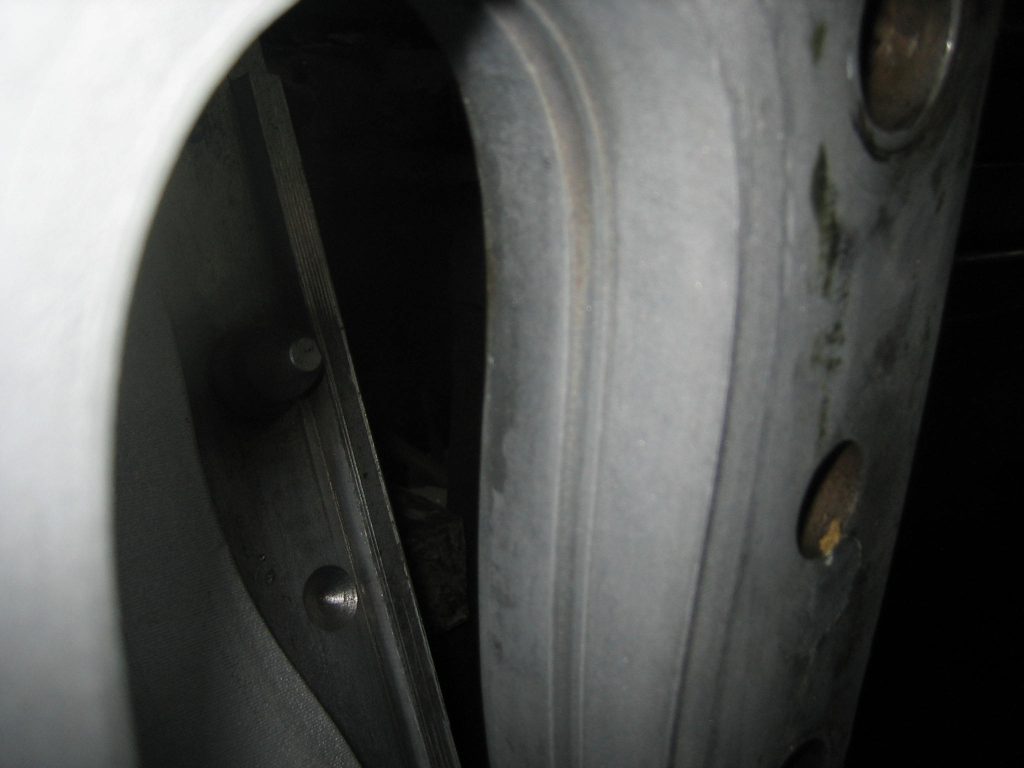
The top surface of the mold is the parting line
The mold surface is made square to fit into the hot press molding machine
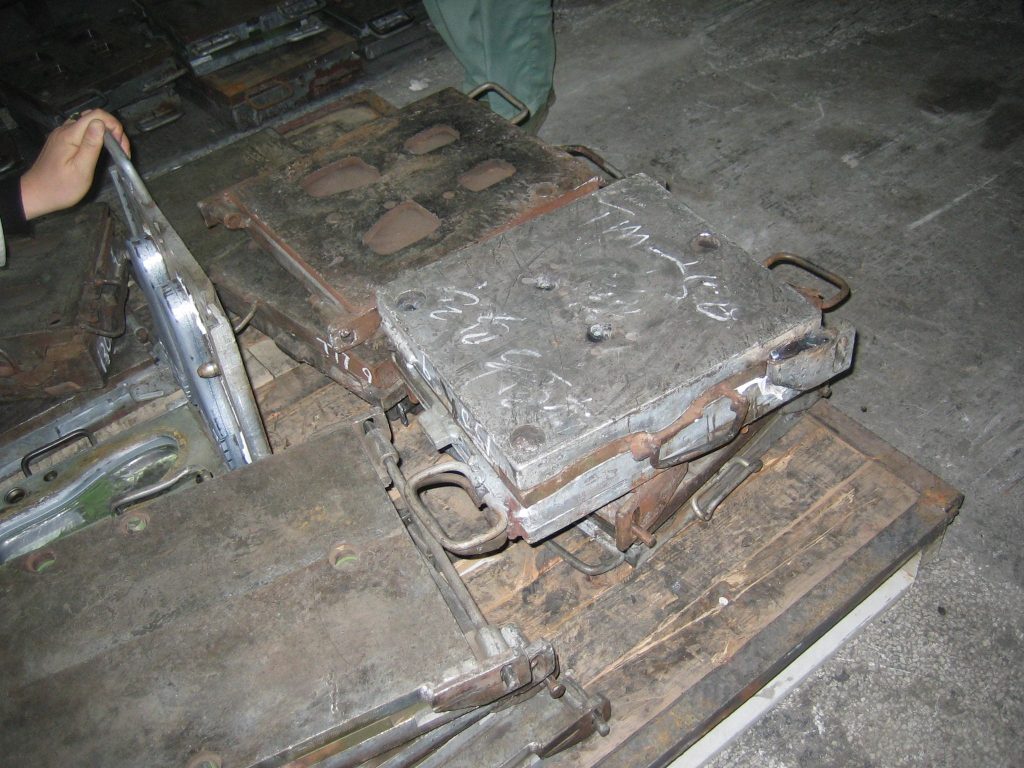
Assembled mold waits for pick up
CAPÍTULO 5 : DISEÑO DE HERRAMIENTAS DE SUELA EXTERIOR
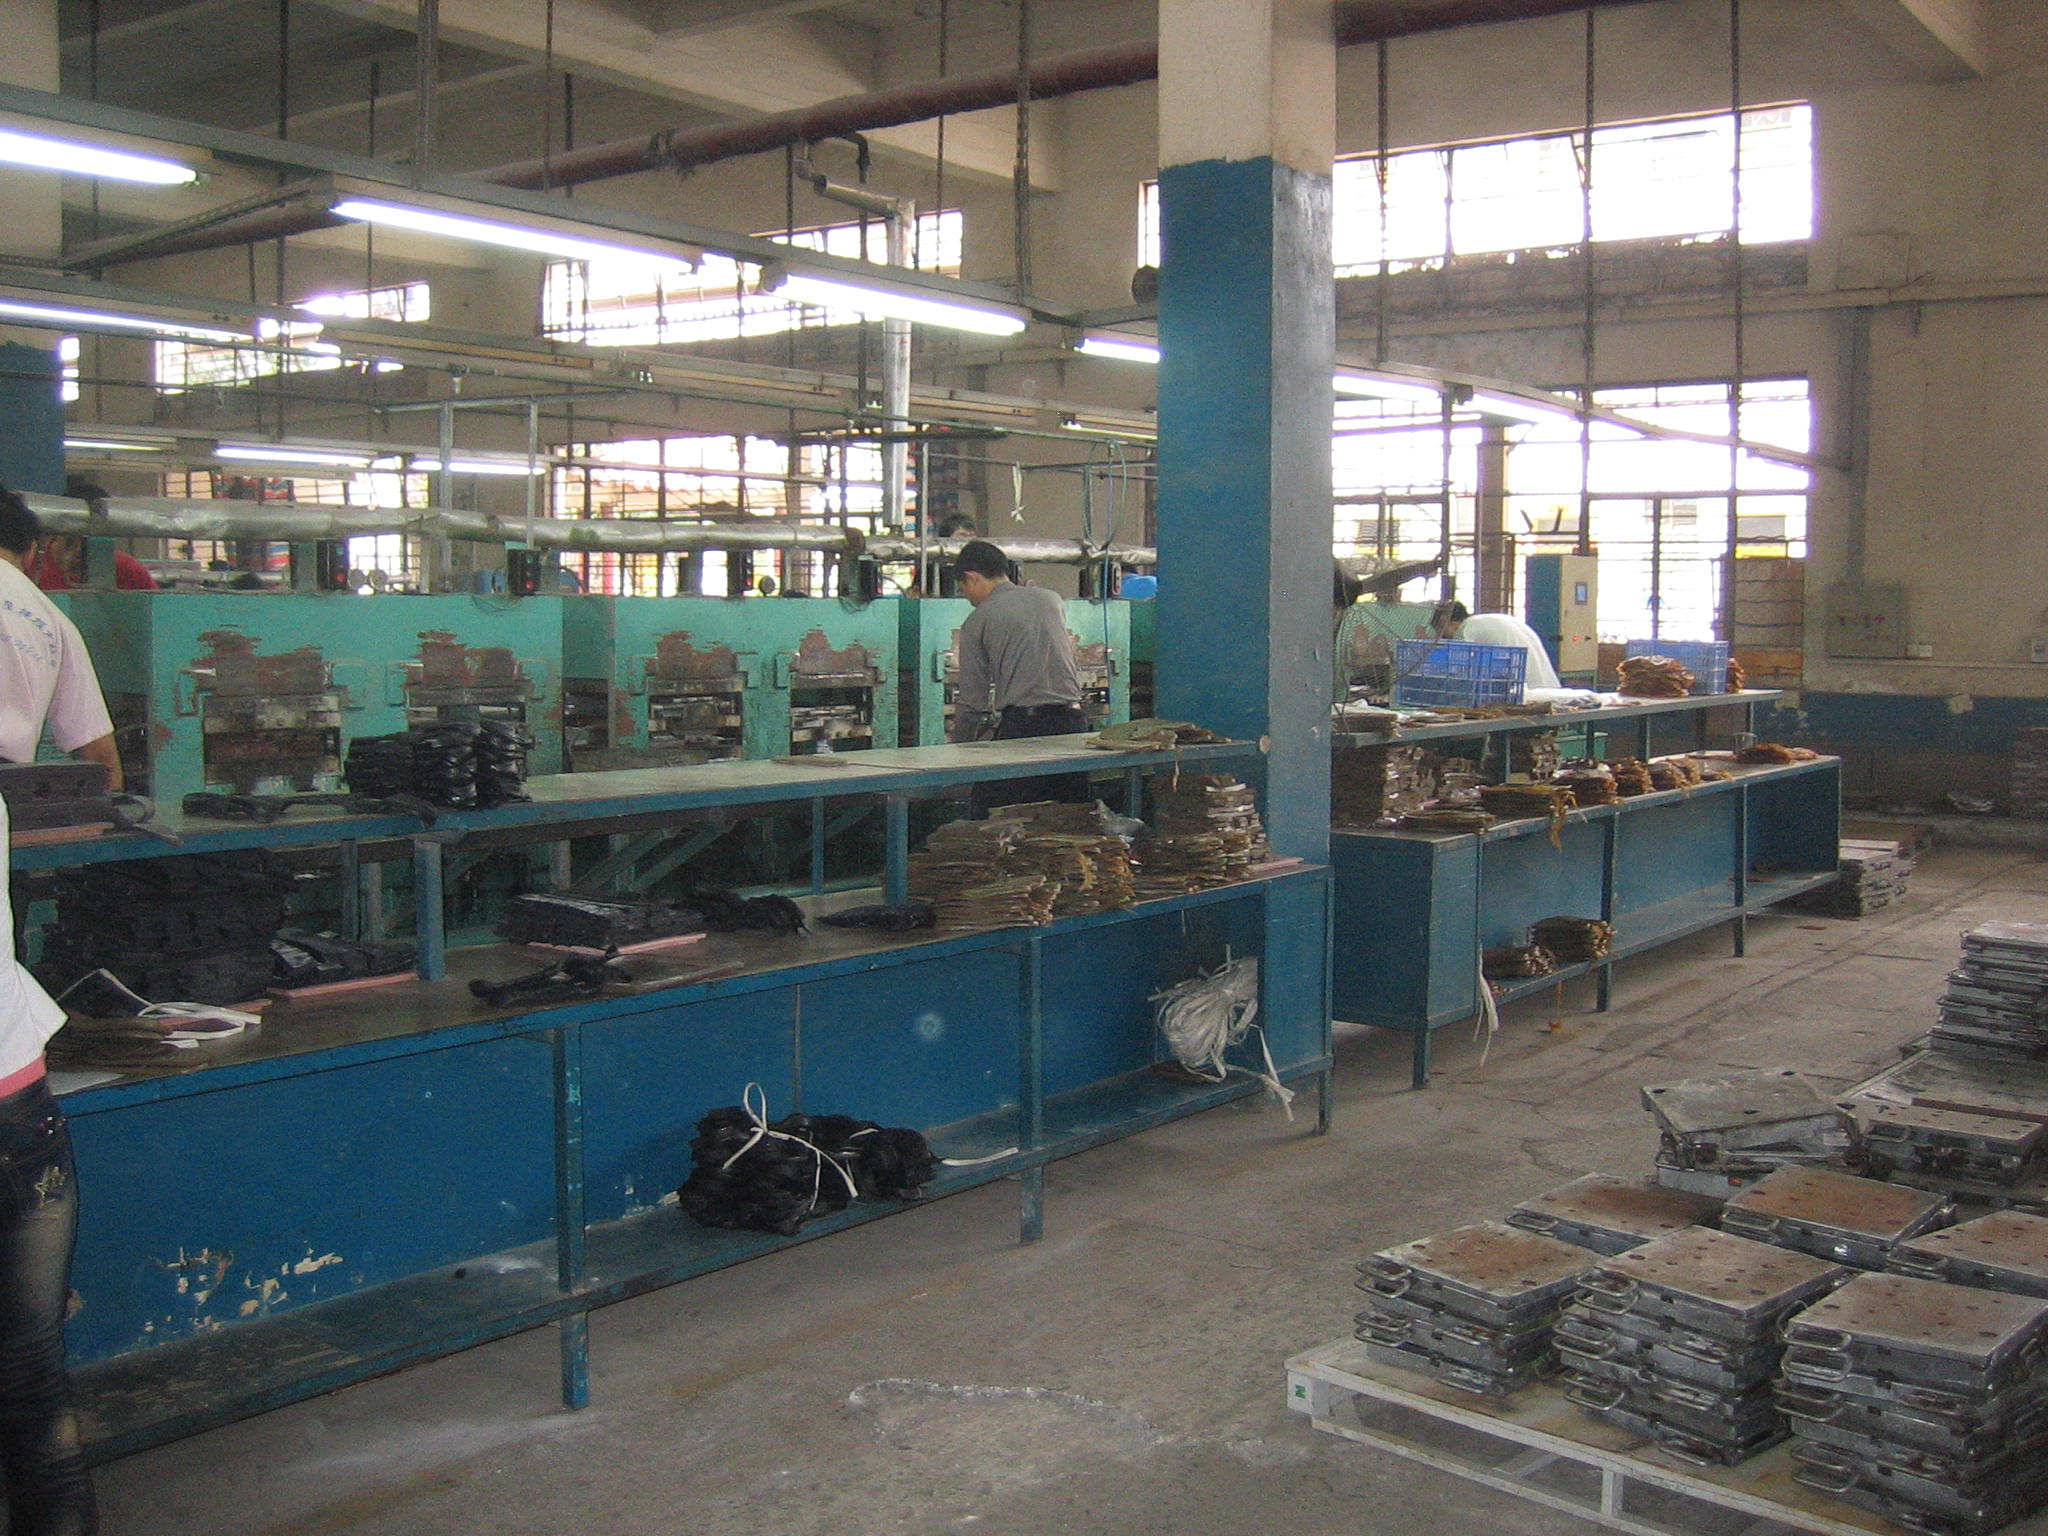
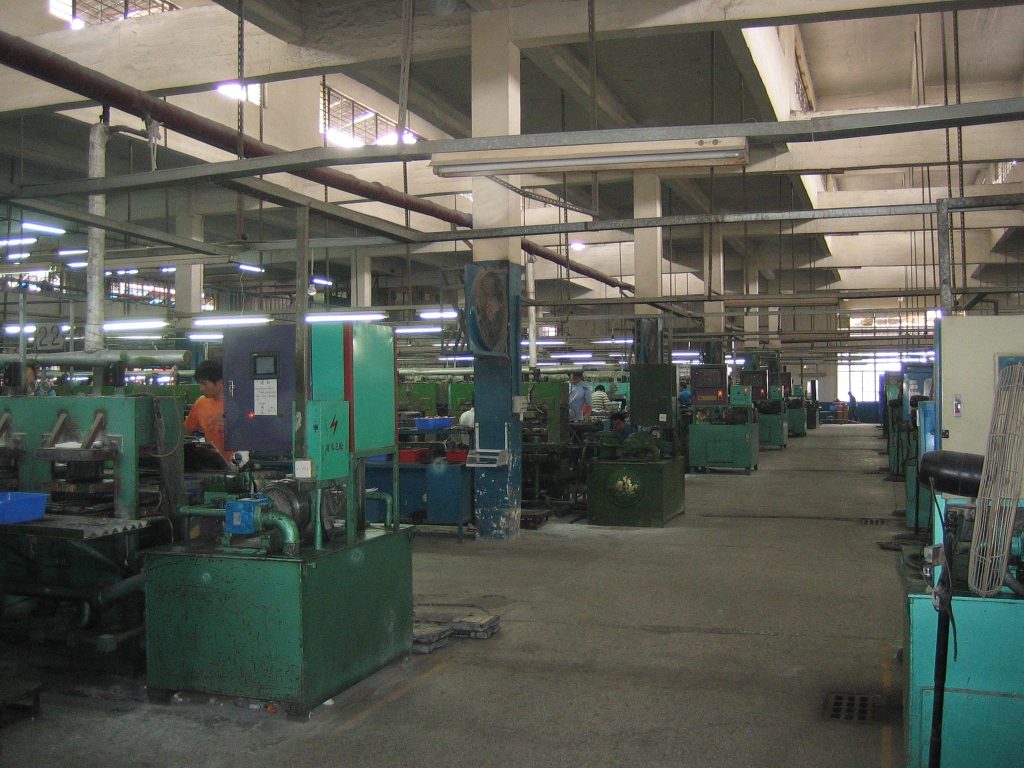
A bank of outsole presses
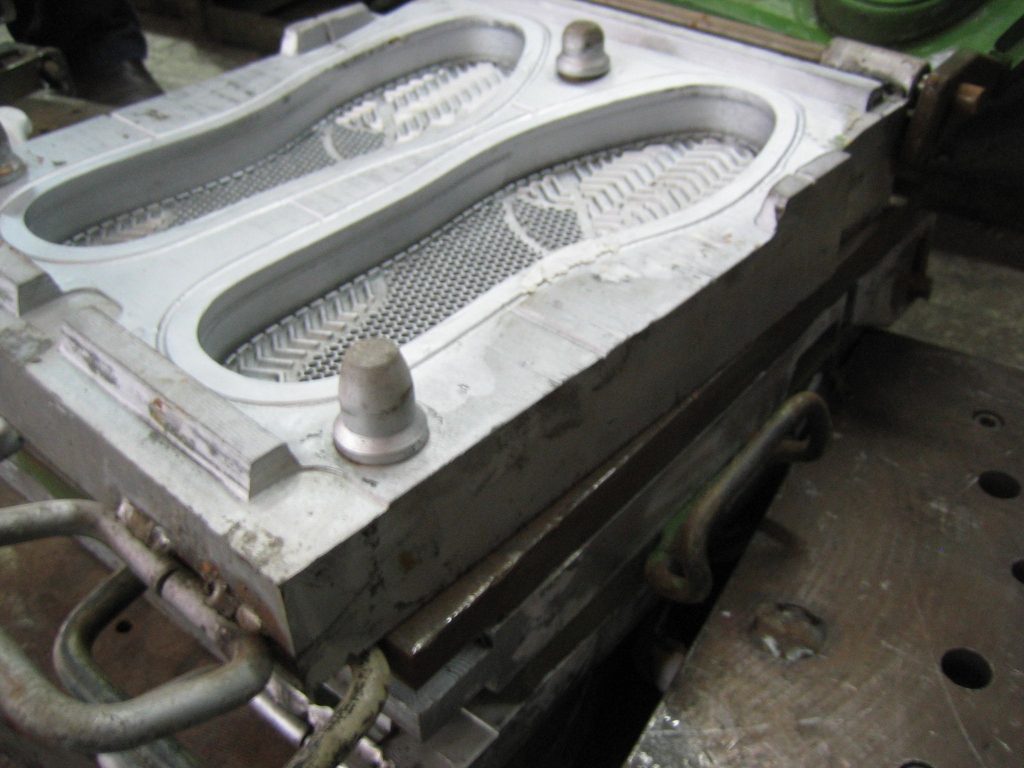
Outsole mold with locater pins
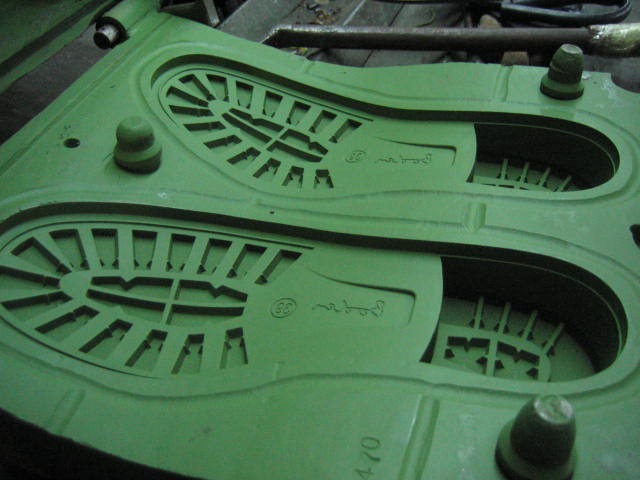
Outsole mold with tread detail
The rubber pressing operations for shoe soles are usually sub-contracted to a factory that specializes in the compounding and pressing of the rubber parts. The rubber mixing operations are messy and pressing rooms are uncomfortably hot, making it best done outside of the shoe factory. Also, the rubber pressing factory will have many customers, allowing the presses to run higher volume efficiently.
See a rubber pressing factory The rubber pressing operation begins with the mixing of the rubber components. Depending on the performance requirements of the rubber outsole, natural and synthetic rubbers are combined with curing agents such as sulfur or peroxide.
A size run of shoe outsole tooling stacked, waiting for orders
Outsole Tooling sidewall
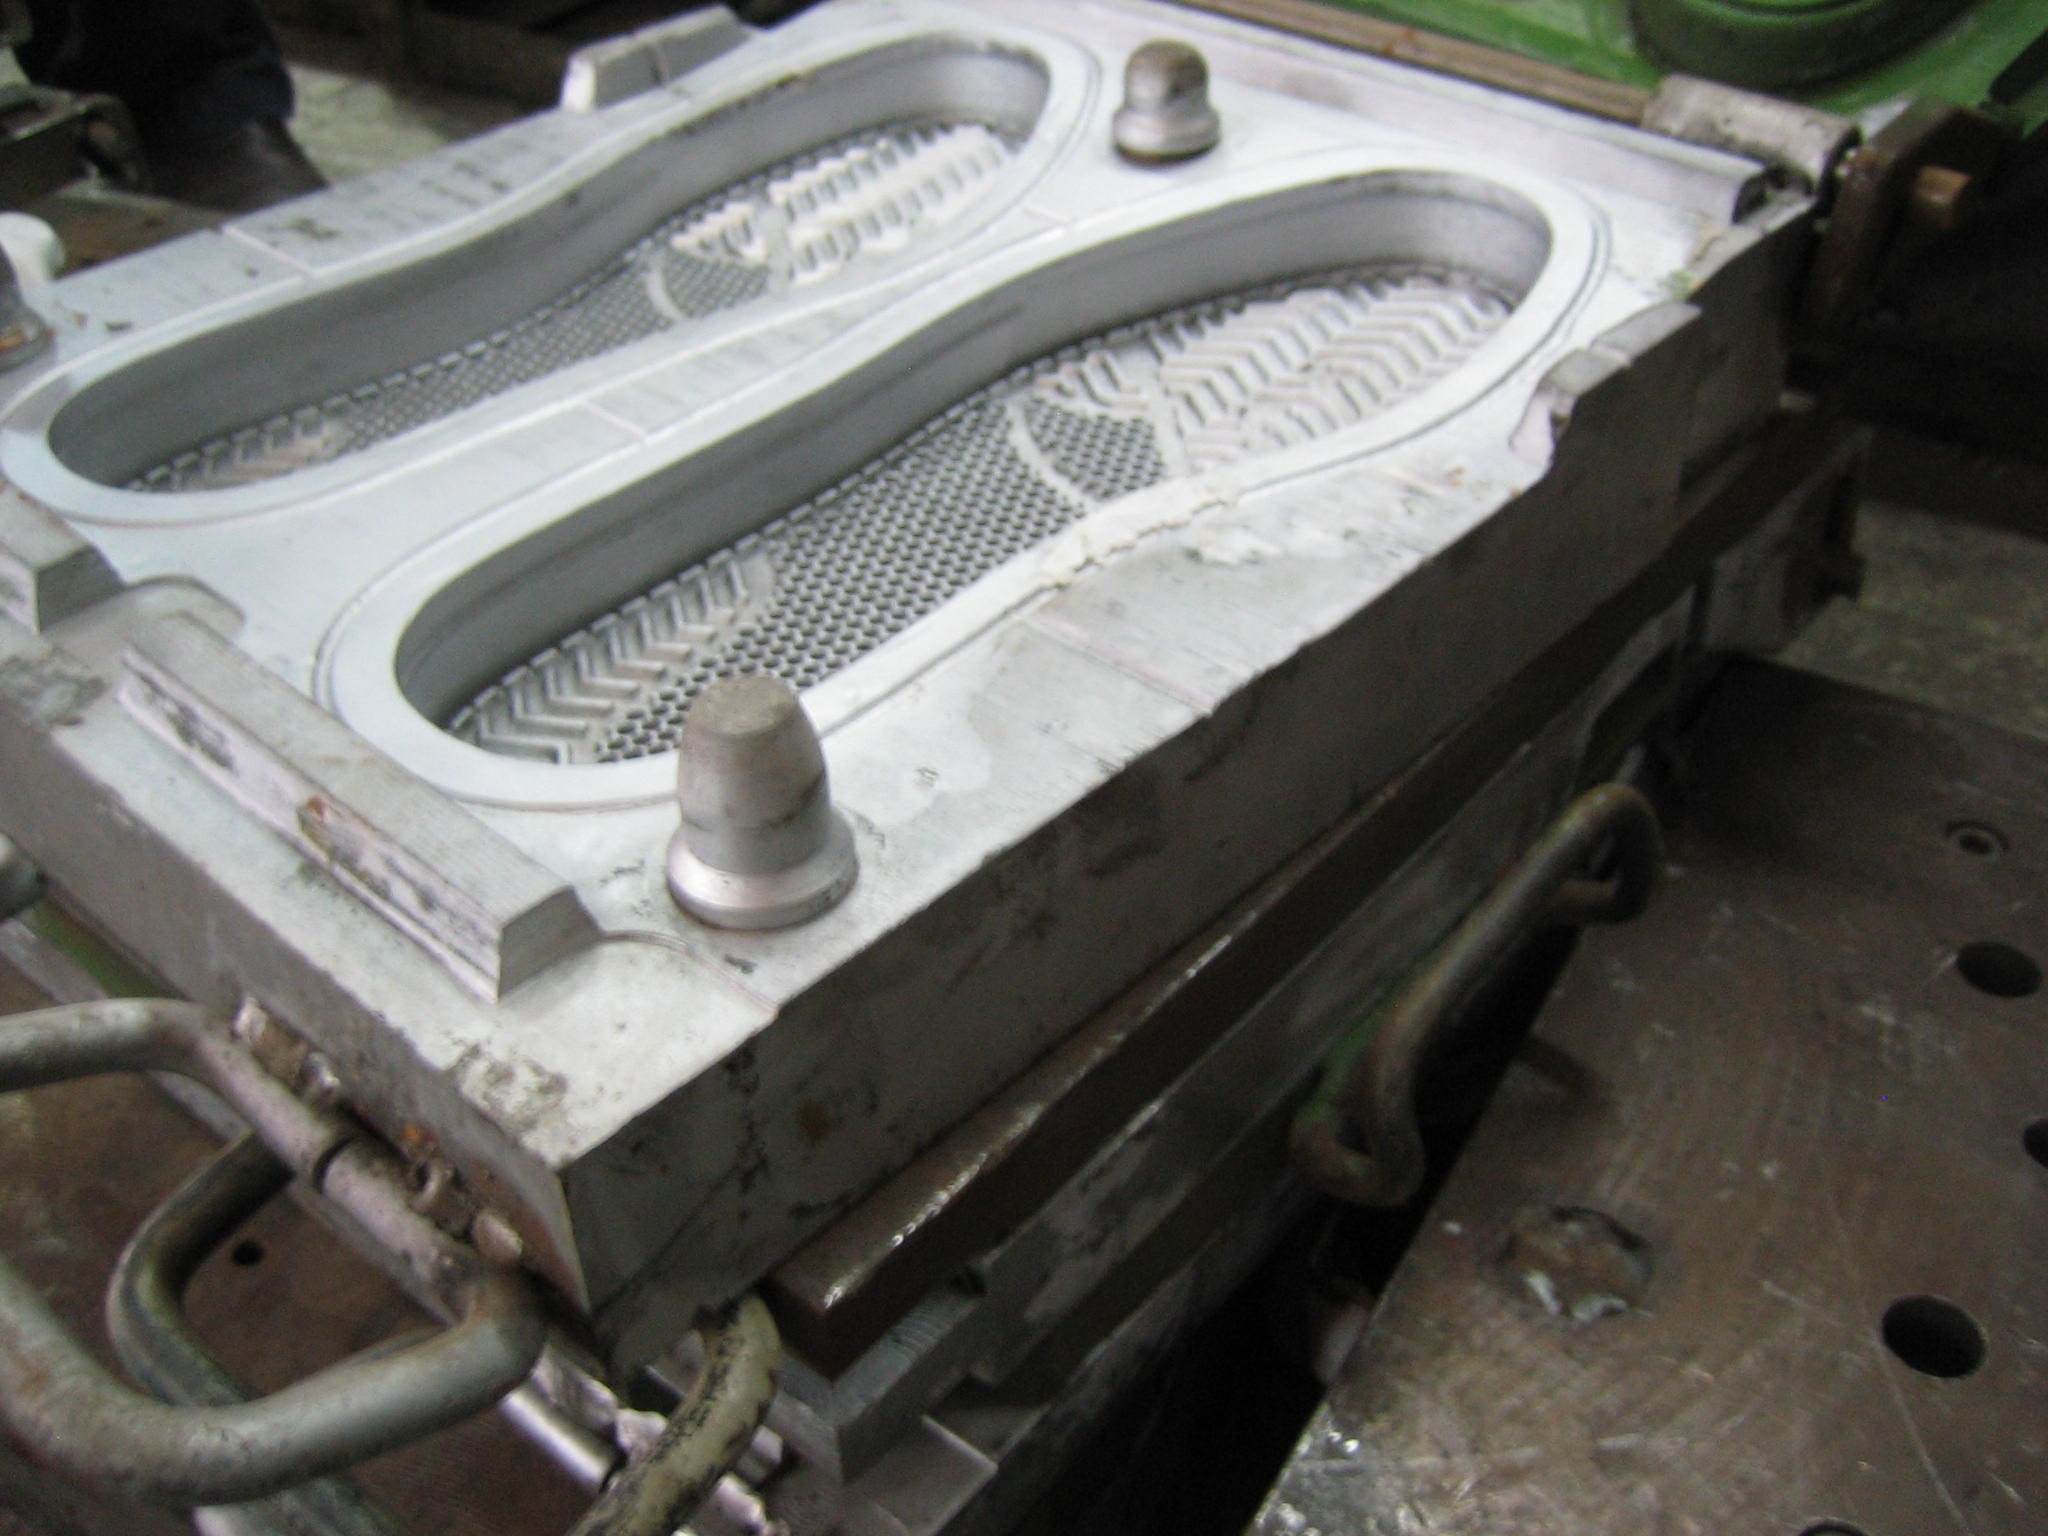
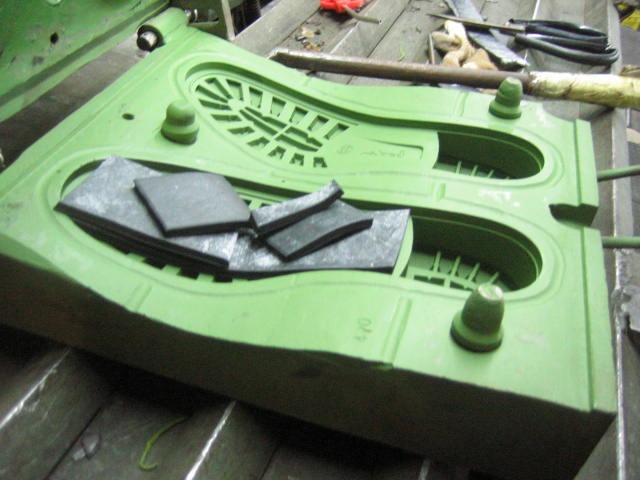
The outsole mold is a big waffle iron
Outsole mold with tread detail
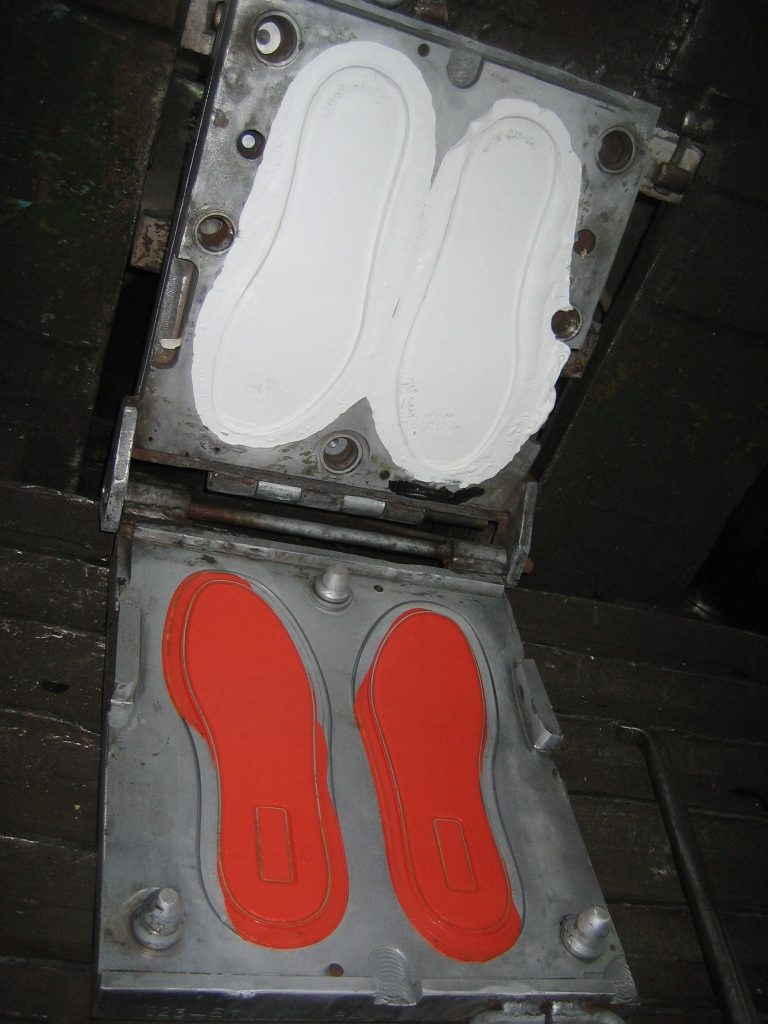
Top and bottom ready to be fused
Rubber packing
empty mold
An outsole mold packed with uncured rubber
The Green coating is Teflon
This shape makes a rubber egg crate in the shoe sole
Outsole mold with locater pins
Outsole mold
Sidewall
A bank of outsole presses
A bank of outsole presses
Pins to align the mold
A high heel rubber outsole mold is hand finished
Here is a hot press rubber outsole mold before and after Teflon coating
After test pressing the rubber outsole mold will be adjusted


 Warning: After you learn the skills of footwear quality control you will never look at shoes the same way again. Shoe quality inspection is a critical skill for a shoemaker to master, as footwear construction quality is a very important feature of any shoe you may make, buy, or sell. In this article, you will learn the basic process of footwear quality control in the shoemaking industry


 Quality Problems from “How Shoes are Made”


 Do you want to be a shoe designer or work for an outdoor products company? There is now a college program exclusively for outdoor gear design and development, including shoe design school courses.

 Sneaker Restoration : The Nike KD 6
 In the workshop, we have a pair of Nike KD VI Kevin Durant’s from 2013. Normally we would be cutting into these to show you the Nike Zoom air midsole and laminated fly knit reinforcements, but these are looking more like a diamond in the rough, ready for a good clean, and a quick flip. We picked these up for $10.00 at the Alpine Village swap meet in Torrance, California. Let’s see if we can restore these into sellable kicks.
 Here are some questions to consider. Is the shoe worth any restoration effort? Is the shoe valuable as a collector’s item for reselling? Is the shoe valuable to you because you like it? In this case, we know the Nike KD VI is worth $50.00 at the most if it’s in good condition. Not big bucks but why not give it a roll as a basic sneaker restoration project.
 This pair of Nikes is pretty dirty, but besides the dirt, we can see the shoe is in nearly new condition. The bottom sole unit is showing minimal wear. Just a tiny amount of wear on the heel. Rubber outsoles are difficult to “rebuild” unless you plan to replace them. Sneaker sole replacement is major surgery and not worth the effort for most shoes.


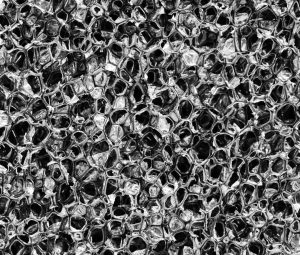 Reticulated foam for shoes
 An Asker “C” scale Durometer tester is used to test the hardness of any foam components in your shoe. The Durometer tester will give you a reading of the density of the material. Try to test in flat spots and take several readings for each shoe part you are checking. For foam, try to cut the parts so you can test the center of the foam. EVA foam skin may give you a harder reading. A standard EVA midsole may be 55˚, a soft footbed 35˚. You can see the testing problem on the bottom is larger for softer foam.
 When testing the hardness of rubber and plastic shoe parts you need a Shore scale “A” Durometer tester. The Durometer tester’s bottom measuring pin is simply pressed against the material. The Durometer tester will give you a reading of the density of the material. Try to test in flat spots and take several readings for each shoe part you are checking. You can see the testing problem is very small.


 Carréducker
 – I wish this site and these design and development tools were around 20 years ago when I was new to the trade. Great practical information to read or purchase. Blog and books written by Wade Motawi and various veteran shoe dogs cover everything you need to succeed in the shoe business. Check out their books,
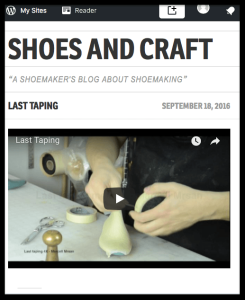
 The Honourable Cordwainers’ Company (H.C.C.)


