
How to Make a Shoe Pattern: Step-by-Step
Making a shoe pattern or cutting a shoe pattern is not a difficult shoemaking skill. If you have the time and patience, you can produce shoemaking patterns with just a few common tools. The shoe pattern making process is not complicated. The basic techniques for drawing on a shoe last are simple, and the process is easy, but the skills required to make a beautiful, well proportioned, mechanically sound, shoe pattern may take years for a shoemaker to perfect! This is the true art of the shoemaker that a computer cannot replace. A skilled pattern cutter is the heart of a shoe factory’s development group. Here we will show you how you can cut your own pattern.
Here is a list of the shoemaking tools you will need to make a shoe pattern:
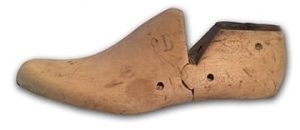
1. A shoe last. If you don’t have a shoe last you can tape over a shoe or 3D print a last.
2. A roll of 1/2 inch wide masking tape. This will be used to cover the shoe last. (3/4 inch will do too.)
3. A sharp X-Acto knife or other hobby knives.
4. Pens and pencils.
5. A small flexible steel ruler.
6. Bristol paper (any stiff paper will do, like a manila folder)
Here is a list of some other shoemaking tools you may need,
How to make your own shoe pattern
First step: tape up the shoe last
 To make a new shoe pattern step-by-step you will first need to “tape” the last so you can “pull the shell” off the shoe pattern. The tape should be layered in two different directions so the pattern stays together when you are ready to peel it off the last. You will start on the lateral or outside of the shoe last. First, starting at the top, lay the tape lengthwise down the lateral side of the last. Next, run a strip of tape down the center of the last from the top of the instep down to the toe. Do the same on the heel of the last. Finally, run layers across the last from the bottom edge up the side of the last. Make this extra smooth, this will be your drawing surface when you start marking your shoe pattern.
Make sure the tape wraps around the bottom edge of the last. You will need this edge, as it will become the bottom edge of your shoe pattern. If your shoe design is symmetrical then half the last is okay. If the medial and lateral side of your shoe design is different you will need to tape the entire last. The process is the same for both sides.
DIY Shoemakers
Start Here
Step by step pattern making and shoe last design. Pattern making explained simply. Everything you need to know about making a shoe pattern yourself.
Learn more
On Sale $39.99
How to mark the shoe pattern on the last:
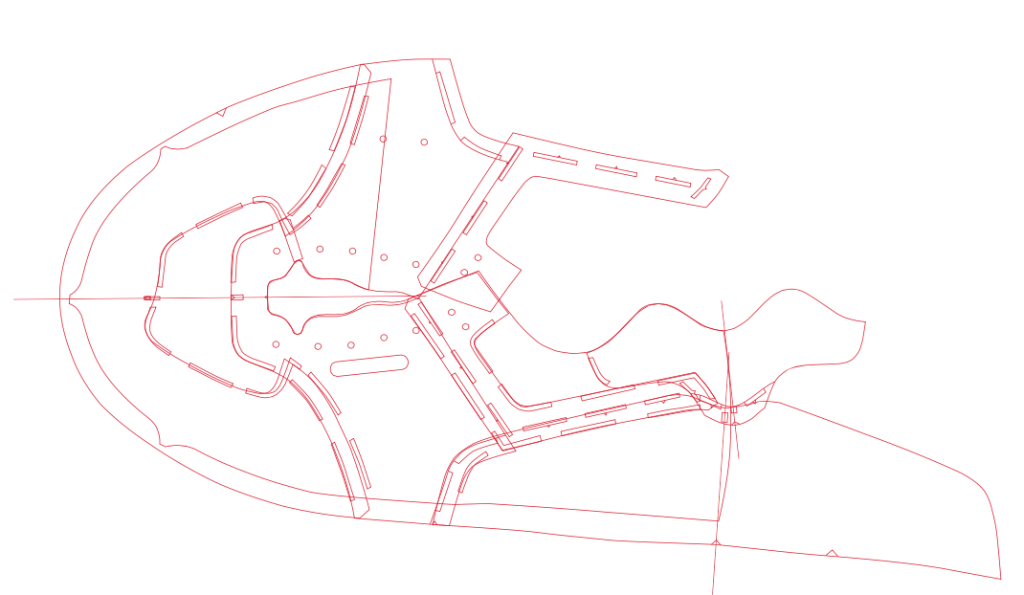
 Once the shoe last is covered with tape, it is time to start marking the shoe pattern. With the steel ruler, mark the centerline of the last from the instep to the toe tip and down the heel. For a list of last terms you can read this post about shoe lasts and how lasts are made.
With the centerlines marked it is time to start drawing the pattern on the last.
Drawing the shoe pattern:
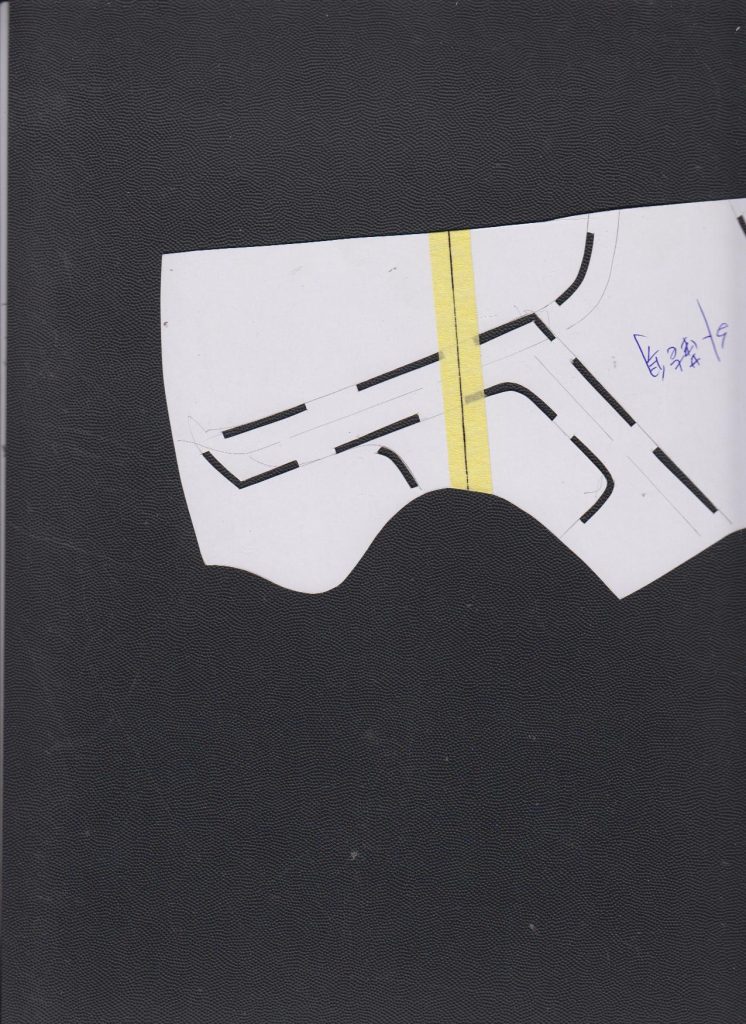
 It’s fun to add a little color or paste on a logo. You can start to get a feel for what the design will look like in 3D. Go ahead and iterate upon your design, this is your time to be creative. If you don’t like your line, grab some tape, cover it up, and try again.

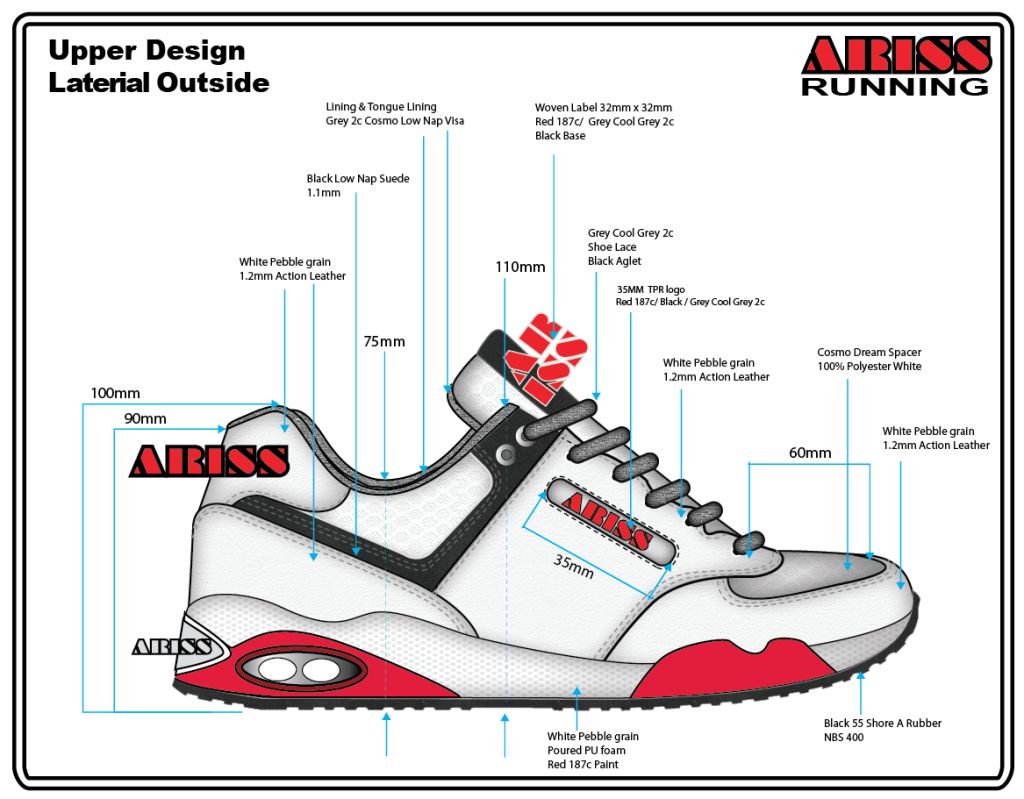
Make a quick check of the top line, collar, and heel notch heights. For a size 9 shoe, (measure from inside to the Strobel sock,) the collar line is 55mm, the heel notch is 80-85mm to top eyelet, 90mm measured from the Strobel’s bottom.

The design does not have to be perfect now but keep an eye out for any major flaws. This is a good time to show it to your developer. Are the pattern parts wasting material? Are there any overlapping issues? Too many layers overlapping in the flex zone will cause problems.
Shoemaking Material
DIY Super Kit
All the hard find parts for your DIY shoemaking project are here in one place. Lasts, soles, materials, tools and pattern making text book included. Your shoe size is in stock.
Learn more
On sale $200
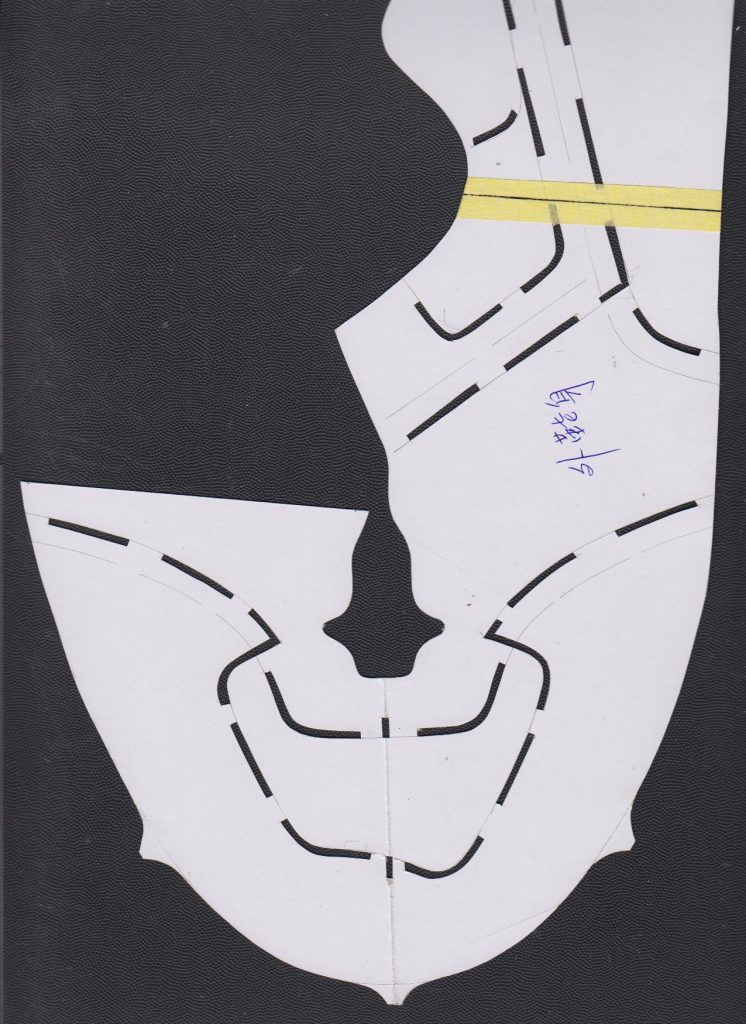
Flatten the shoe pattern:

After you have your shoe design down on the tape it is time to peel off the tape. Using a sharp blade, cut the tape down the center lines of the toe and heel. Next, cut the tape along the bottom edge of the last. Now, start peeling off the tape. If the tape was laid down correctly in overlapping layers the pattern will pull off.
 Here is the pattern free of the last. You may find that it does not lay flat, don’t worry.

Now, carefully lay the tape on a sheet of stiff paperboard and press your new shoe pattern flat. Starting at the top eyelet position and collar line, work your way down the middle then out to each end. As you move to the heel and toe, the 3D pattern will need some relief cuts to “spring” the pattern. Add a few cuts and the pattern will flatten.
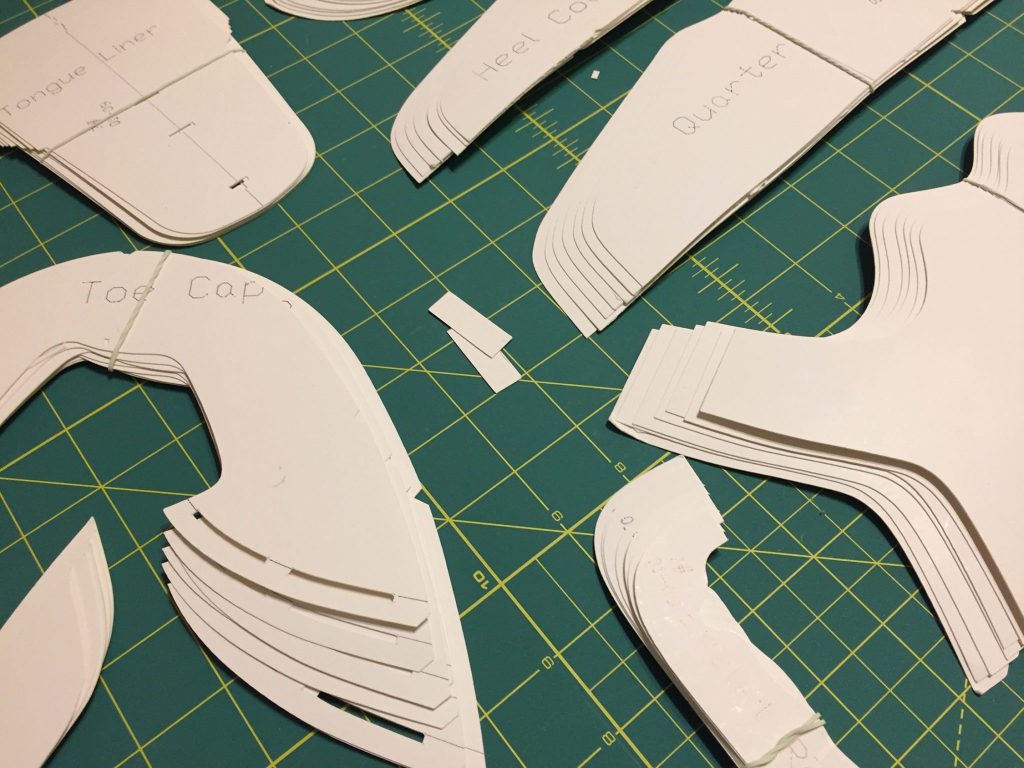
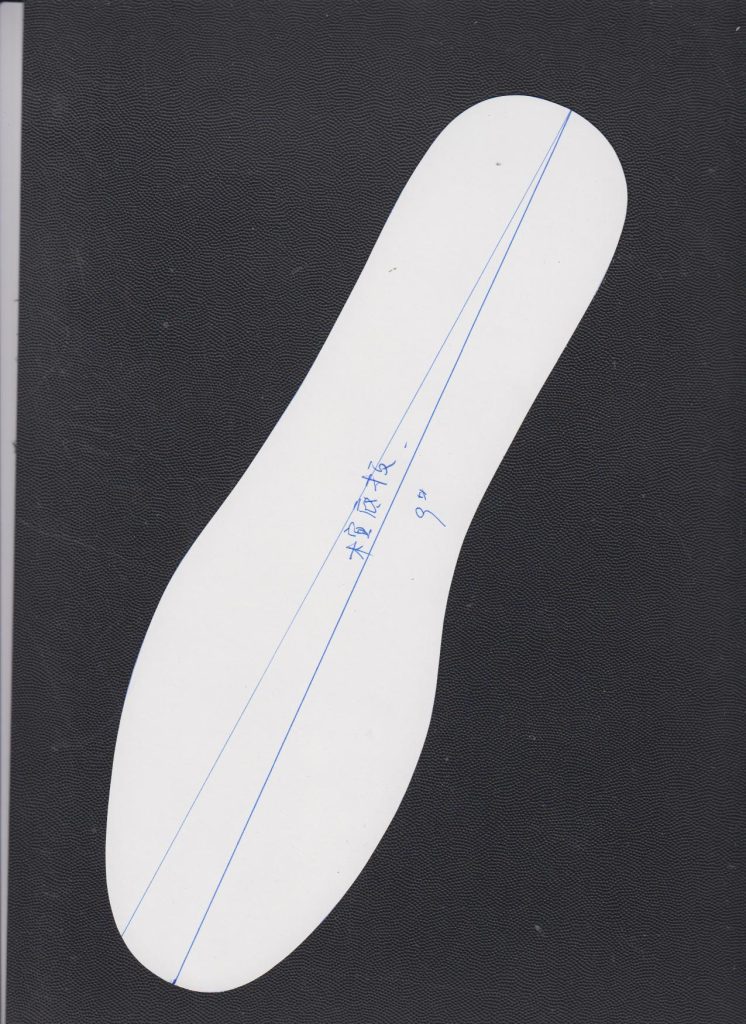
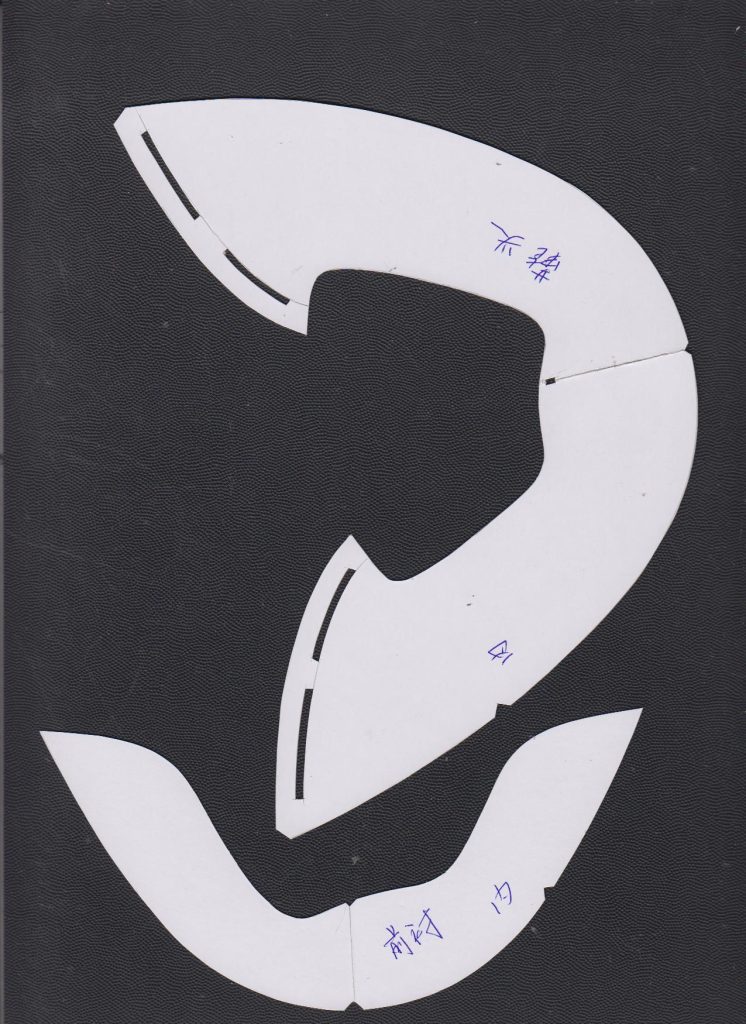
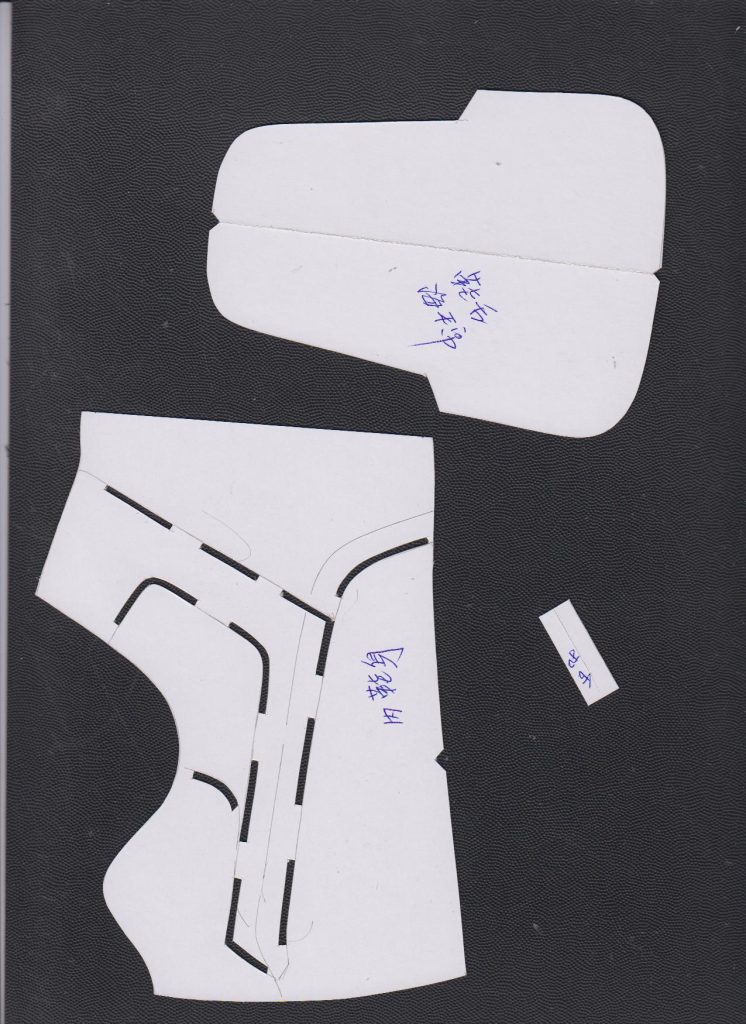
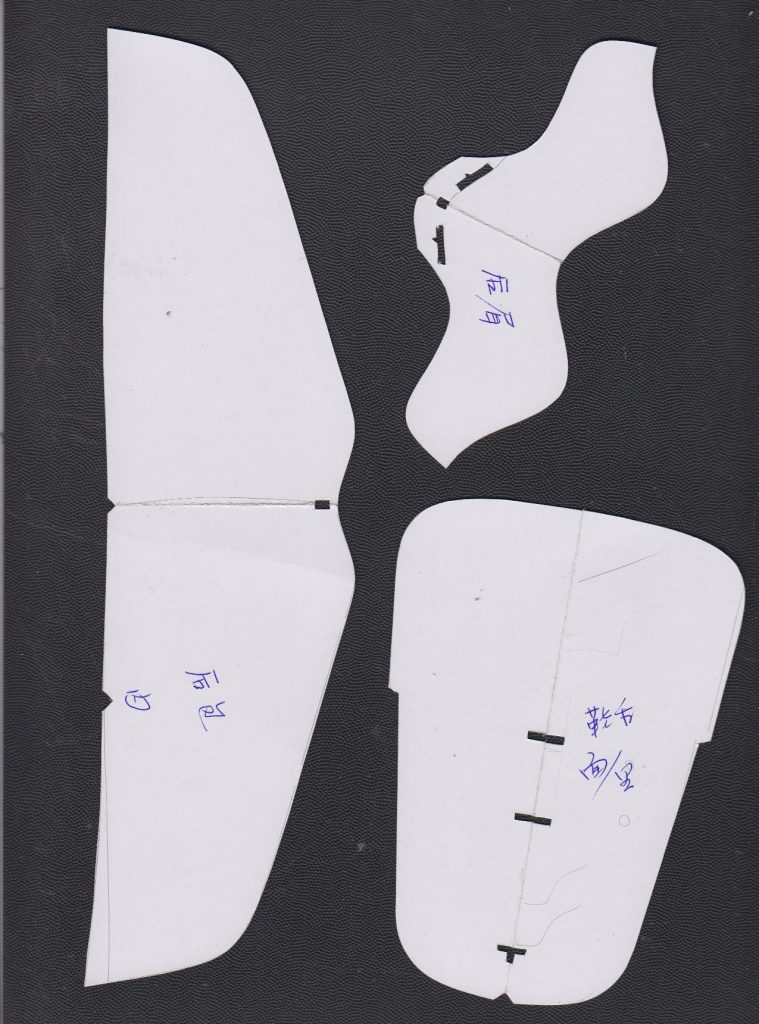
Cut the shoe pattern:
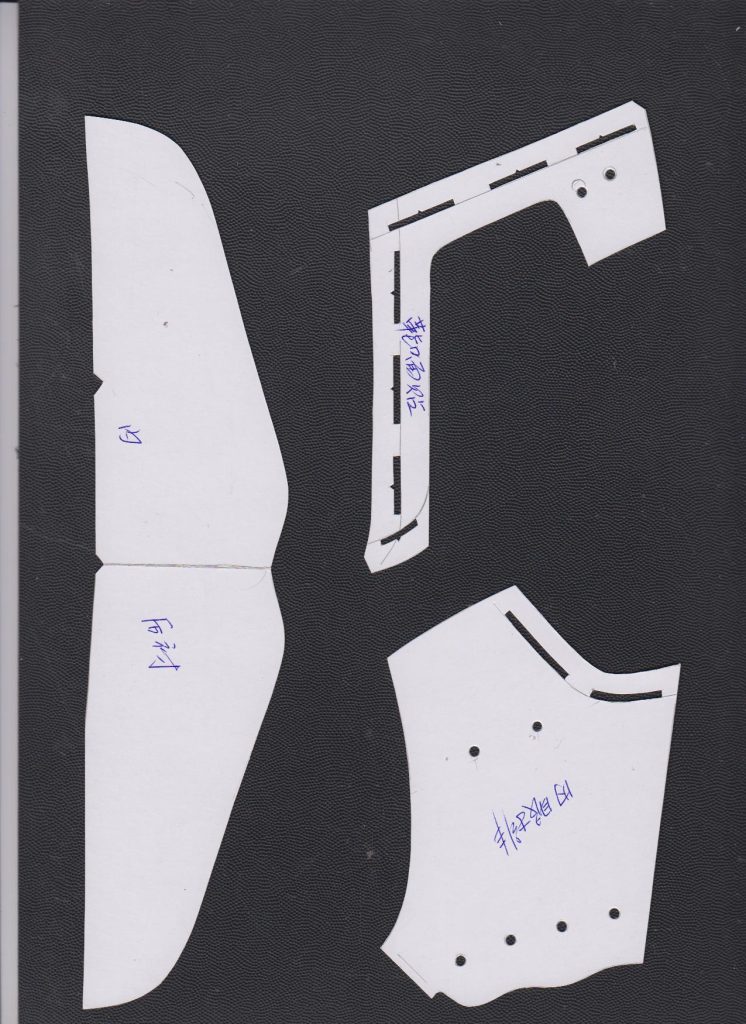
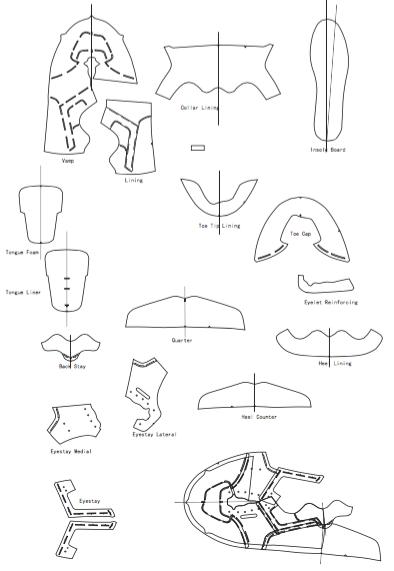
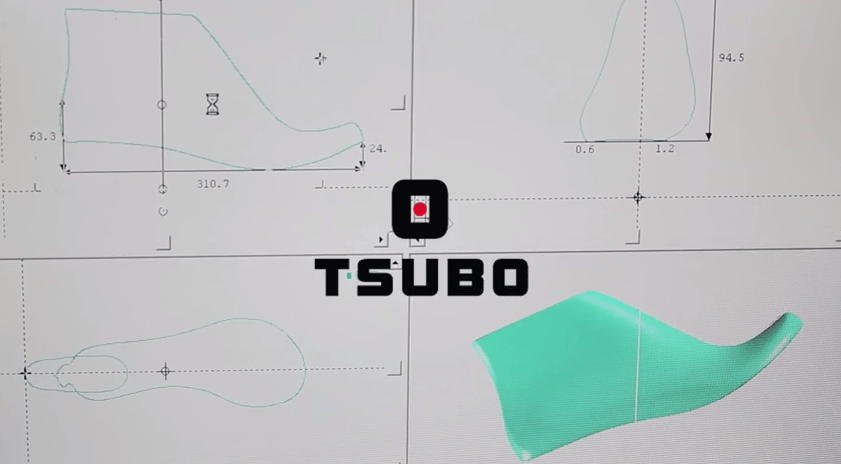
 Once the tape is peeled from the last and flattened you have the shoe pattern! The pattern with all the parts together is called the “shell” pattern. With the pattern attached to some paper, it’s time to “trim out” the pattern. Now the shoe pattern can be redrawn in a computer and cut out of heavy paper. The Pattern Cutter will add the overlaps and alignment marks.

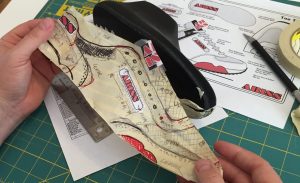
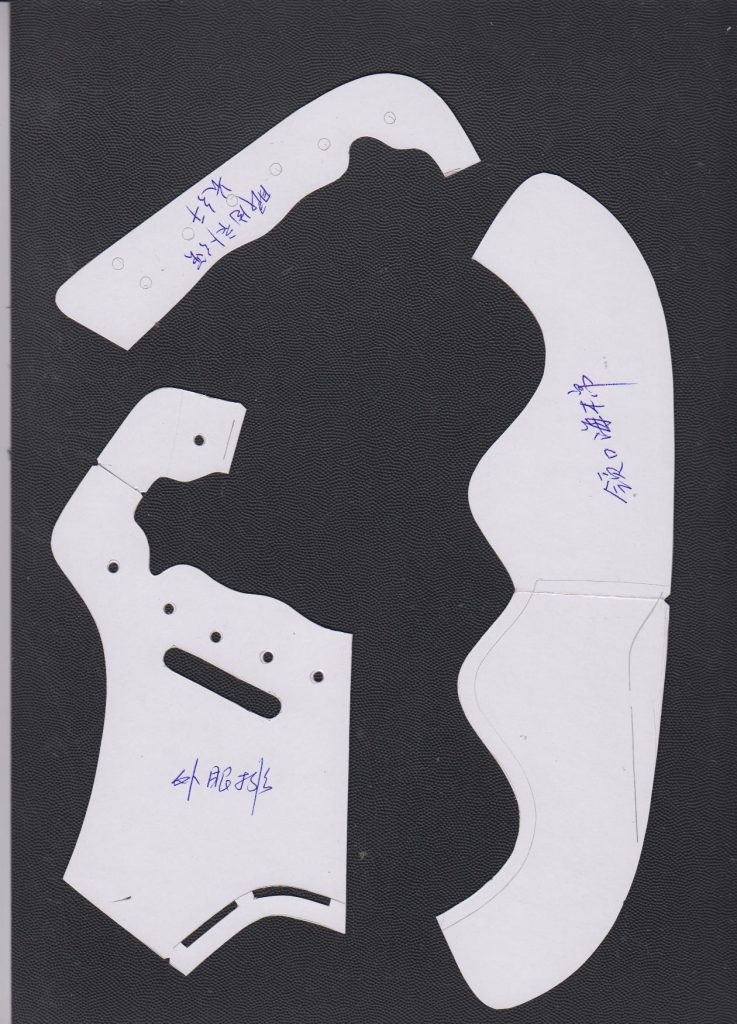
As a shoe designer, you should always ask for the flat pattern of a new shoe design. When you make corrections for the pattern maker, it’s easier to draw on the flat pattern than to draw on the sample. It is also much faster to scan the corrections and email them to the factory rather than Fed-Ex the shoe back to China.

Here is the finished flat pattern. Scanned and with overlaps added, this pattern is ready for the sample room. Buy the pattern here.


 The shoe lasts’ other critical dimensions also change per size, but at different rates. For example, the ball girth is graded at 3mm per size, and the ball width (measured across the bottom of the last) measures 66% of the total ball girth. For men’s size 9, the ball girth is 234mm and the ball width is 156mm. Also, while the shoe length increases 4mm per half size, the collar height and back height increase only 1mm per size.
 The shape of each shoe component will change per size depending on its location. The tongue length will increase quickly according to the last length, while the width grades slowly according to the girth.
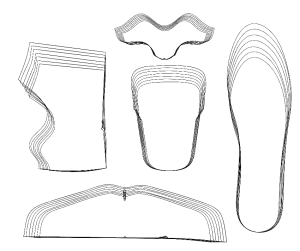 Not all the features of a shoe pattern are graded. For example, the pattern overlaps and lasting margins are not graded.
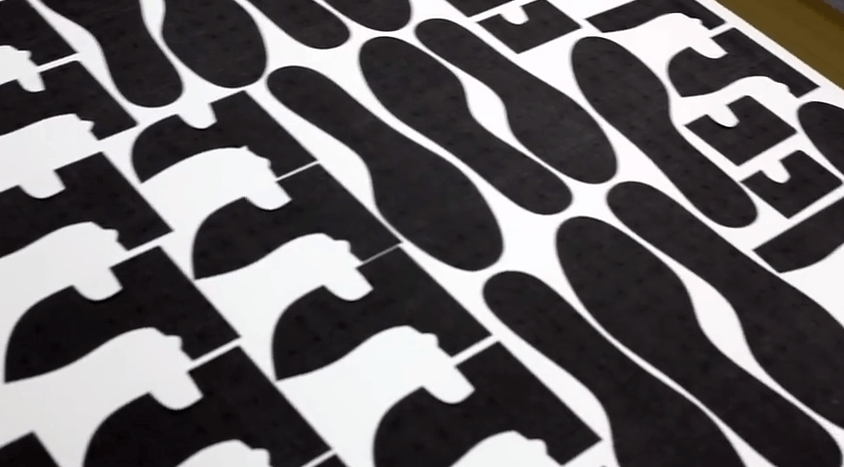
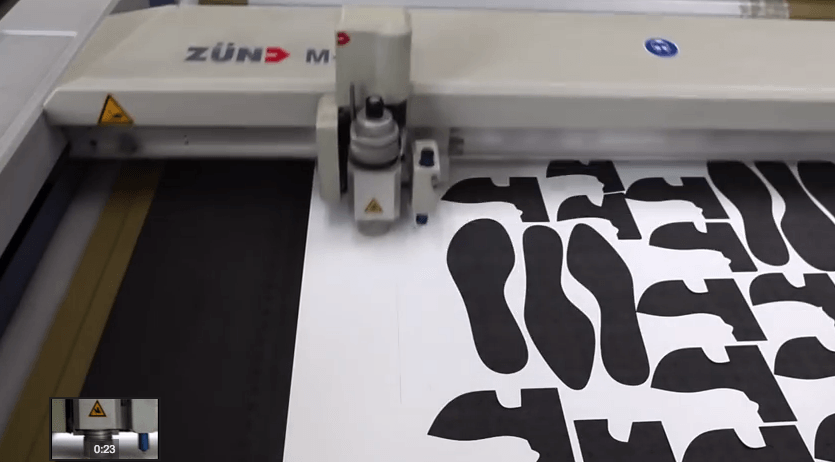
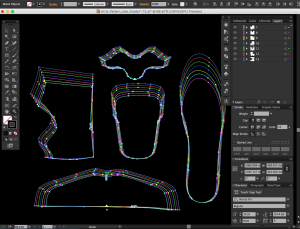 Once the pattern is graded, the pattern master will check it by hand. The pattern master then instructs the sample room to make the trial patterns. The trial patterns are checked for visual proportions and outsole fitting. Once the patterns are approved, the cutting dies will be made.


 If you have some woodworking skills, patience, and access to equipment, you can carve a custom last from wood. The wood-carved last is the most traditional way to make a shoe last. Starting with a block of wood that is free of any knots or split grain, draw the side profile and bottom shape.
 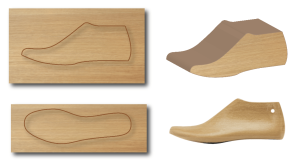 Then, using a band saw or hand tools, cut the general shape of the footwear last. From this point, use chisels, sanding machines, and files to refine the shape.
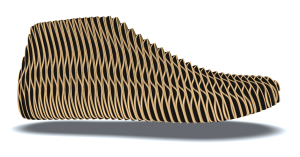 Using stacked cardboard is an easy way to make a shoe last with only a hobby knife and cardboard scraps. This will take some time, but if you have a printer it is easy.


 Build your foot casting box. Make the box fit close to your foot but make sure to leave an inch or 30mm around your foot, your helper will need this space to apply the Alginate.
 Plaster gauze is another great way to make a casting of your foot. You will need a helper for this project as it can get a bit messy. The process is simple. First, prepare your foot by shaving off the hair and then apply Vaseline petroleum jelly to stop the plaster from sticking.
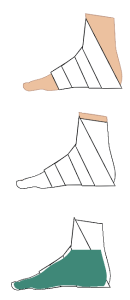 heat but it’s not dangerous. When you feel the plaster getting firm it is time to remove the casting. You will need to carefully trim down the side of the plaster casting. A small pair of scissors with tape on the point can be used.
 If you have access to a decent-sized 3D printer you can print this last full size in about 5 hours. We have a really slick MakerBot Model Z18 on hand so we tested the file. We printed the sneaker last with 0% fill, 2 shells, and scaled to 275mm long for USA men’s size 9. With 0% fill the last is fragile but perfect for filling with expandable foam, casting resin, or plaster for a more durable last.
 Today we are visiting a shoe last factory operated by a good friend of mine, Jackie Huang. The Dongguan Lian Xiang shoe last factory is located on a busy side street in the South China shoemaking town of Houjie. Jackie operates the business and meets with customers while his brother, an accomplished last master, works to shape new lasts.
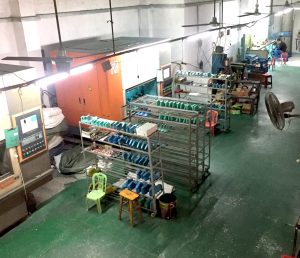
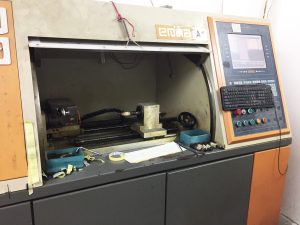
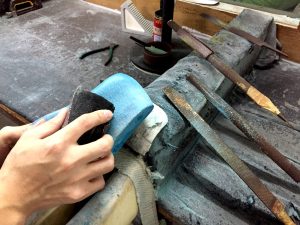 The last shaping bench:


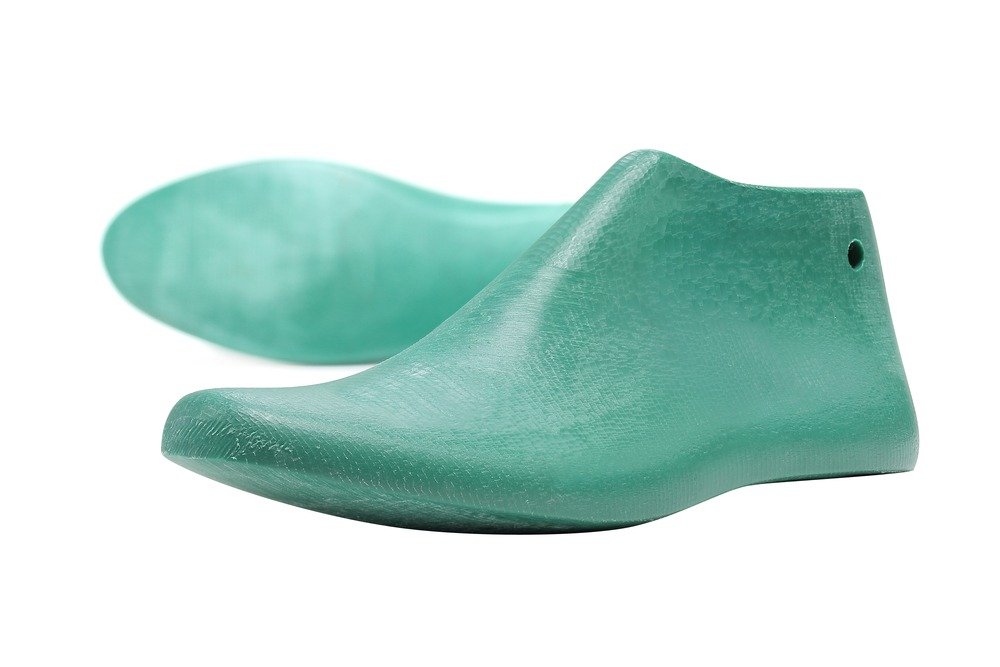
 The shoe last is the starting point for any shoe design project and is critical to the shape and function of all types of footwear. The last is used by the shoe factory to determine the shape of the shoe. The last also determines the fit, performance, ergonomics, and style of a shoe. Round toes, pointed toes, low heels, or high heels, these attributes are all determined by the shoe last. These attributes are what make different shoes suitable for running, basketball, hiking, or high fashion.
 When discussing the attributes of a last, you will need to know the common terms. The majority of measurements are volume rather than the traditional length and width associated with shoe fit.


")


