Posted on

How to Build a Sneaker 

makes shoes at home Complete Guide to How To Make Shoes

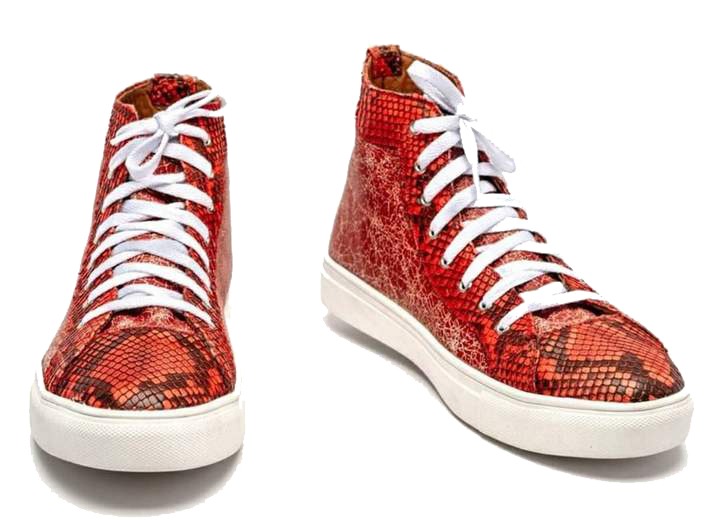
These instructions are designed for use with the Shoemakers Academy DIY Sneaker Build Kit. You can order your kit here!  


Order Your DIY Sneaker Build Kit

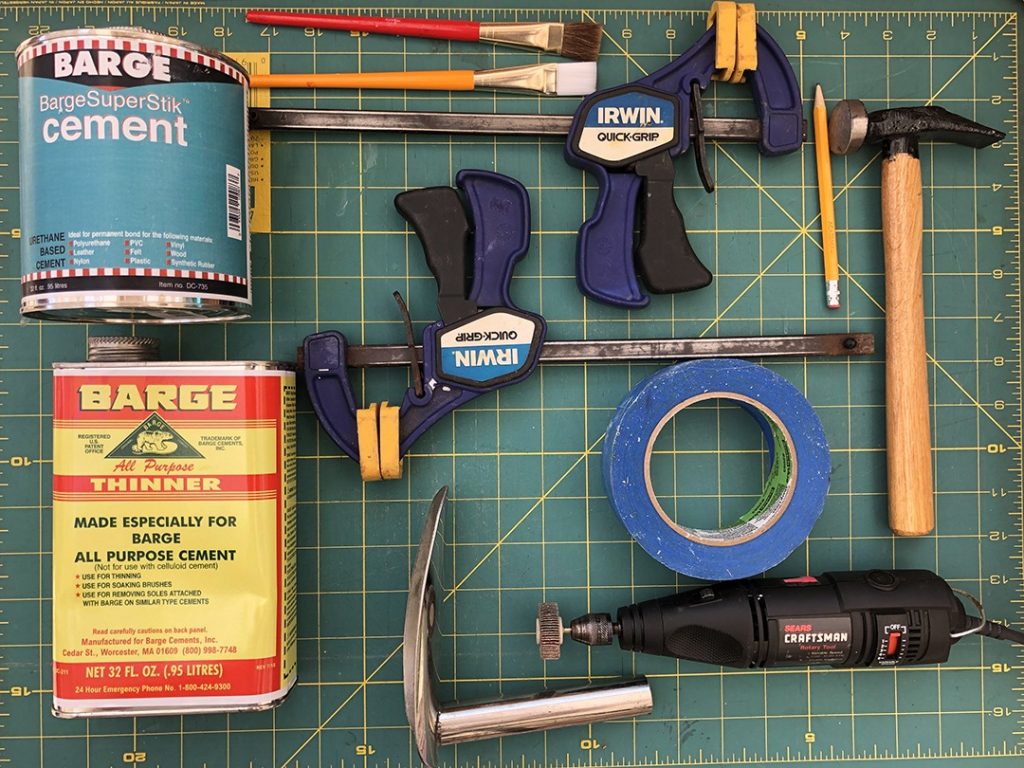
To complete the DIY Sneaker Build Kit you will need the following few items :
1. Shoe glue from Amazon 
2. A cutting & punching matt from Amazon 
3. Scissors from Amazon 

DIY Shoemaking
Make your own shoes

We put it all together for you. DIY Build Kits include your choice of material, size, color, step-by-step written instructions. Learn shoe making techniques
Check It Out!
you can do it!

Step 1: Tracing, Punching, and Cutting

Organize the paper pattern parts. Make sure you have all five: tongue, toe tip, quarter side panels (left and right), and footbed pattern. Remember, you will need two sets of parts that mirror each other to make the left and right shoes.

Lay out the pattern parts on the pre-cut leather parts. You will use the footbed pattern to cut the EVA footbed and the pink colored lasting board.

Tape the pattern parts to the leather. Trace the outlines and punch the stitching holes. You can pre-punch the paper pattern or punch directly through the paper pattern into the leather. 

BUILD TIP:
You can punch right through the pattern don’t worry, use clear tape to repair any tears.

BUILD TIP:
The EVA foam footbed part does not need punched holes; just mark and cut the outline.

Shoe making materials

BUILD TIP:
Make sure your holes are punched cleanly through the leather, as this will make your stitching much easier.

The toe tip is symmetrical, you can cut the pair with the printed side of the pattern facing up.

Where to buy shoe making tools

BUILD TIP:
Cut the toe tip part very carefully, as this will be front and center on the finished shoe.

The Tongue part is NOT symmetrical. The printed side of the pattern is the left side tongue. To create the right side part flip the tongue pattern print side down.

BUILD TIP:
Punch the 4-square holes after you have attached the tongue to the shoe.

To create the quarters and footbed for the right-side shoe, mark and cut the parts with the printed side of the pattern facing up. To make the left-side parts, flip the pattern face down

What tools you need to make shoes

BUILD TIP:
Mark your parts left and right; keeping them separated is best. Also, mark your quarters medial (inside) and lateral (outside).

Cut your parts with scissors or a razor blade.

What materials you need to make shoes

BUILD TIP:
Cut just inside the line. If you cut outside the line, your shoe will be oversized.

How to make shoes

BUILD TIP:
Leave a little extra material above the heel seam. After stitching, this extra material will allow you to trim a smooth and even top line.

Step 2: Lace Hardware

Use the 5mm punch to create eyelet holes.

Push the rivet shaft into the 5mm hole and place it on the rivet setting base with the outside face of the rivet facing down. Add the rivet back to the setting post. Set the rivet with the setting punch and hammer.

BUILD TIP:
Practice with scrap leather to find the hammering force required. Hint: It’s not too much.

Step 3: Sewing Your Upper

Use a cross stitch or overlay seam to join the back seam together. Using one thread and two needle technique, connect Part A to A.
After sewing, trim the top edge to make it smooth and round.

Join the toe tip part to the quarter panel parts. Parts B to B and C to C.
Wait to attach the tongue! You will do that later. Leave the tongue off to allow easy sole bonding and sole stitching. Your upper will look like this.

How to make shoes
how to construct shoes

BUILD TIP:
Use some scrap parts of leather and the extra thread color to practice your stitching technique.  

Step 4: Strobel Stitching

Make sure you have the right upper and right lasting board. Start with the back seam A-A in the middle of the heel. On the bottom pattern, you will see the two dots that mark the heel.
Make your Strobel stitching a little bit loose. You should have 1/8″ (2 mm) between the bottom edge of the leather upper and the edge of the lasting board. If the strobel stitching is too tight your upper will not fit the outsole easily, it will be too narrow.

Start your own shoe business

BUILD TIP:
When looking the bottom of the shoe you should see the leather along the outside of the edge lasting board. Not on top.

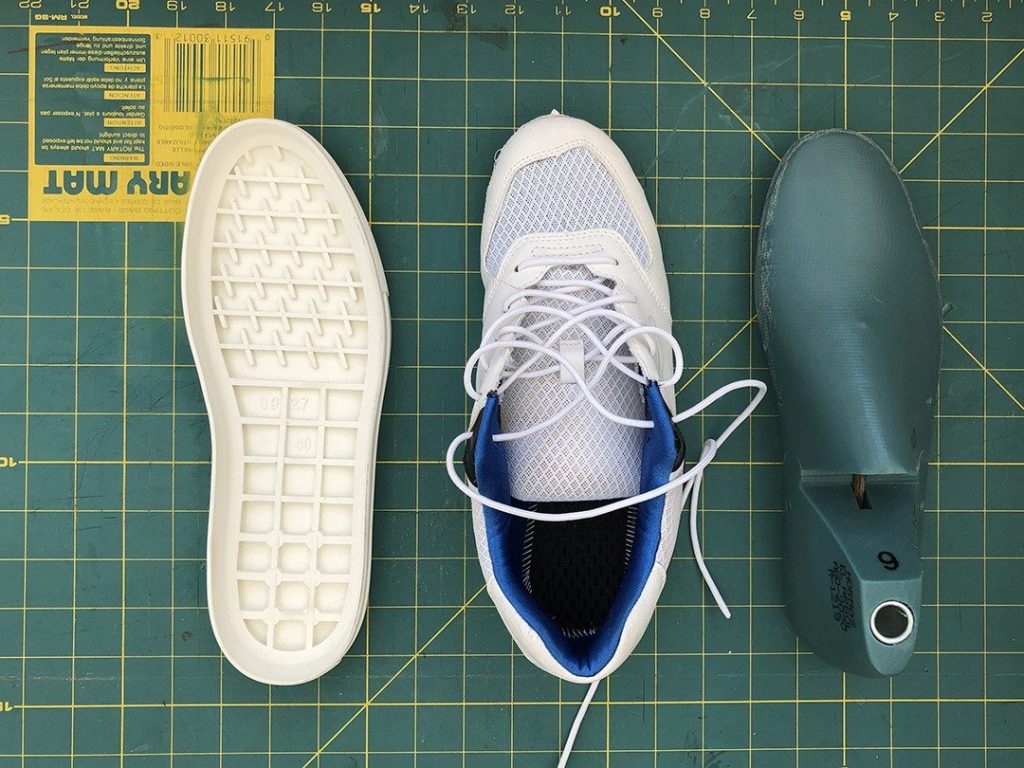
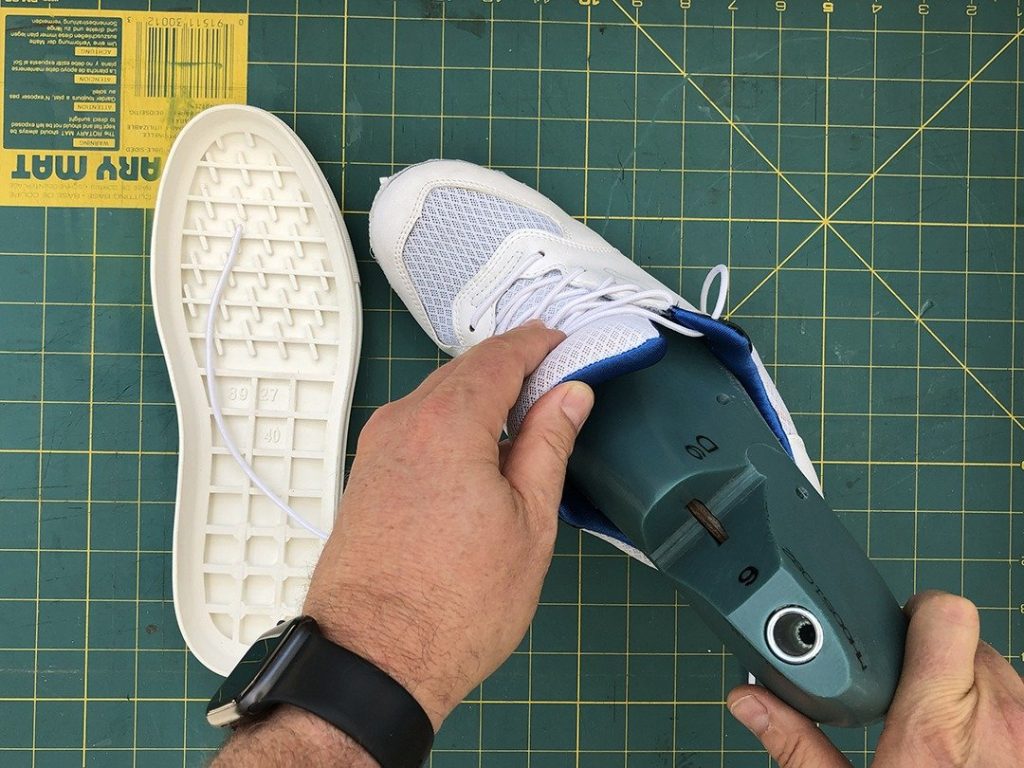
Step 5: Fitting The Sole Unit

Press the upper into the outsole, you should be able to press the leather against the side wall of the sole unit. If you can’t, you may need to release some tension and resew parts of the Strobel stitch. With your parts fitting, it’s time to glue.  It should look like this.

Use the last to make your shoe

BUILD TIP:
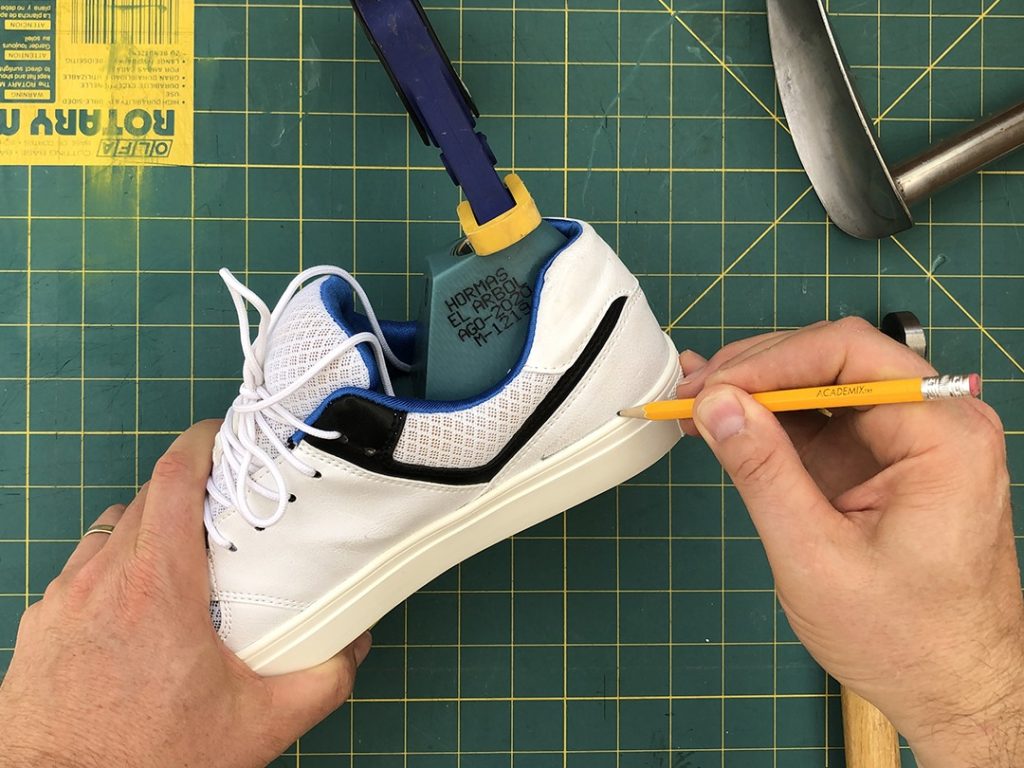
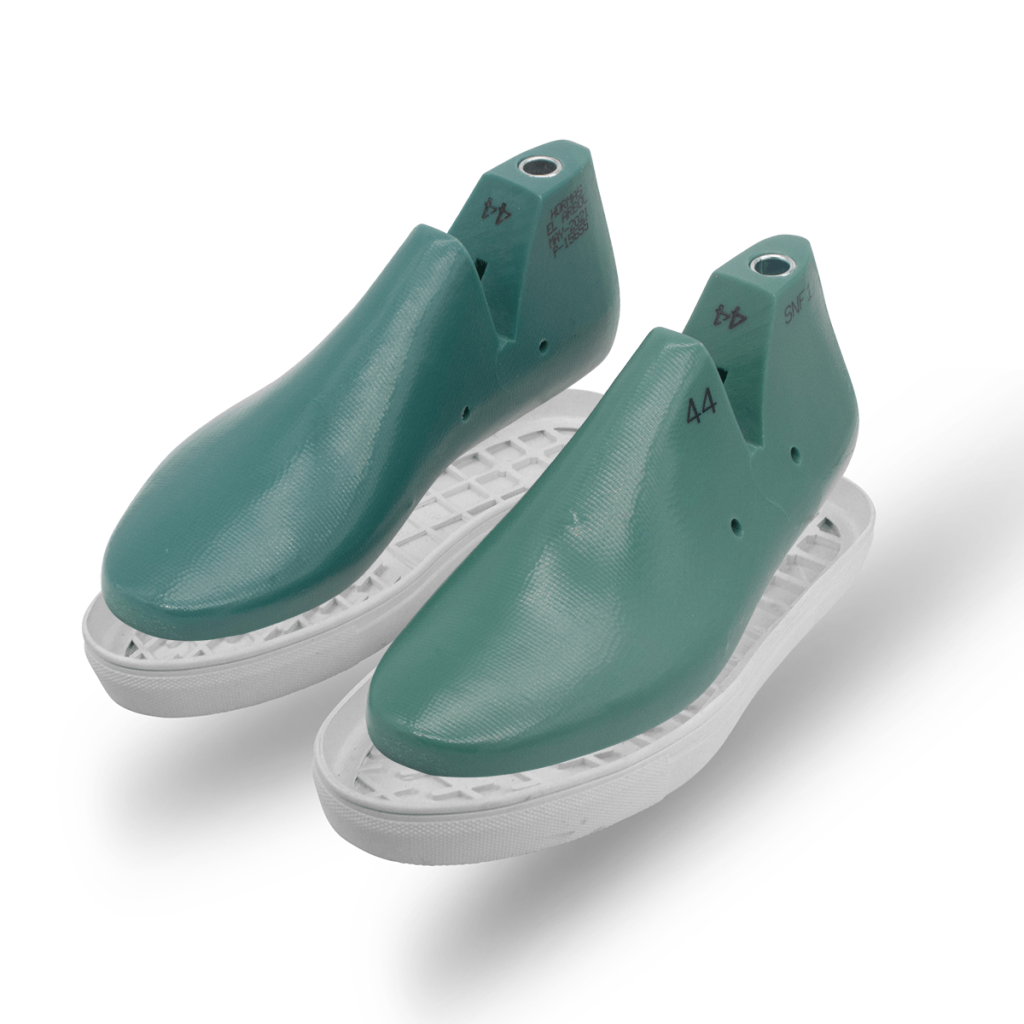
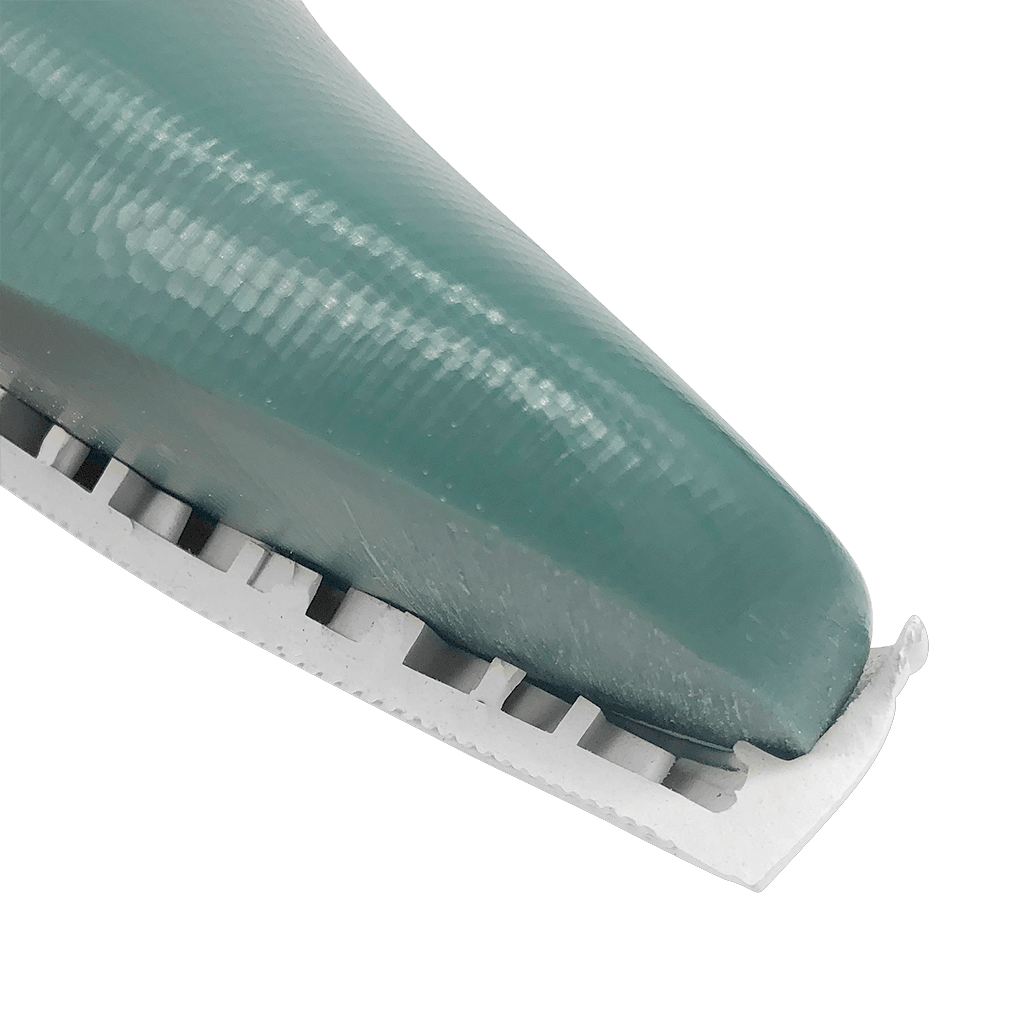
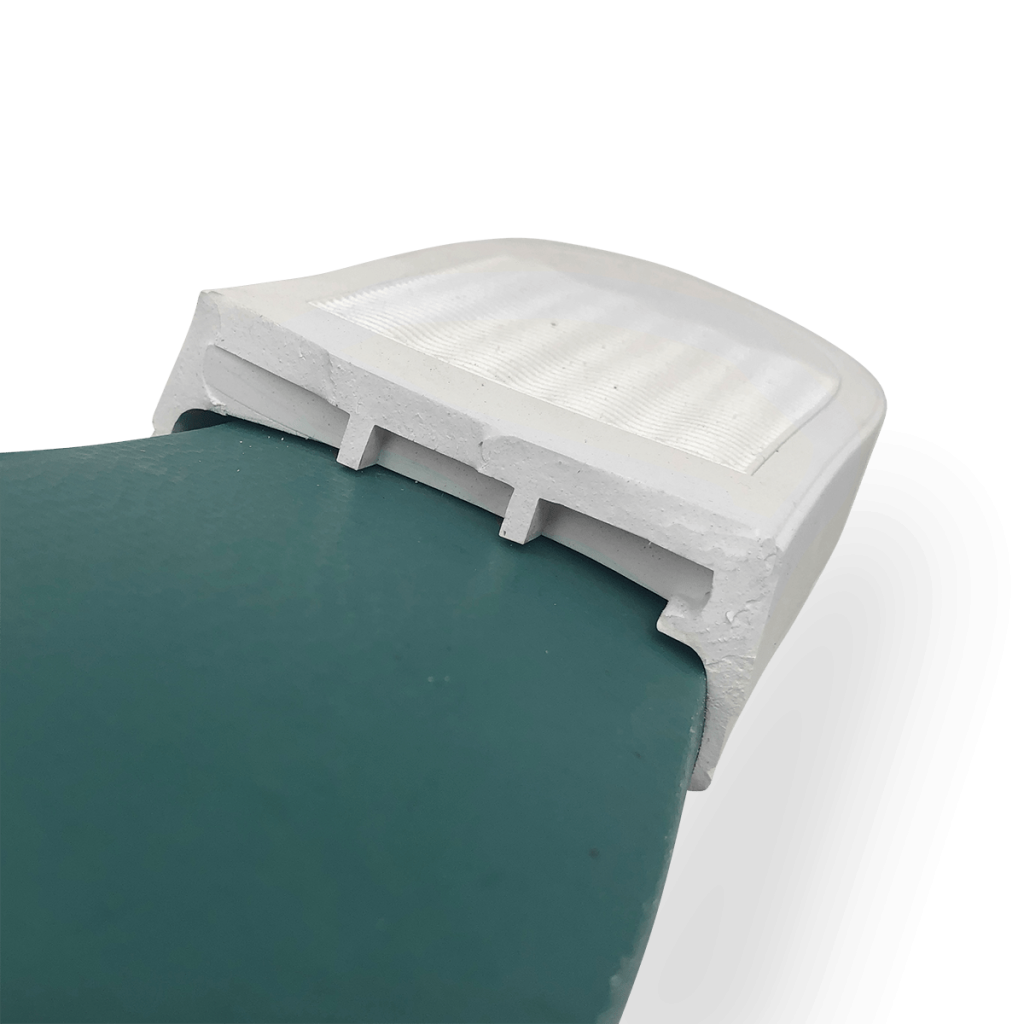
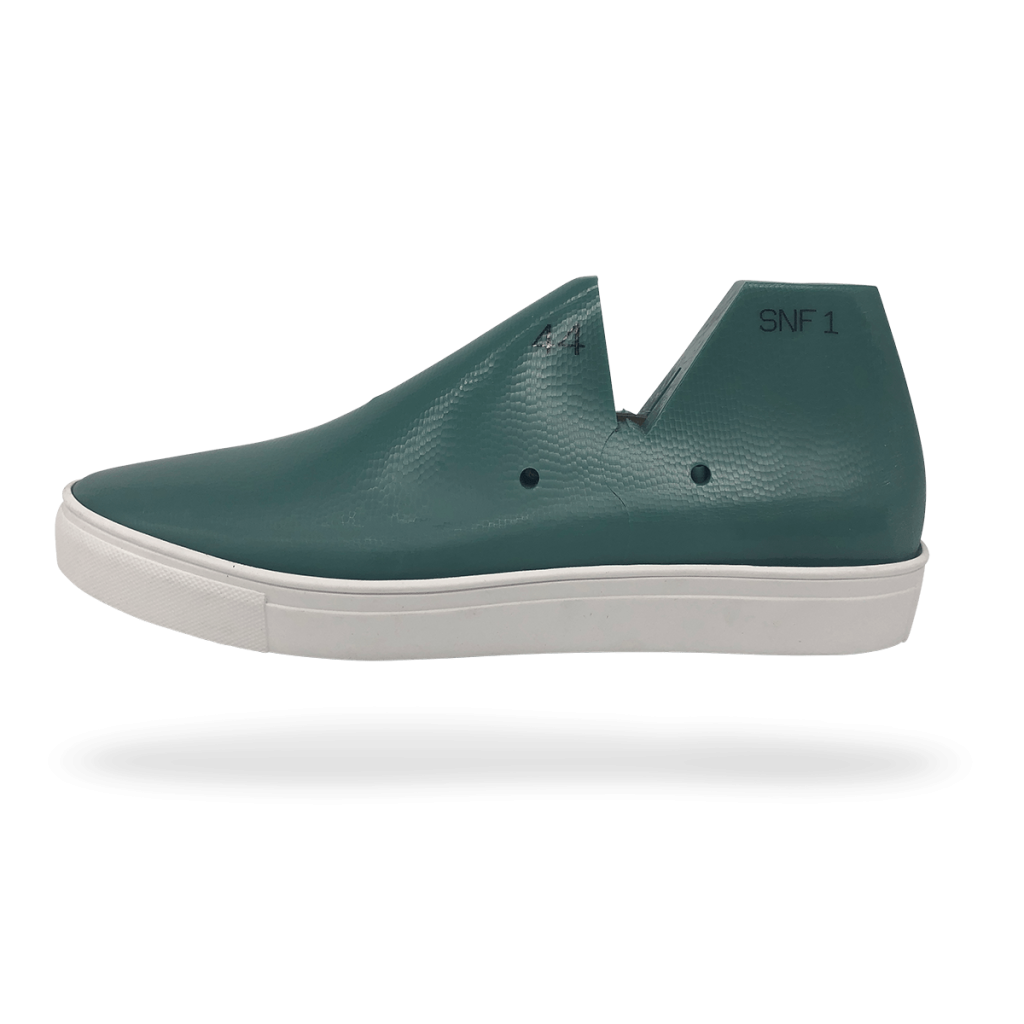
If you have the SNF-1 Last that fits your kit, now is the time to use it. Slip the last inside your upper. It will be tight; be careful not to damage the upper. 

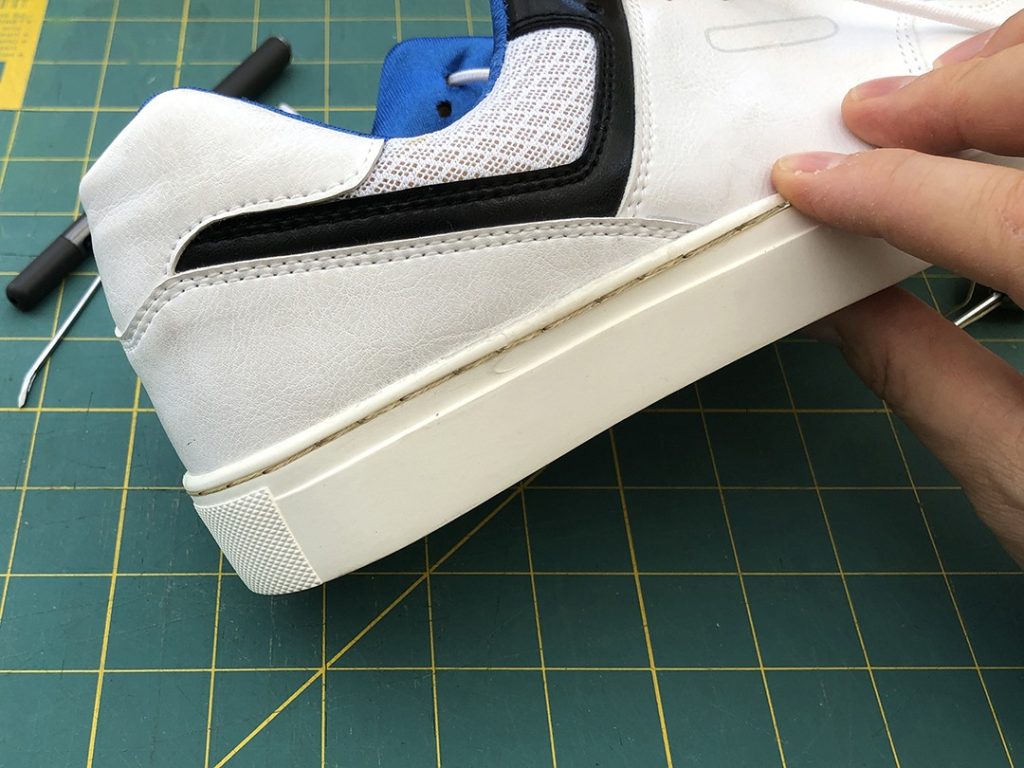
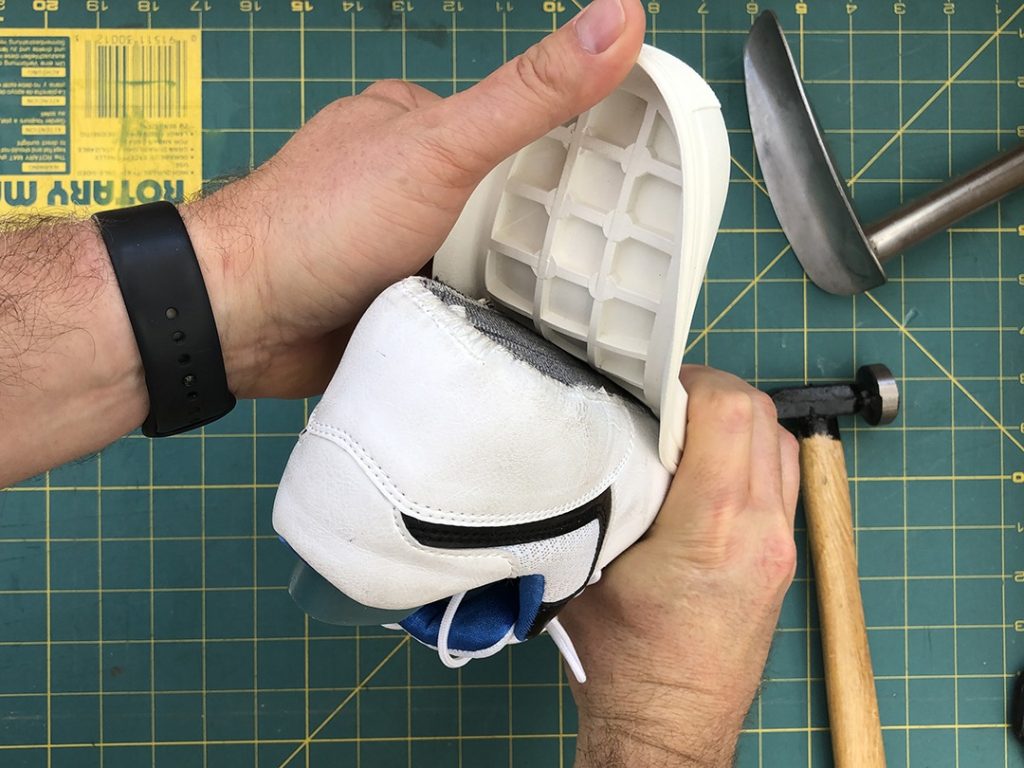
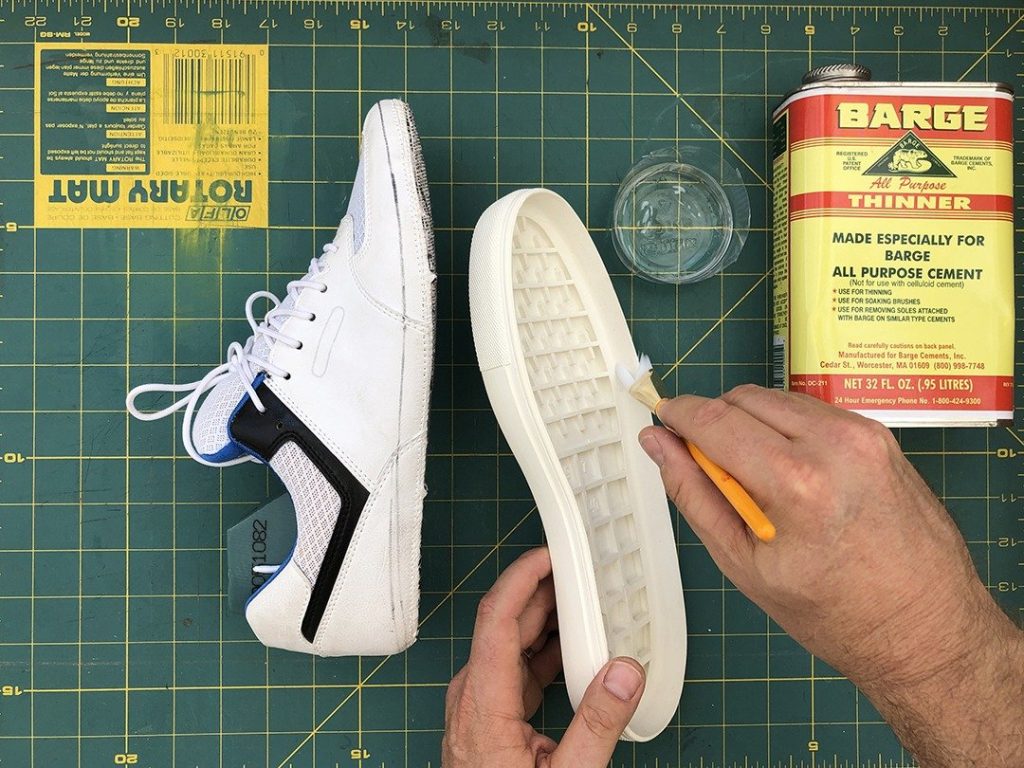
Step 6: Glueing The Outsole

Press the upper into the outsole and mark the top edge. Use a pencil or disappearing ink pen. This is your glue line. 

shoemaking courses online

Clean your outsole to ensure the parts are dust-free and dry. Apply contact cement to the upper (below the glue line) and to the inside of the outsole. Apply two light coats and make sure the bonding surface is fully covered.

Make your own custom shoes

BUILD TIP:
Take a five-minute break! Let the glue get tacky and dry to the touch. To speed up the drying, you can use a heat gun or hair dryer.

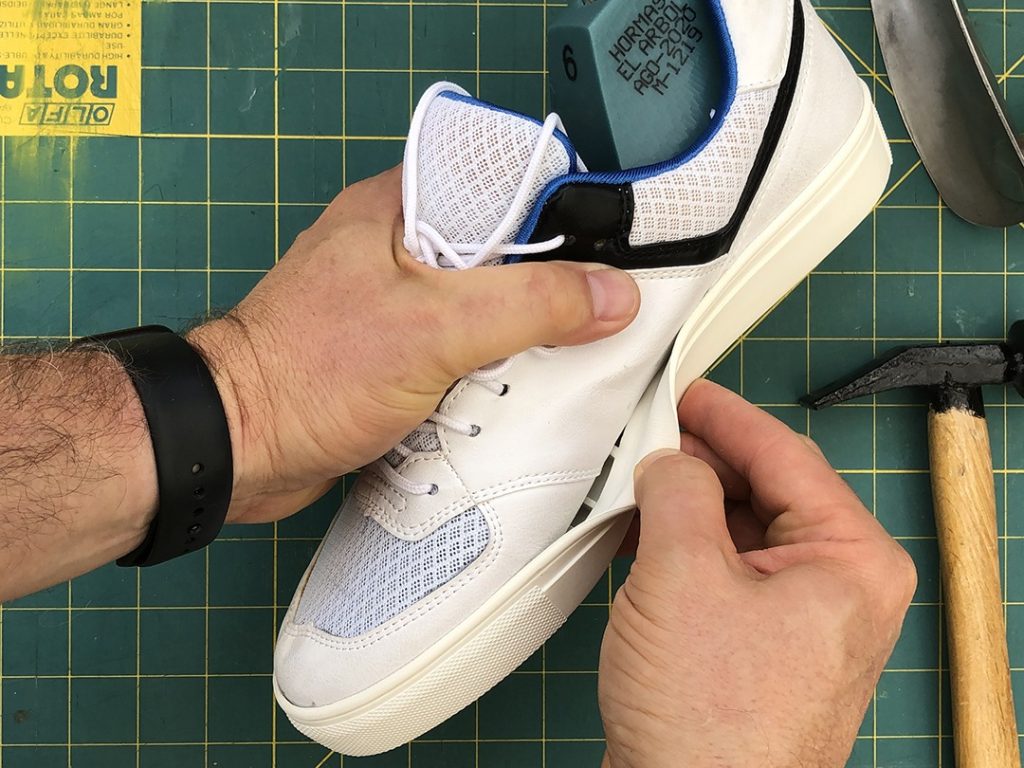
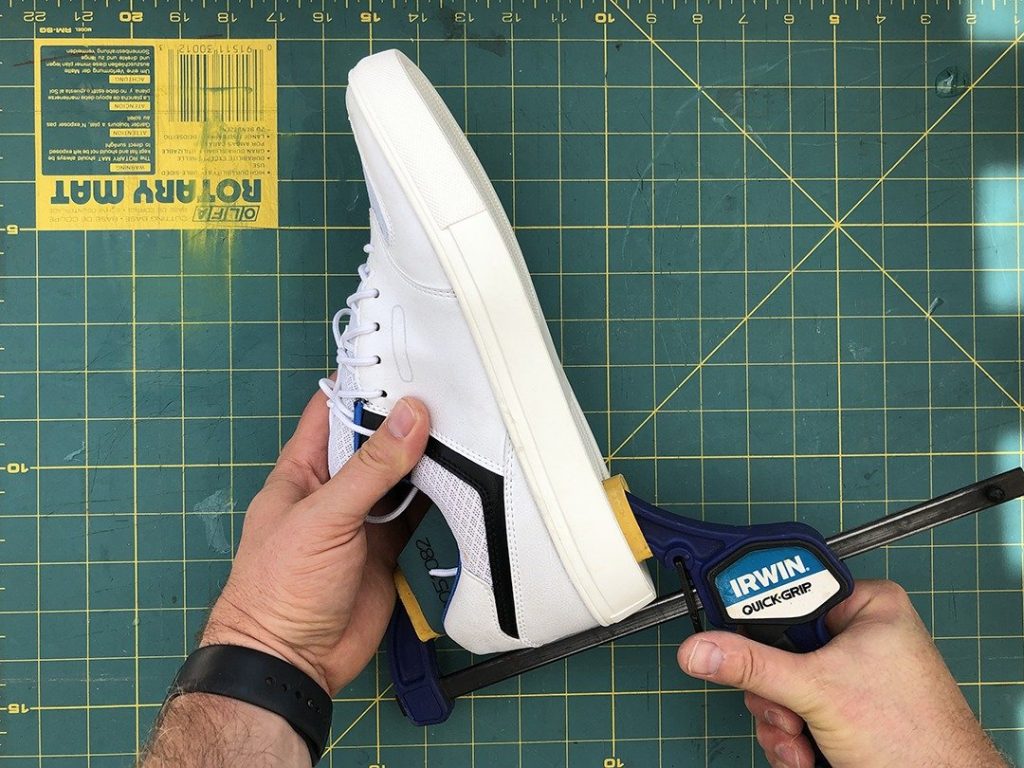
When the glue is dry, carefully press the parts together. Make sure the upper is sitting straight on the sole. Use your fingers to squeeze the parts together. You can move around the side wall. Work this for a few minutes to make sure the entire perimeter is bonded. You can also use your hammer handle to press the lasting board down into the sole.

You can use rubber bands to secure the upper to the outsole. If you have a shoe last, this a great time to insert the last and hammer the upper into place.
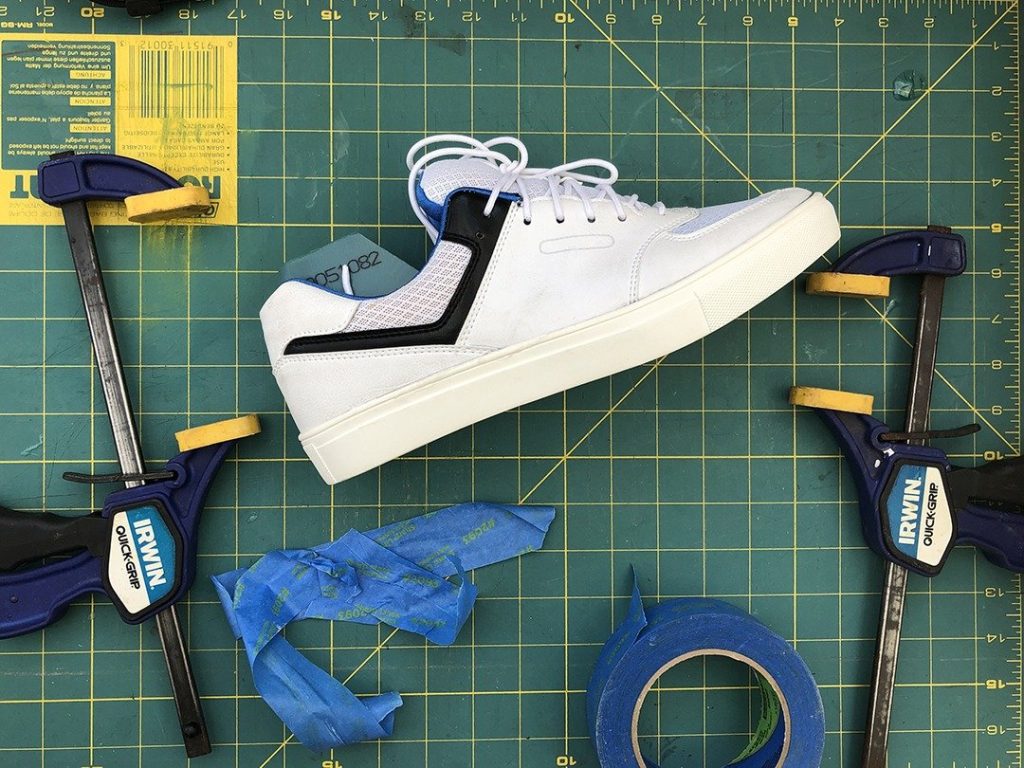
Now, set this aside for a few hours or overnight. It’s best to let the glue fully cure before stitching.

If you see some small gaps around the top edge of the edge don’t worry. You can use a needle to apply some glue into the gaps, then when you are channel stiching take extra care to pull the gap closed.

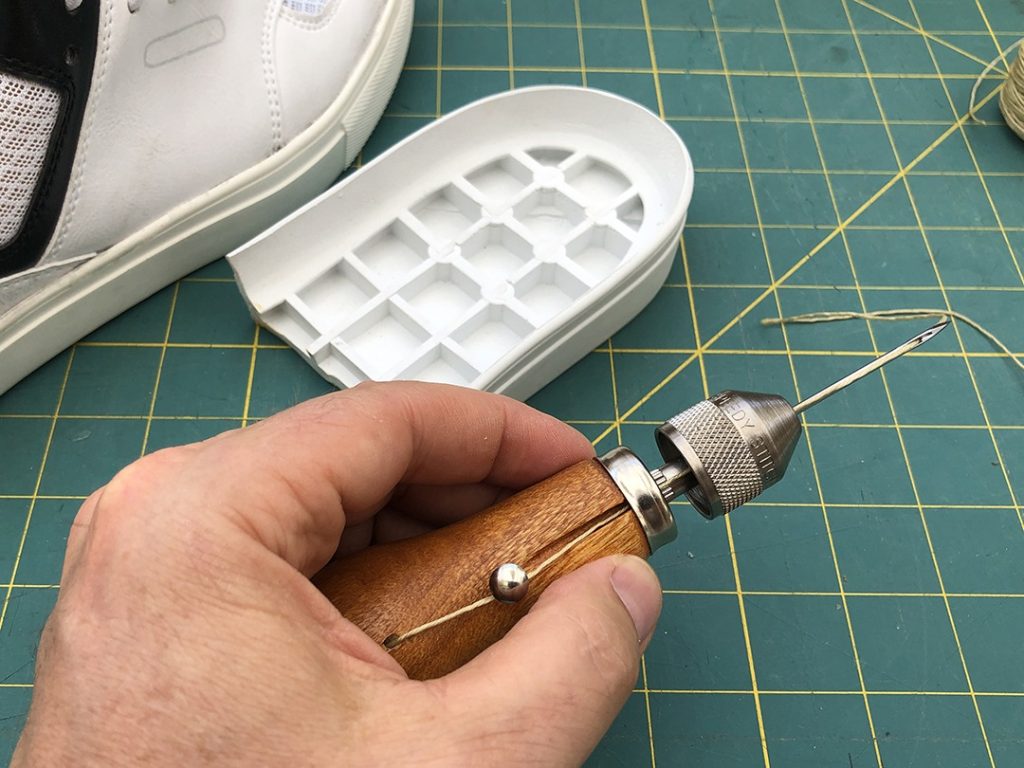
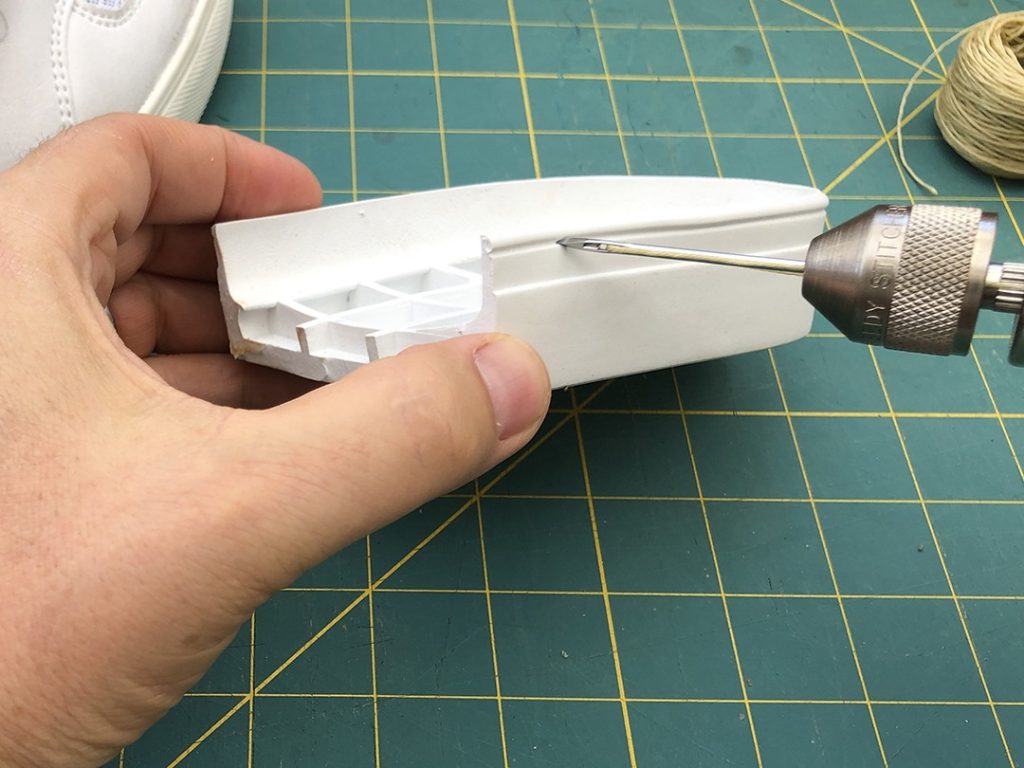
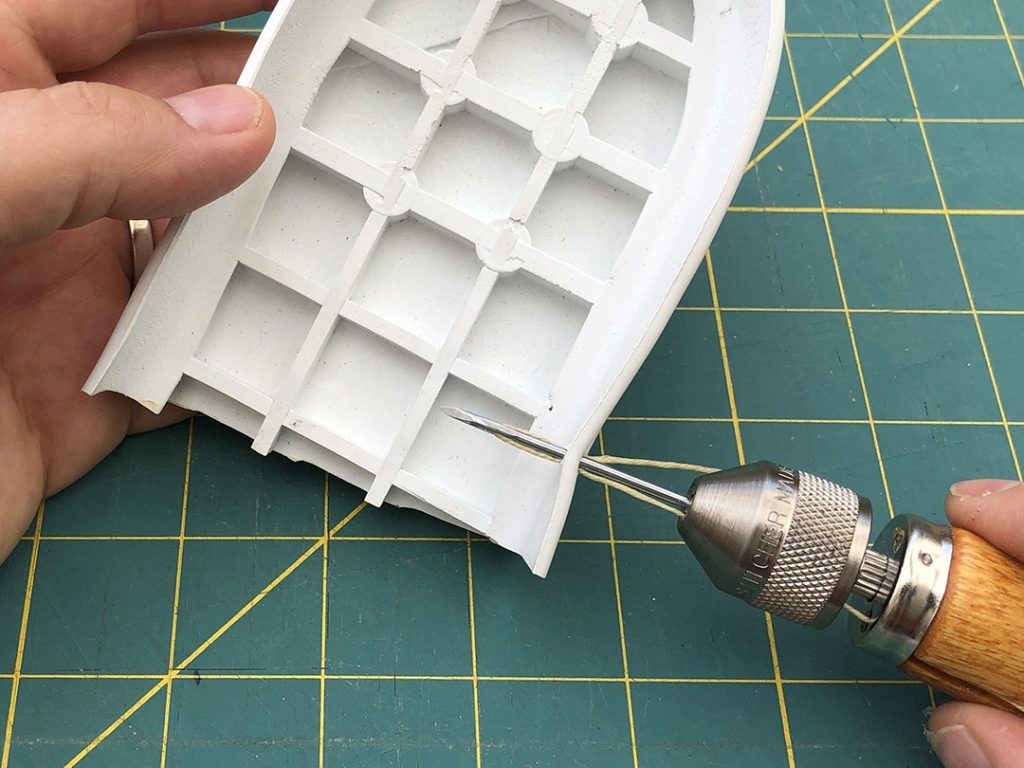
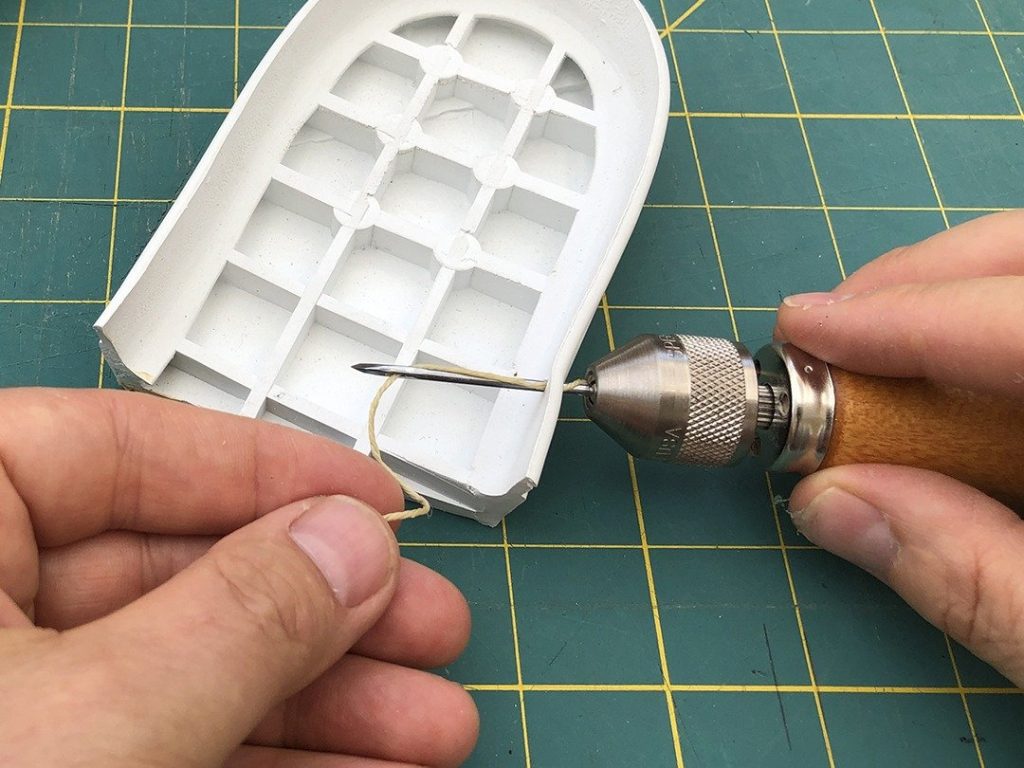
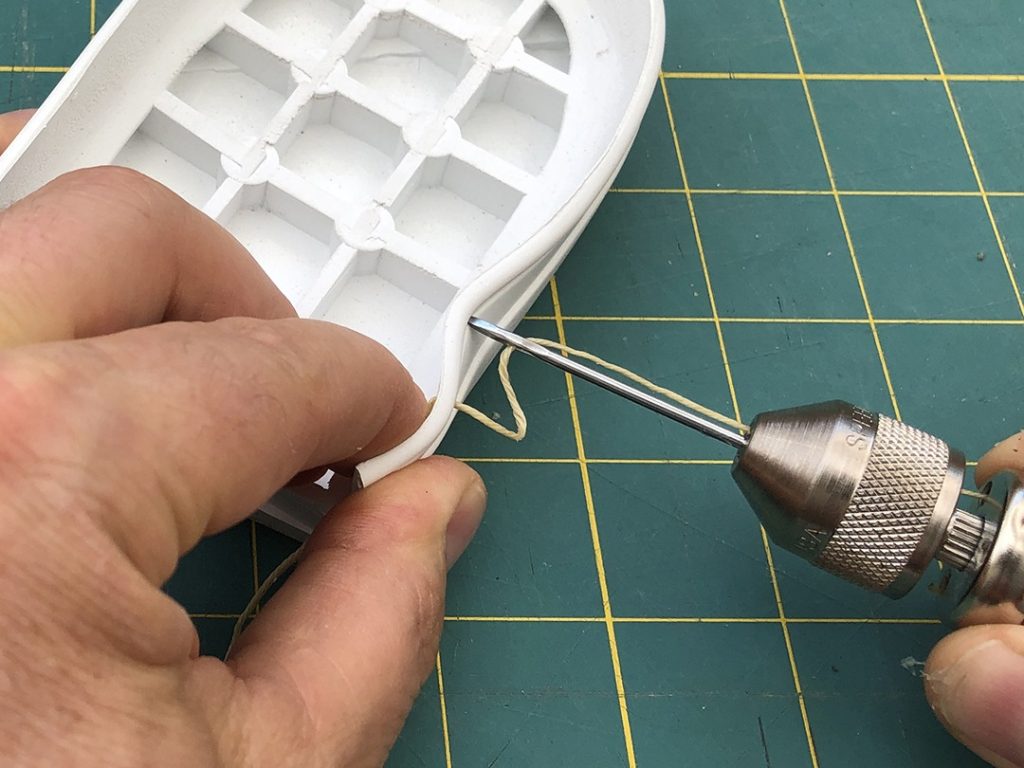
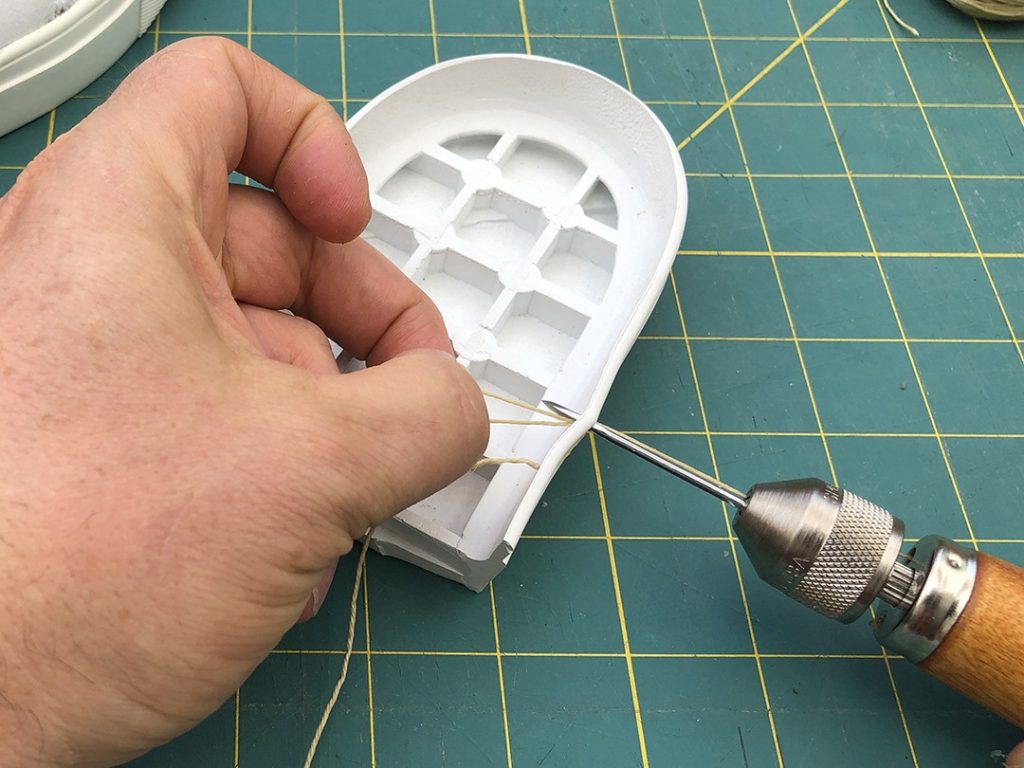
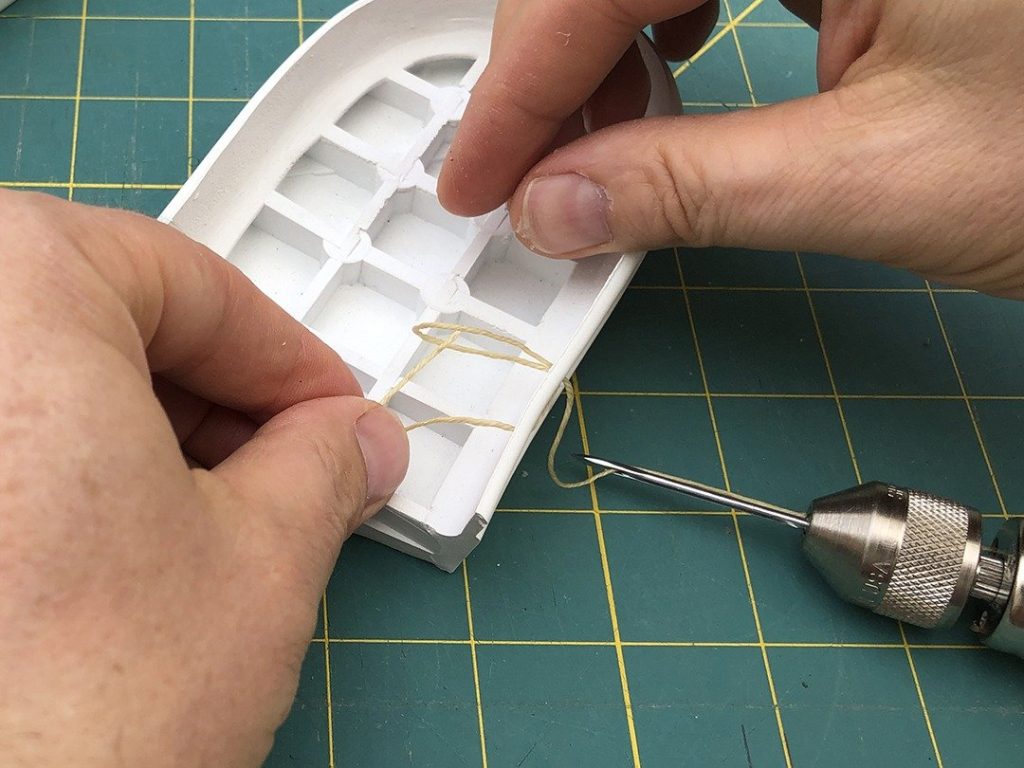
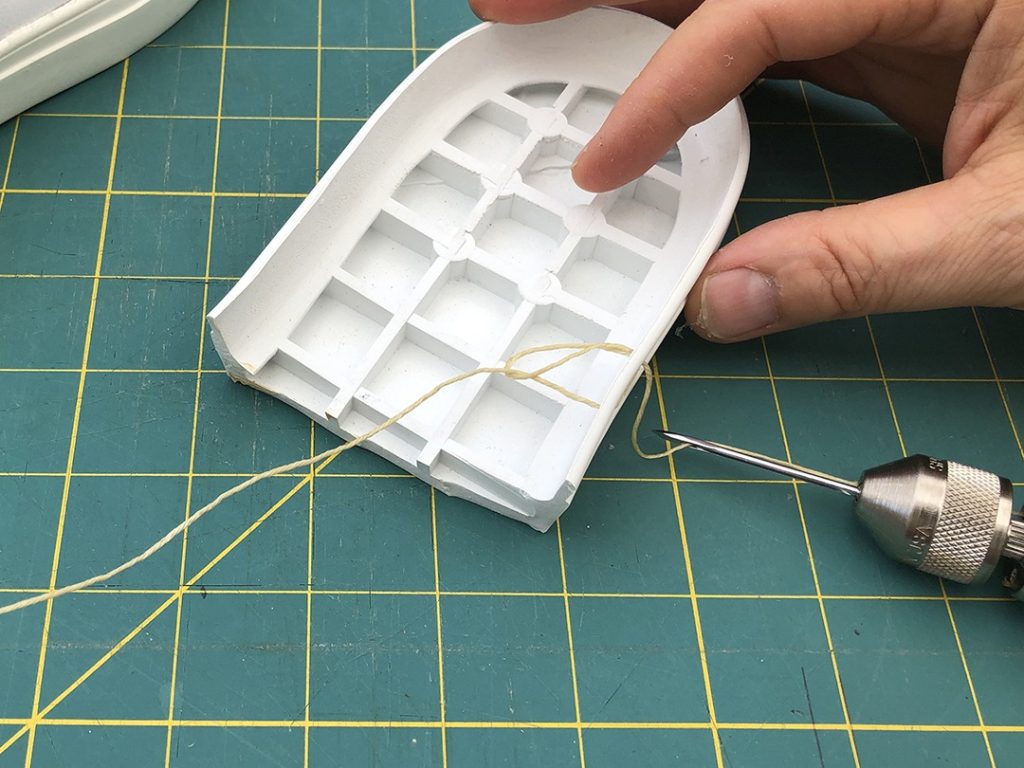
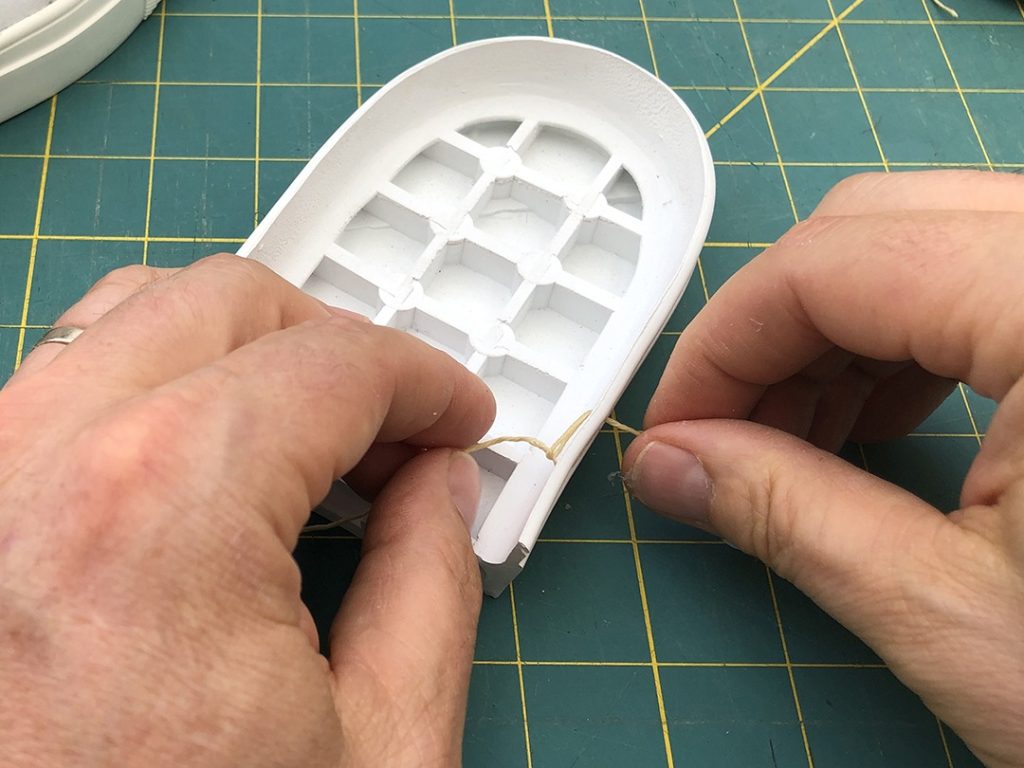
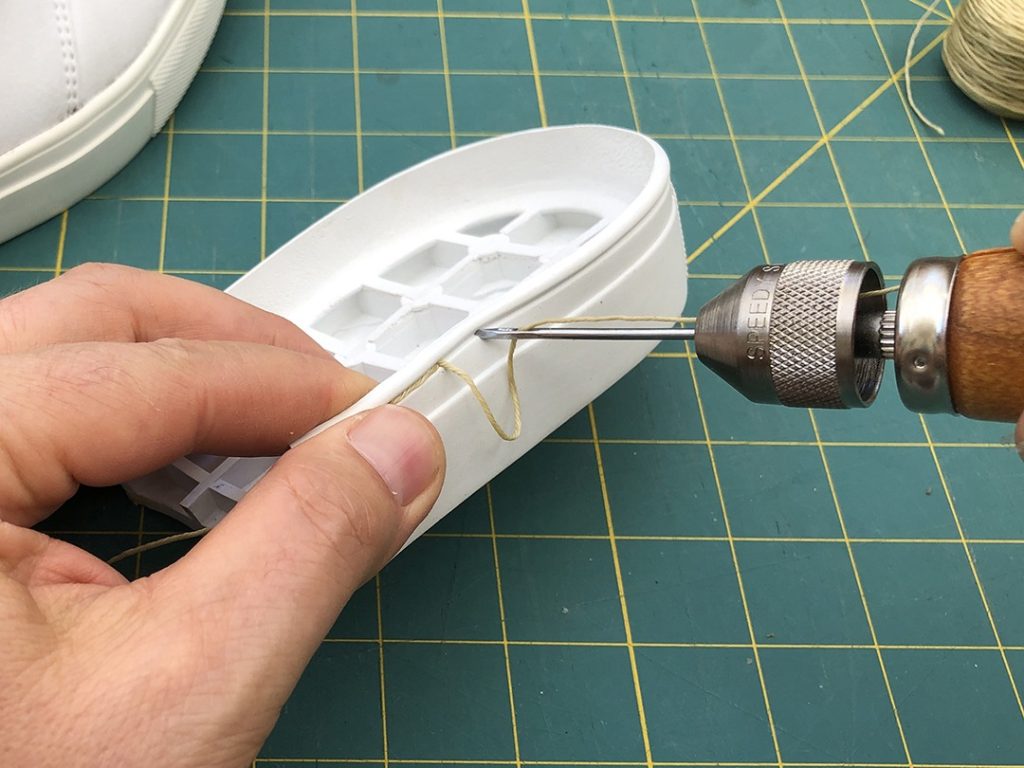
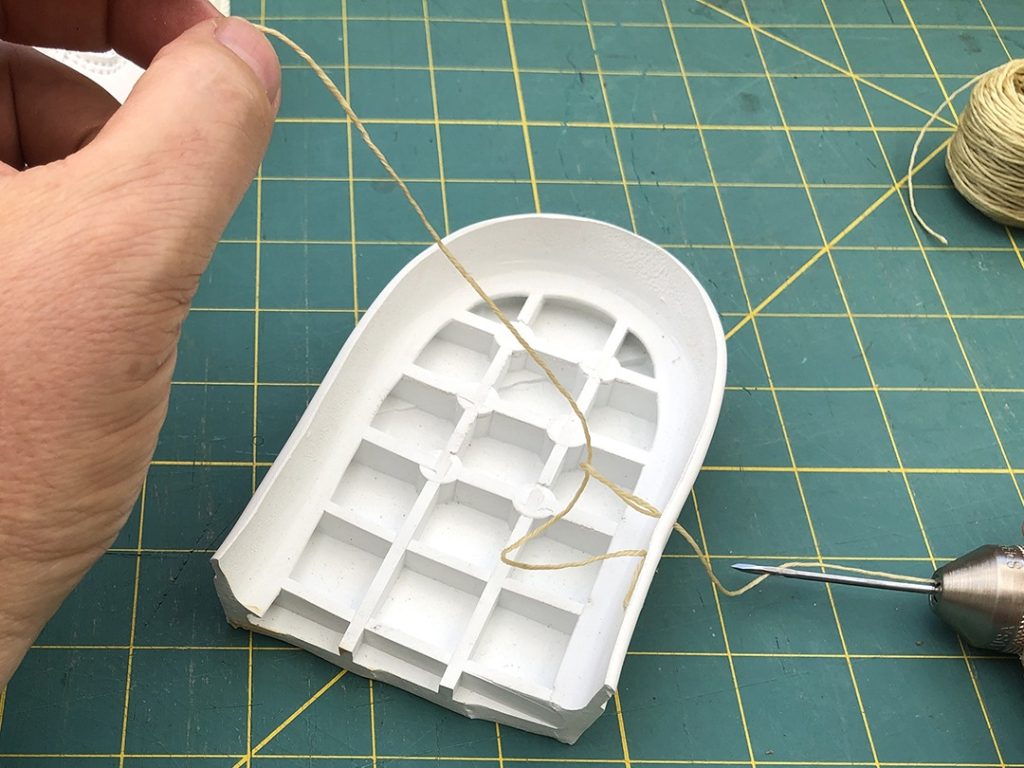
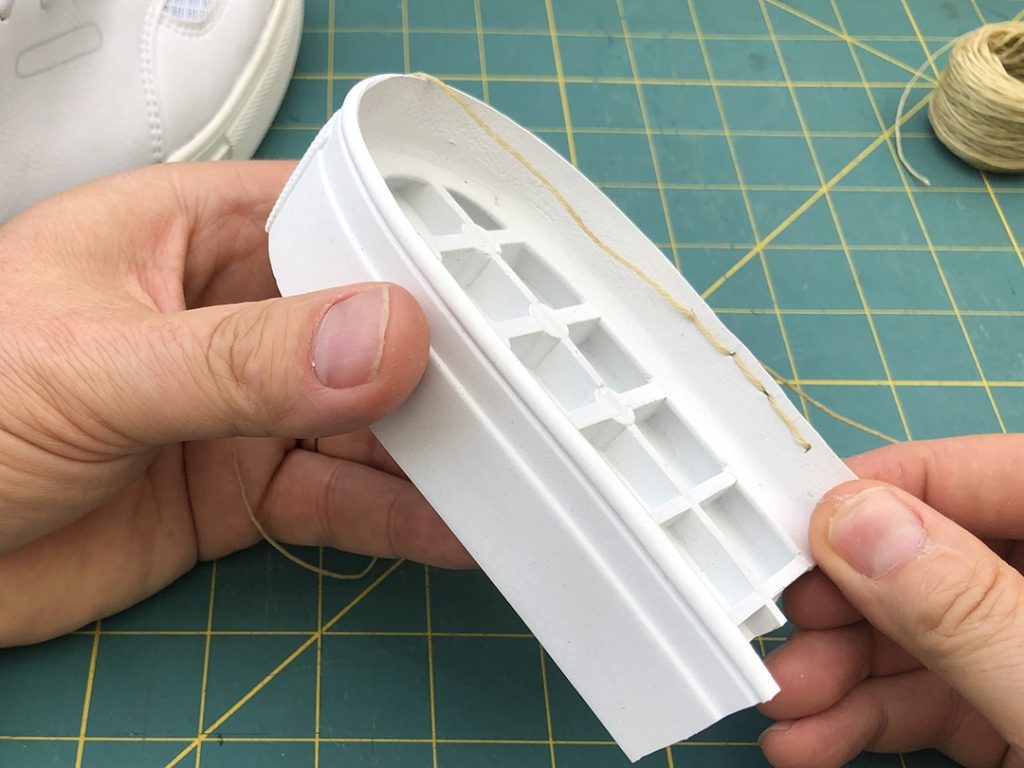
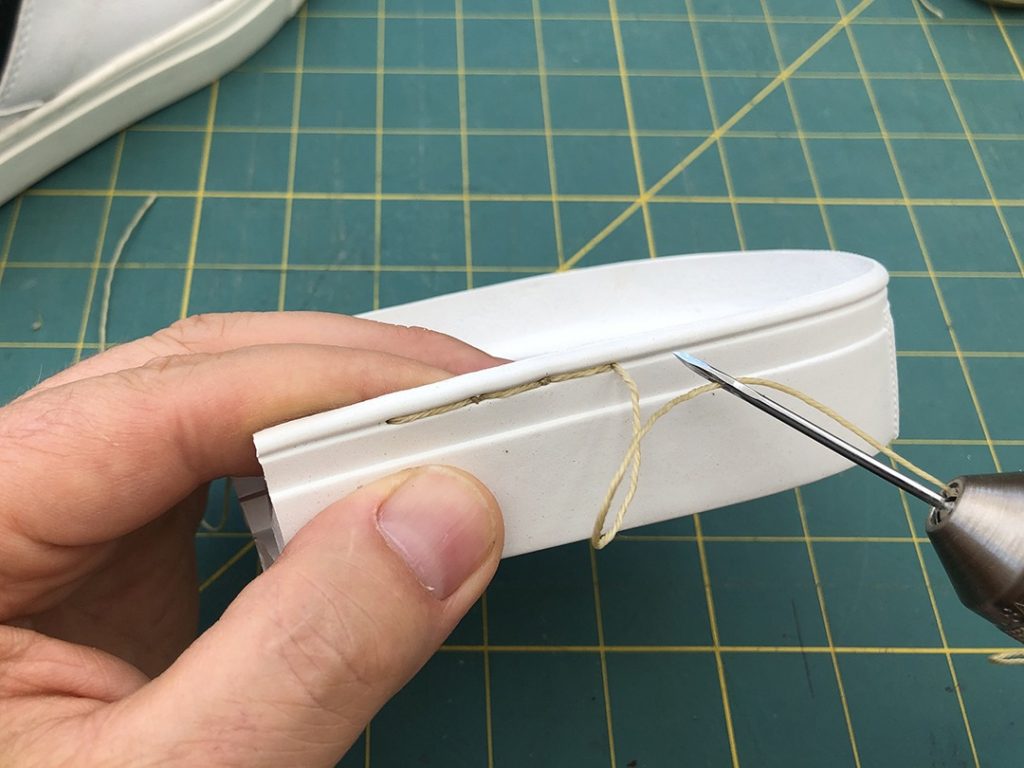
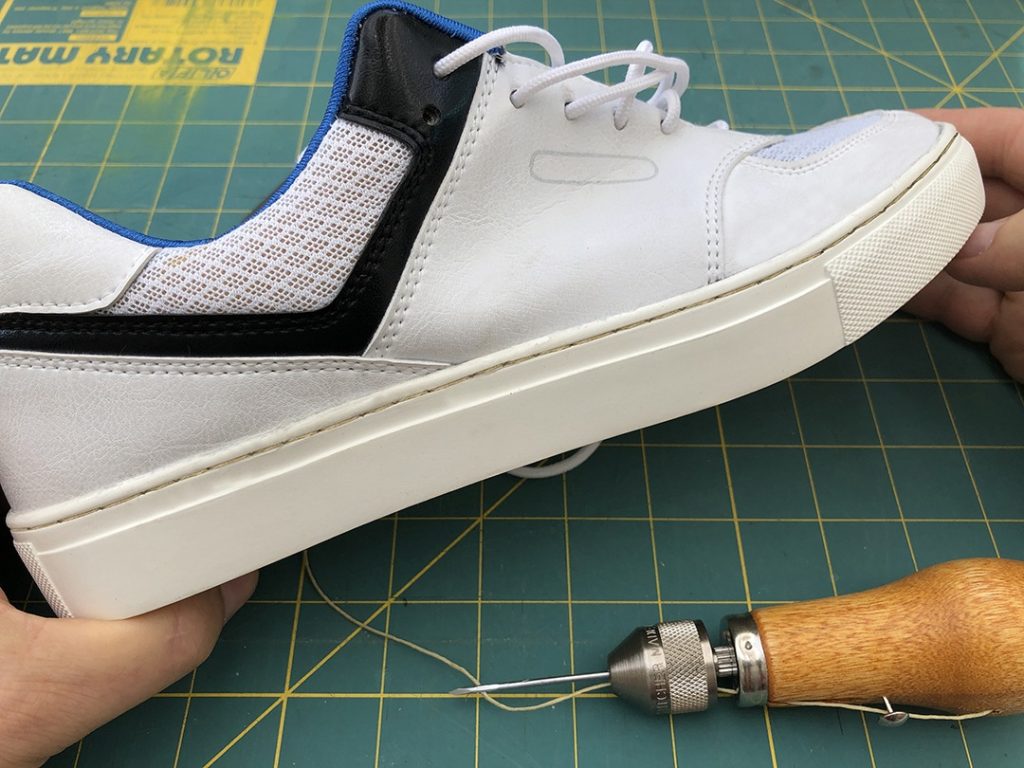
Step 7: Stitching The Outsole

Use the punch needle or sewing awl to attach the outsole.
Starting on the medial arch, insert the needle and feed the thread into the shoe. You will need a length of thread equal to 4 loops around the shoe sole. For your first stitch punch the needle into the groove and pull the thread inside your equal to one loop around. To complete your first stitch Punch the needle into the stitching groove. Slowly withdraw, leaving a small loop inside the shoe.

Feed the inner thread into the loop and pull both the inside and outside threads to secure the stitch. On the last stitch, pull the outside thread into the shoe and secure it with a knot.

Shoe making tools

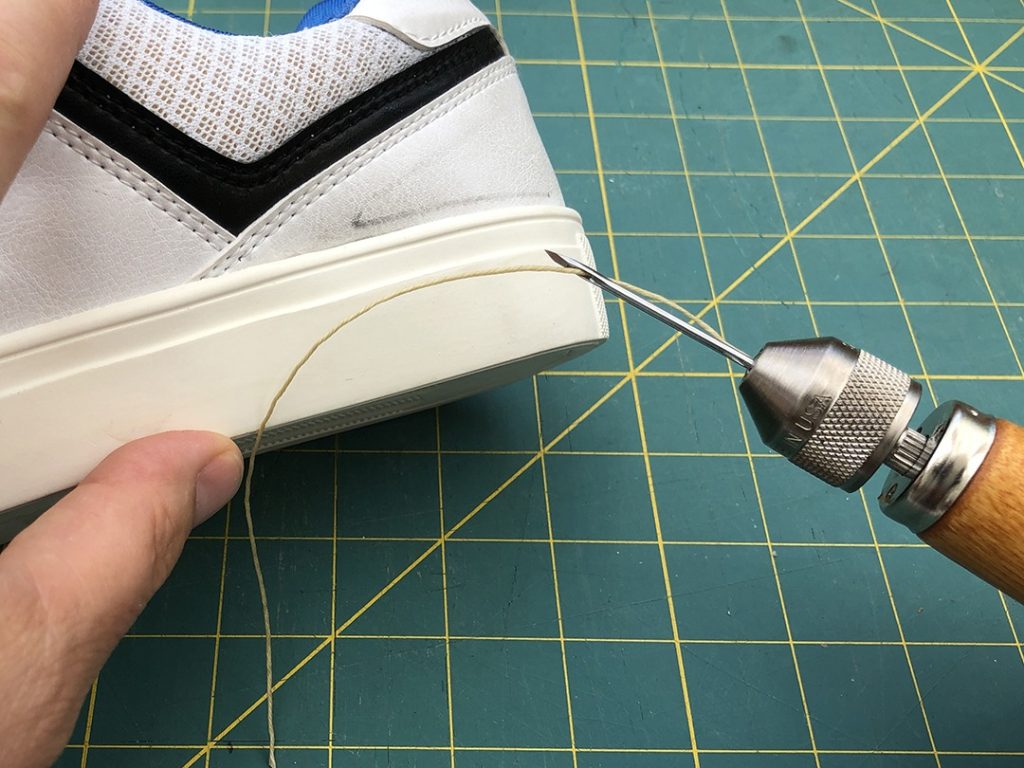
Step 8: Stitching The Vamp

Using the one thread and two needle technique, start on the first hole of the vamp and the top hole of the toe-tip connection.
D-D.

How to use shoe making tools

BUILD TIP:
Make sure to start at the very first hole at the end of the toe tip part.
This hole is the top of the connection stitch line. Yes it will have a stich already. No Problem!

Work your way around the vamp, trying to keep the tension even to avoid wrinkles on this important seam. You will be looking down on this when you wear your new shoes, so make sure it is your best work!

Shoe making techniques

BUILD TIP:
When you reach the end, secure the thread with a knot. You can hide the knot in between the layers.  

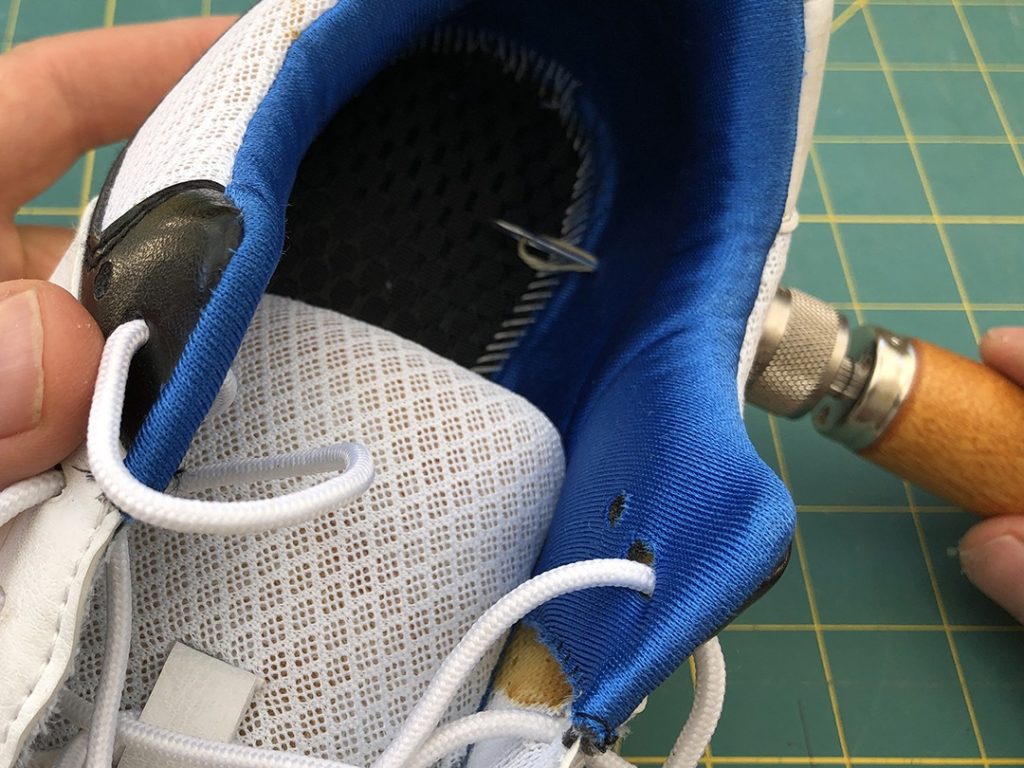
Your final sewing operation will be the cross or square stitching to secure the quarter to the tongue. Use the 4 holes on the quarter as a guide and mark the holes on the tongue. 

You can punch these with your sewing needle or the awl. Use the double needle technique to make your stitches. When you have finished stitching, You can feed the needle between the layers and hide your final knot.

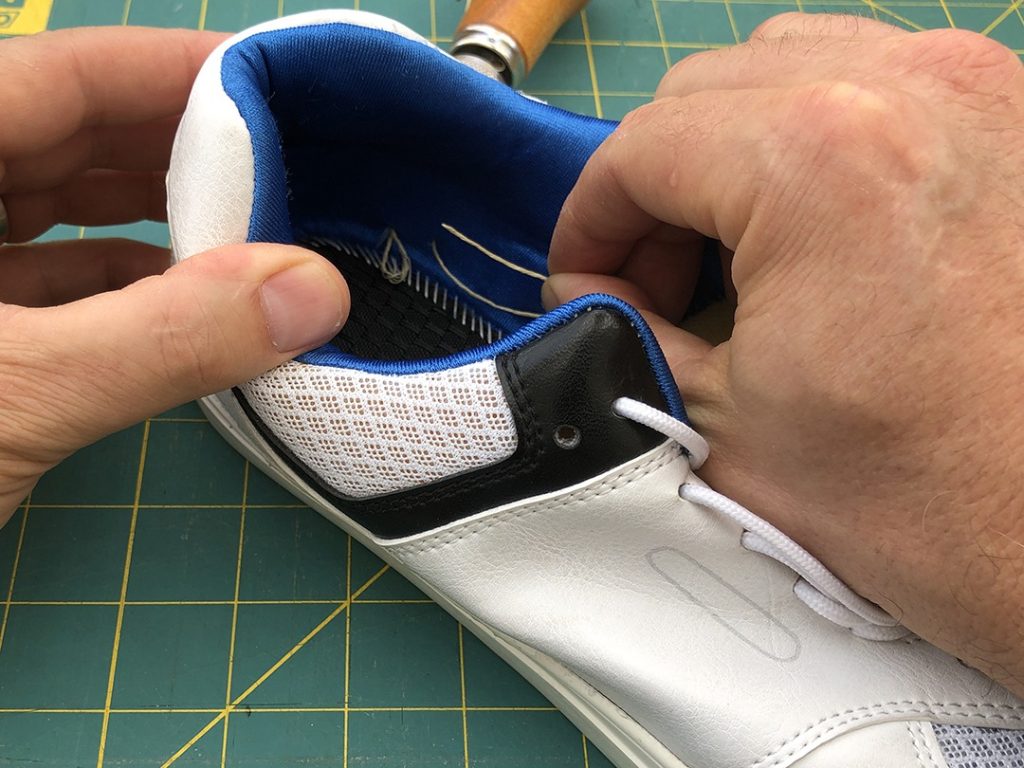
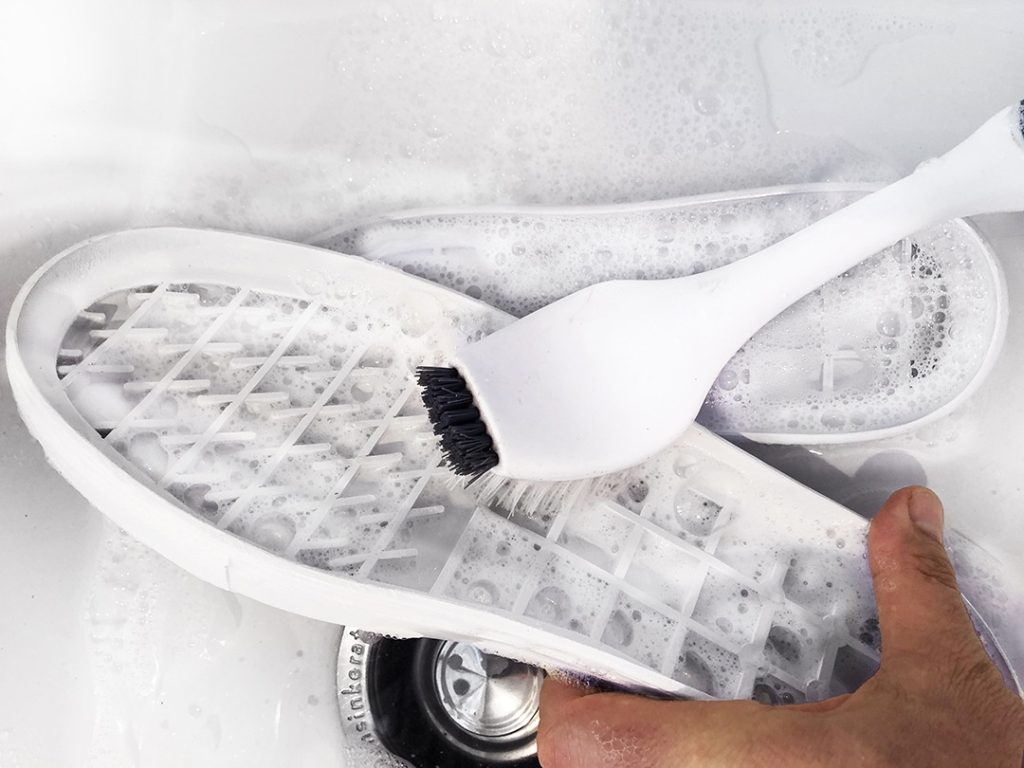
Insert the footbed and add laces. 

Congratulations! You did it!

DIY Shoemaking Kit Make Your Own Shoes Kit Shoemaking Starter Kit Handmade Shoe Kit Craft Shoe Kit beginner shoemaking kit leather shoe making kit

Don’t forget to send us a photo of what you Made! 
TheShoeDog@shoemakersacademy.com

DIY Shoemaking
Make your own shoes

We put it all together for you. DIY Build Kits include your choice of material, size, color, step-by-step written instructions. Learn shoe making techniques
Check It Out!
you can do it!

Posted on

Channel stitching a sneaker sole

For a DIY sneaker project, it’s a good idea to reinforce the cement bonding with outsole channel stitching. You can stitch the toe, heel, or the entire perimeter. In the shoe factory, the workers will use a purpose-built channel stitching machine. The skilled worker can stitch a pair of shoes in less than a minute. Unfortunately, we don’t have this special equipment in our DIY workshop so we will use the Speedy Stitcher. You can find the Speedy Stitcher on Amazon.

Using the Speedy Stitcher

The Speedy Stitcher is a heavy-duty sewing awl with a built-in supply of thread. Follow the instructions on the package to assemble the stitcher with the straight needle and the thread running from inside.

Getting started with the Speedy Stitcher

Here, you can see step-by-step stitching operations with the Speedy Stitcher. I am using a rubber sole without the upper attached for teaching purposes.

First, push the threaded need into the groove. Next, with the needle inside the shoe, pull the loose end of the thread through the hole. While holding the loose end of the thread inside the shoe, withdraw the needle. You will need the loose end to hold the stitches inside the shoe, so pull enough thread into the shoe to wrap the entire perimeter of the sole. This will be 80 cm to sew a size 11 or 44 shoe! This thread will be your bobbin thread as you sew.

You will use the entire length as you work around the inside perimeter of the shoe. Don’t worry if you run short, you can knot off the end and start a new thread line.

To complete your first stitch, push the needle back into the sole 10mm beyond your first hole. With the needle inside, pull the thread away from the needle, making a loop. While holding the loop in place inside the shoe, withdraw the needle. Next, feed the inside bobbin thread through the loop. You can add a hooked needle to the inner thread to make this operation easier. Now, tension the outside thread and the inside thread to secure the stitch. You have made your first stitch!

When you are working inside the toe of your shoe, pull the inner loop 2 or 3 inches long so you can see the loop and easily feed in the bobbin thread.

Here is the step-by-step sole stitching process

Stitching your shoe sole

Your first stitch may take a few minutes to get right. Be patient. With a little practice, you will move faster. Hand stitching your outsole may take you an hour or more. Relax, play some music. You will build muscle memory and a rhythm. Inside the toe of the shoe can be a challenge; make sure you have a well-lit workspace, and it’s okay to pull the inner loop out long enough so you can see when to feed the bobbin thread.

When you get to the end, knot the threads together and trim them off. Now, run your hand along the inside to check for any loose threads or rough spots. Jobe done!

Shoemaking Material
DIY Super Kit

All the hard find parts for your DIY shoemaking project are here in one place. Lasts, soles, materials, tools and pattern making text book included. Your shoe size is in stock. Learn more On sale $200
Posted on

Outsole Cementing Process

DIY Outsole assembly

DIY outsole cementing: step-by-step process

Today in the workshop, we are finishing the assembly of our sneaker test pattern. Here, we will cover the step-by-step process of preparing the outsole units and uppers for cold cementing and sole stitching. We don’t have a shoe factory with presses and heat tunnels so we are going to adapt the cold cement process for the home workshop and DIY shoemaker.

Sneaker sole cementing tools

Before we cement together our sneaker, we will need to collect some tools. For this process, we are going to use as many common household tools as possible.

Sneaker sole cementing tools

Sneaker Sole Cementing Tools
  1. Cement (I like Barge)
  2. Cement thinner (Make sure you have the correct thinner for your cement!)
  3. Brushes
  4. Shoehorn (if you are making a Strobel shoe)
  5. Sandpaper or rotary buffing tool
  6. Pencil
  7. Flat-faced hammer
  8. Clamps
  9. Non-staining tape

Sneaker parts

You need your upper, your last, and your outsole unit. If your upper has laces, make sure you have threaded the shoelaces or have some temporary laces installed.

Washing your sneaker outsoles

Washing your sneaker outsoles Yes! You should wash your outsole parts.

Yes! You should wash your outsole parts. During the manufacturing process, the production mold is sprayed with a lubricant. The lubricant spray helps the rubber flow in the mold and allows the hot metal and rubber to be separated once the molding is complete. Before you can bond your parts, give them a hot soapy bath.

Lasting your uppers

Lasting your upper

If you are building a board-lasted shoe, you may already have your uppers lasted and ready. In this case, I will show you how to prepare a Strobel upper. Carefully slip or force the last into the upper. If the upper is very tight, you may use a damp towel and a little heat to soften the upper. I have a proper industrial shoehorn to help. Work slowly so that you stretch the upper without damaging the material or stressing the seams. Make sure the shoelaces are loose. If you have a hinged last you can “break” the last to get it inserted, then carefully close the last to tighten the upper.

 
Lasting your upper

With the last completely inside, tension the laces bottom to top. Pull tight! Now, check the upper fitting to make sure you don’t have any loose spots. You can use a hammer to seat the heel and toe down to the last. You may need to tighten the laces again afterward. Make a final check that the pattern is straight and not crooked or rotated on the last. If you steamed the upper or used a damp towel, now is a good time to dry the upper with a hairdryer. Let the upper cool off and dry out; this will help pull the upper tight to the last. Now, recheck your shoelace tension.

Lasting your upper

Shoemaking Material Kit

All the hard to find parts for your DIY shoemaking projects are here in one place. Lasting board, Strobel material, lining mesh, collar foam and all the reinforcing parts you need to make shoes. Buy Now On sale $39.99

Test fitting the upper to the outsole unit

With the upper tight to the last, it’s time to double-check the fit of the sole unit. Most rubber outsole parts have some stretch, and we are looking for a tight fit. If the rubber is loose, you will need to downsize. It’s better to stretch a small unit than try to bond an oversized part.

Check the fitting around the length, toe perimeter, across the bottom, and sidewalls.

Marking the upper

To prepare the upper, mark the bonding surface that will be in contact with the rubber sidewall. In the factory, a worker uses a press to hold the parts together. You can use a clamp, rubber bands, or a tabletop. Firmly press the sole and upper together and, using a pencil, lightly mark the edge. This is the cement line.

How to use the cement line

The cement line shows you where to rough your upper and apply shoe cement. Depending on the upper material for your shoe, you may need to rough (or buff) the bonding surface. Suede and mesh materials don’t require buffing. Smooth leather and PU leather materials will require some roughing to ensure the primer and cement penetrate the materials. Following the cement line, use sandpaper or a rotary tool to lightly buff the material’s surface. Be careful not to grind too much or damage the stitching. You must never rough above the pencil line, as this will show after the sole is attached.

Roughing the outsole

While you have your roughing tools in hand, it’s a good idea to rough the inside surface of the outsole unit. After you have roughed the upper and outsole, you must clean away any dust. Use a vacuum, high-pressure air, or dry towel to clean all the parts. You must remove any dust for the bondings surfaces.

Priming your shoe parts 

Primer is a mixture of shoe cement and cement thinner. You must test it first to make sure you have the correct thinner for your cement. The idea is to thin the cement into a liquid that can penetrate the upper materials and the surface of the rubber parts. Try a mix of 50% or even 75% thinner. 

Coat the bonding surfaces of the upper and outsole with the primer, let it dry for a few minutes, and prime again.

The shoe factory will use a different primer for the rubber and upper parts but for our DIY shoe project we can use the same primer mix for both.  

The Classic Sneaker Last is Here

Stop searching! The classic Sneaker last is in stock. Ready for your DIY shoe making projects. We have your size and outsole bottoms that fit. Buy Now On sale $79.99

Cementing

Once the primer coats on your outsole and upper are completely dry, you can apply the cement. Follow the same procedure and apply multiple light coats of cement to both the upper and the outsole. Again, be careful not to cement above your line.

Now, wait! On a hot, dry day in California, the cement will dry to the touch in just a few minutes. If you are working in a cool, damp London studio, you may need to add a little heat to dry the cement. Be patient! DO NOT put wet parts together.


A word about shoemaking contact cement

The cement we are using is not like Elmer’s glue, epoxy, Superglue, or other types of glue you may have used. We are using CONTACT cement. What does that mean?

Contact cement must be dry when the parts are brought together. The cement has already bonded to the parts and when we bring the parts together we are bonding the cement to itself “on contact.” If the cement is wet and the parts can slide against each other the bond will not be strong.

Assembly

When the parts look dry, test the surface with your fingertip. The cement should be tacky but not wet. Now, the tricky part. Starting at the heel of the shoe, bring the parts together. We are using CONTACT cement, so the goal is to press the parts together and not slide them against each other. Getting the heel lined up straight is critical to getting the sole application right.


Start by touching the heel down into the sole. To do this, bend the rubber sole backward and try to keep the side walls “open” as you apply the sole to the upper. It is a good idea to practice this assembly procedure with dry parts, so you feel how to do it. Next, work your way from the heel to the toe. Don’t press the sidewalls yet.

Before you press the sidewalls, it is a good idea to press the bottom down hard onto your work surface to ensure the upper is fully seated in the sole. If you see the sidewall is below the marked line,
carefully peel back the sidewall and push it into place once the bottom edge is seated.

Fitting and pressing the parts together

In the factory, they use a press; we can use clamps, a hammer, our thumbs, and tape to make sure the sidewall is in full contact with the upper. If you see any gaps you can peel back the upper and apply more cement. Make sure to hold the sidewall back for a few minutes to let the glue dry. Press firmly. Now relax and let the glue cure.

Removing the last from the upper

With the upper cooled and the glue cured, it’s time to remove the last. For sports shoes with open eye stays, simply loosen or remove the laces and push the last out from the bottom. For leather shoes with solid vamps, “break” the last on the hinge and remove it. Many shoemakers drill a hole and thread a cord thru the last to create a handle. Then, they use the cord to pull the last out of the shoe. For leather shoes, be very careful not to crease the shoe when removing the last.

Outsole Stitching Process

Stitching the sole
For a DIY sneaker project, it’s a good idea to reinforce the cement bonding with outsole channel stitching. You can stitch the toe, heel, or the entire perimeter to keep your sole fixed in place.
See the step-by-step channel stitching process here.

Shoemaking Material
DIY Super Kit

All the hard to find parts for your DIY shoemaking projects are here in one place. Kit includes lasts, soles, materials, tools, and pattern making textbook. Your shoe size is in stock. Buy Now On sale $200
Posted on

Sneaker Lasts for DIY Shoemakers

CLASSIC VAS STYLE SHOE LAST SHOE MAKING KIT MATCHING SNEAKER SOLE

Side view Vans sneaker last Side view hinged sneaker last
SNF-1 Hinged shoe least

Hormas El Arbol in León, Mexico

Today is a big day at the sneaker factory workshop! The lasts arrived from León, Mexico. Our sneaker last, SNF-1, is made by Hormas El Arbol. Hormas El Arbol is one of the top last makers in Mexico. The SNF-1 is made of high-density polyethylene plastic and has a spring hinge. These lasts are made by injection molding the rough shape then turning (machining) it down to the exact shape and size. The team at Hormas El Arbol has done an incredible job with our SNF-1 last, it’s perfect and easy to use! You can see the SNF-1 lasts here.

How the sneaker last is made

SNF-1 Last : Pure sneaker styling!

Side view Vans sneaker last
Classic sneaker styling

The SNF-1 shoe last allows for a sleek vamp and toe box yet it’s accommodatingly wide in the midfoot. The SNF-1 shoe last features a defined feather edge (suitable for both hand-lasting and Strobel-lasting footwear constructions). The spring hinge allows for easy removal without damaging your shoes. You can buy the SNF-1 lasts here.

Sneaker Last DIY shoemaking

Based on the classic “Vans” styling, the SNF-1 last instep is suitable for low-cut, mid-cut, and high-top patterns. This casual shoe last also works for slip-on and lace-up style shoes.

Last and matching outsole – Now Available!

This matched set is perfect for your DIY pattern-making and home shoemaking projects. Together, the proven SNF-1 sneaker last and our classic rubber cupsole unit are a great choice for making casual-style shoes. The classic cupsole unit has a high sidewall for bonding. The rubber egg-crate midsole provides cushioning and reduces weight. The modeled sidewall groove allows for a secure stitch-down attachment.

CLASSIC VAS STYLE SHOE LAST SHOE MAKING KIT MATCHING SNEAKER SOLE

The SNF-1 last and classic cupsole are ready for your custom shoe build. You can buy the SNF-1 lasts and outsoles here.

Shoemaking
TextbooksBuy Now
Shoemaking
SuppliesBuy Now
Shoemaking
CoursesCourse Details
Previous Next