Posted on

How to Design Shoes – Synthetic Leather

Synthetics For Shoe Designers

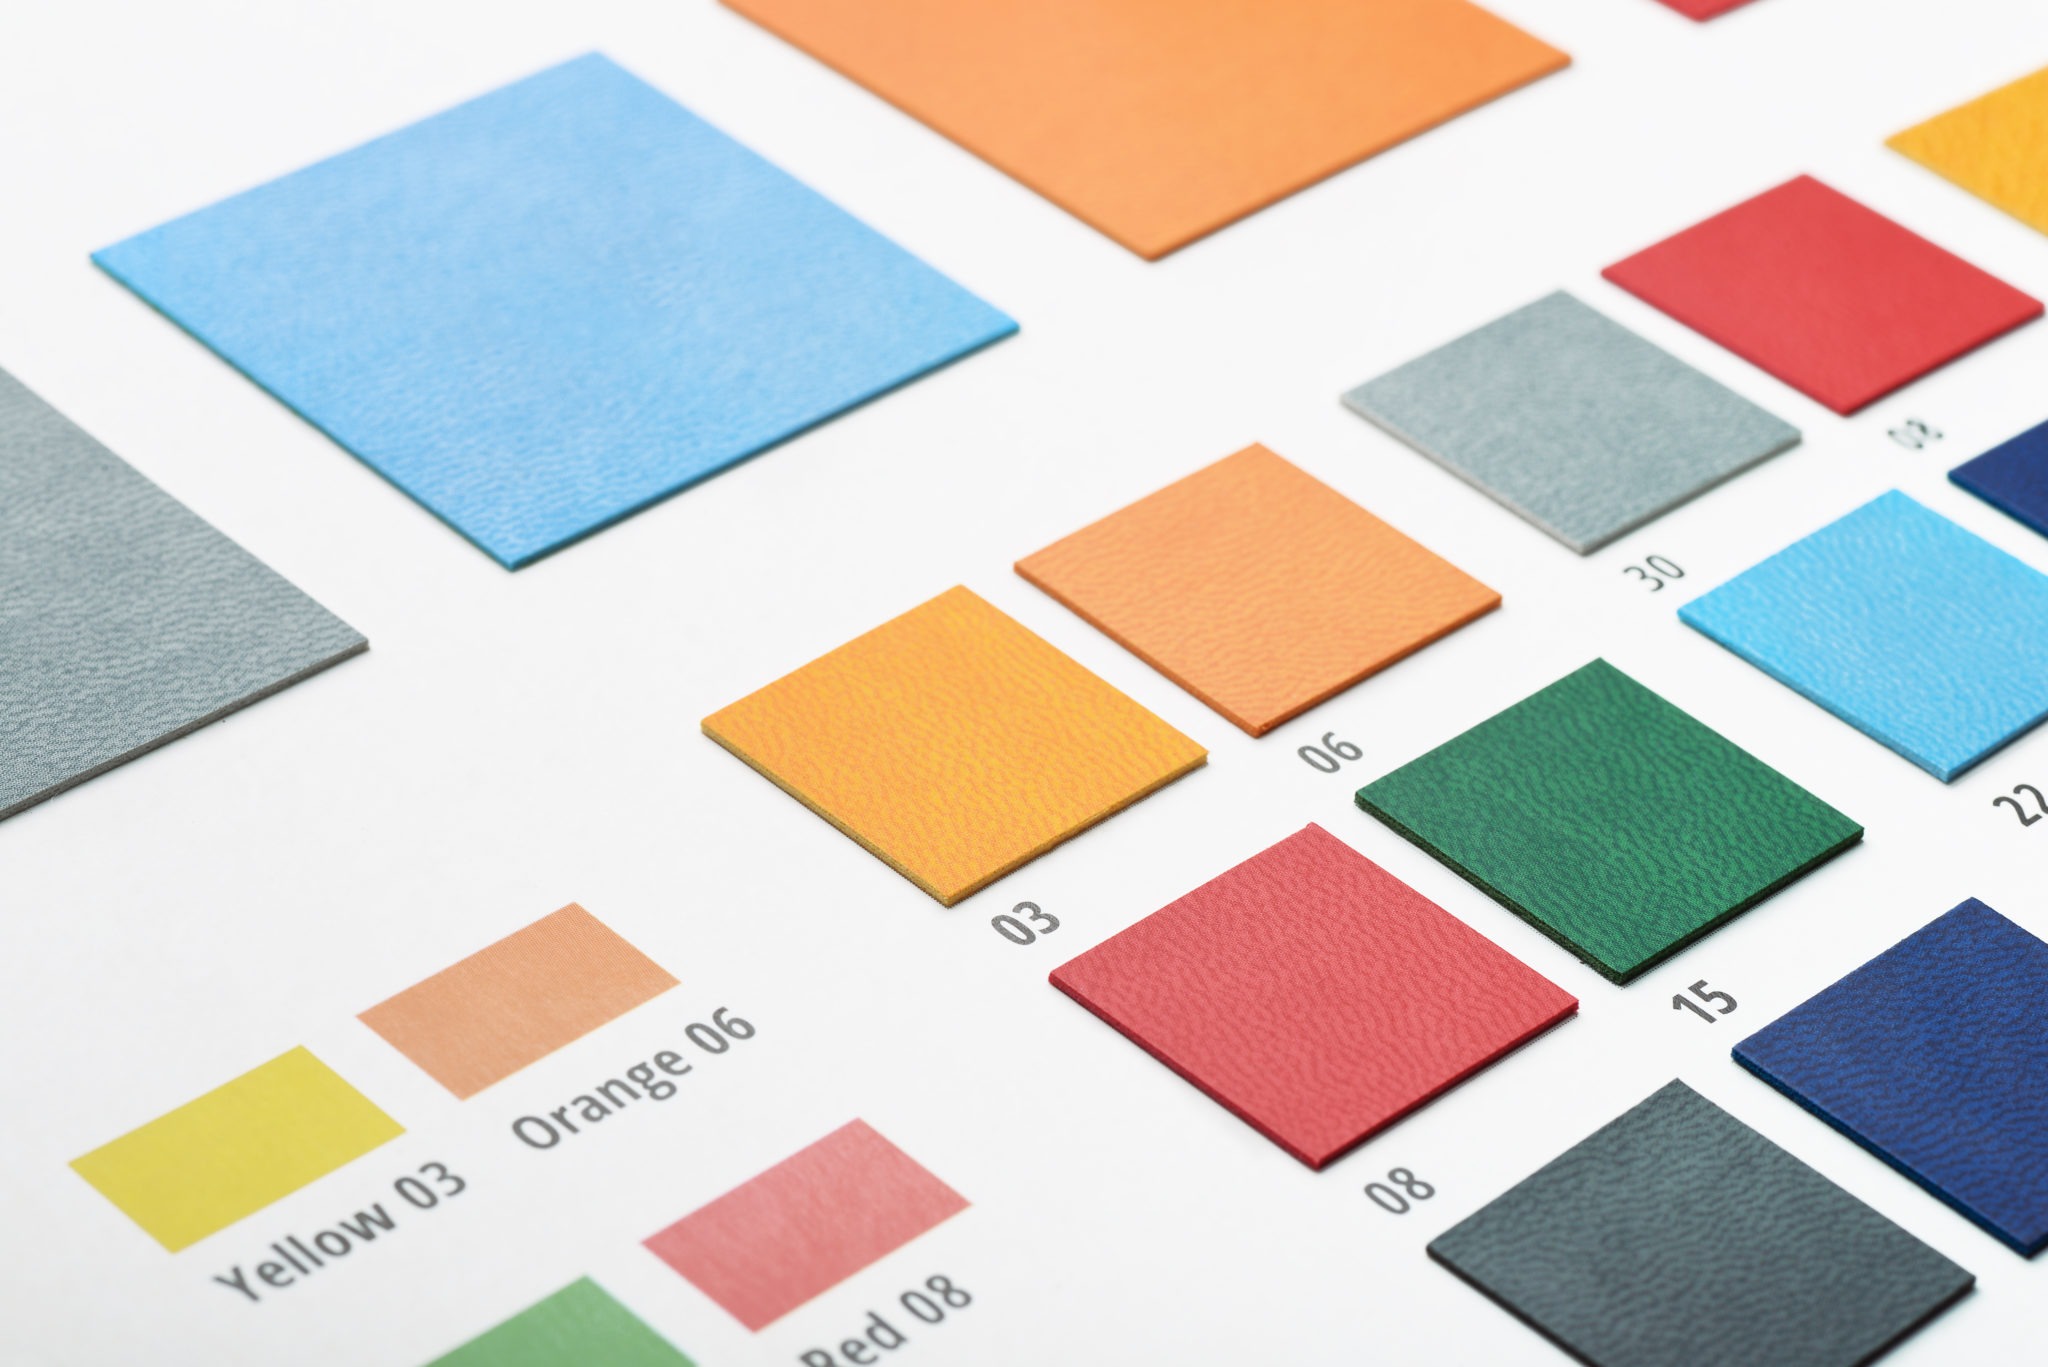
Whatever you call it, synthetic, synthetic leather, PU leather, pleather or just PU this material is another must have for modern sport shoes.  If you want to learn how to design shoes you must have an understanding of modern synthetic materials.  This class of material offers the shoe designer a huge variety of colors, textures and features at a range of prices.  While synthetics were once considered to be cheap junk not suitable for high quality shoes, times have changed!

These synthetic materials are now high performance and are  often a composite made of two layers.  A backing layer made of woven or non-woven polyester fibers combined with an external surface by “dry” lamination process or by liquid “wet” processes.  The least expensive synthetics have a fibrous woven backing with PVC skin made by wet process.

This shoe has a mix of synthetic PU materials

The high-end PU leather starts with a water-resistant micro fiber PU backing.  This backing has a smooth surface, cuts cleanly, and can be dyed to match the surface materials. The micro fiber style backing can be ordered in .5 to 2.00mm thicknesses, has some stretch, and can have a water-resistant treatment.  On top of this backing the skin can be applied.

Polyurethane plastic film .2 to .5mm thick is made in a separate operation and the two layers are then rolled together with heat and pressure.  The PU outer skin is then printed, embossed, scuffed or polished to create one of the millions of surface options.  The largest PU maker has hundreds of different emboss patterns that can be applied to hundreds of different surfaces. If you can meet the order volume required, you can pick any color you want!

So lets look at some other features of synthetic leather.  There are four common surface materials, PVC (Polyvinyl Chloride) is the cheapest, PU (Poly-Urethane) can be of higher quality with many surface options, TPU (Thermo-Plastic Urethane) and there is also a class of materials made of PU fibers without a surface skin. Of these four types PVC and PU are similar in construction, a skin with backing.  The TPU material tends to be single layer material with a finer emboss.  PU materials are also offered as a solid, skinless material, this can have a brushed surface to look like suede or nubuck.

Inexpensive PVC with woven backing

PVC leather is the most basic synthetic leather, made by wet process the surface is a sealed skin usually embossed.  Liquid PVC is poured on a textured release paper then a cloth is rolled on while the surface is still wet.  PVC leather will often have a woven backing with limited stretchability. This no problem for shoes with pieced together toe and vamp construction but not so good for smooth toe lasted shoes. This material is the cheap stuff found on inexpensive shoes. When it’s pulled tight it may wrinkle and the backing surface will X-Ray through the surface.   Perfect for cheap shoes and can be found mixed on some shoes used as a cost cutting feature.  I would never spec PVC leather for shoes that retail for more than $75.00 USD. Thickness ranges from .8mm to 2.00mm depending on the backing layers and surface treatment.   Surface texture is limited due to the release paper process.

PU_material-with-Non-Woven Backing
PU material with high quality non-woven backing

PU leather is another miracle material for shoes. Available in almost any color, surface finish, and can be treated with many special features. Thickness ranges from .8mm to 2.00mm depending on the backing layers.  PU leather is made with a sealed skin like full grain leather but can be brushed to look like nubuck or fine suede.  The PU skin is made by release paper process but is dry when combined with the backing. A heated steel roller with the emboss pattern is used to laminate the skin and backing. This allows for a deeper, crisper emboss pattern. The PU surface readily accepts embossing and printing effects. The PU skin is stretchable and durable so it can be combined with a lastable backing material.  This allows PU to be used on toe caps of sports and casual shoes.

High Abrasion PU leather
High Abrasion PU leather with emboss

PU leather is also made in high abrasion versions and can have water-resistant backing.  PU material with micro fiber backing cuts cleanly and looks great when perforated. Backings can be color matched so cut edges look clean – they can even be ordered with accent colors for a neat “TRON” effect.

Synthetic suede- how to design shoes
Synthetic suede- in many colors

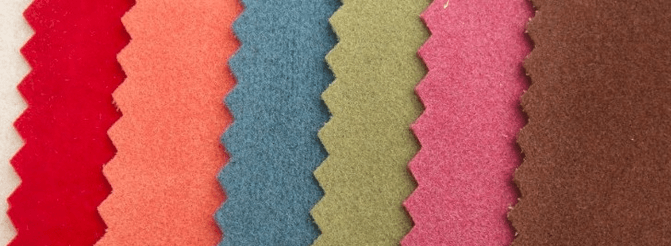
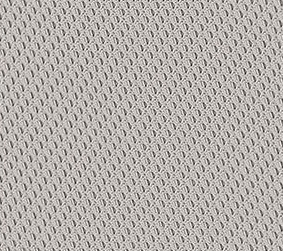
The PU fiber backing materials are also made without the skin layer.  This material has a brushed surface and is known as “Ultra suede,” “Alcantara™,” Hi-skin Chamude or Amara Microfiber Synthetic Leather.  These high quality micro fiber suede materials can be expensive but they are great for use on shoes, gloves, linings and trim.  Being colorfast and waterproof ultra suede quickly replaced suede in sports shoes that will be exposed to water.

TPU sheeting for seamless welding

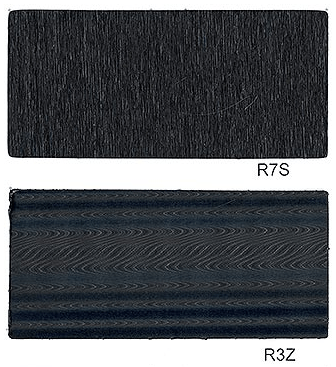
The TPU materials are used for accent parts and for RF welding applications.  The TPU materials are not for use in structural parts of the shoe.  TPU can be transparent white the PVC and PU must be opaque.  TPU is also offered very thin.  .3mm to .8mm.

Posted on

Download Shoe Last for 3D Printing

shoe last download file

Download a Sneaker Last for 3D Printing:

Can I 3D print a shoe last
3D printed Last Shoe size 9 MakerBot Z18

I’ve had many requests to offer a shoe last for purchase (sorry we don’t have this ready yet).  So, while we are working on a way to cost effectively supply you lasts and outsoles, we have put together a .STL 3D printing file of a great shoe last for you to download.
This last is great for your DIY shoe projects.  This last has a standard athletic outline with a well curved arch, plenty of toe space and is relatively thick on the lateral side so its fit is accommodating.  Heel lift is 6mm and the last has a toe spring of 8mm.  The feather edge is in the middle between sharp and round so you an make a stobel pattern or board last without difficulty.
The file is a Men’s size 9 last.  You can make your own size with a little creativity.  The .STL file can be scaled in X, Y and Z.  While a technically perfect last grade is not made by direct scaling, this size 9 can be graded into a 8 or 10 without getting too far off the standards for last making.
If you have access to a decent sized 3D printer you can print this last full size in about 5 hours. We have a really slick MakerBot Model Z18 on hand so we tested the file.  We printed the sneaker last with 0% fill, 2 shells and scaled to 275MM Long USA size 9.  With 0% fill the last is fragile but perfect for filling with expandable foam, casting resin or plaster for a more durable last.

[purchase_link id=”4886″ text=”Purchase” style=”button” color=”blue”]

Posted on

The Shoe Design Brief

A design brief for a shoe design. How Shoes are Made

The Shoe Design Brief:

How does the shoe design process really work?  Does a brilliant young shoe designer just create the new Adidas Power Boost shoe design out of thin air?  Not really, our designer can’t do it all alone. Our brilliant young shoe designer is just one part of a team of professionals that may include the Product Line Manager (PLM), the Product Manager (PM), Footwear Developer, pattern maker and Engineer.  The Design brief is the document the entire team will use to create the new shoe.

The footwear design brief is the instruction sheet and road map the product team will follow as they create the shoe. The design brief has information that each of our team members will need to get the job done right and to make the shoe a success. The design brief is often submitted to the company’s management for review before a project starts. With the manager’s approval, the design brief becomes a written record of the shoe development teams goals for the project.

how high heel shoes are madeWho makes the shoe design brief?  There are no rules to this process, every company has their own process. In many companies the shoe Design Brief is a collaboration. The Product Manager is usually tasked with creating the brief, but he may meet with the designers or his design manager to collect style ideas, the PM should also be talking to his sales manager and sales reps for any price information or market intelligence about competitors.

A design brief for shoes can be a 1 page document, a 20 page report or pasted up concept board. The format I have used has the design brief broken down into two parts. The first part covering the price, demographics, competitors and technical details. The second part is the “Visual brief” and it can detail stylistic direction for the shoe.

So what questions should the shoe design brief answer? The answer is…it depends on the type of shoe you are working on. The running shoe design brief will be different from an army boot. So lets look at the basics.

What is the function of this shoe?
Running, Basketball, Snowboarding, Tennis or Skating

Do the shoe have a special feature?
thick midsole, thin midsole, fat tongue, no tongue etc.

Who is this shoe for?
Men, Women, a new Professional athlete, mall rats

What retail price is planned for the finished shoe?
Price point, Mid range, Deluxe or High end

When will it arrive in stores?
Spring , Summer, Winter, Fall or holiday selling seasons

What is the silhouette?
Ultra low, Low cut, Mid cut, High top

What is the target environment for this shoes?
Forest , Office, Desert, track, school, mountains?

What trends are up and coming?
Neon, earth tone , transparent, plaid

What countries will this shoe be sold in?
USA, Canada, China, Europe, Australia

What materials should be used?
High tech synthetic or classic leather

This there a competitor’s item doing well?

How many different color ways are required?

 Is there something new technology your engineers are working on?

 Is there a plan for import duty?

 Are there existing outsole molds that can be or must be used?

 Is there a particular new design element or material to try on this new shoe.

A design brief for a shoe design. How shoes are Made A simple Visual Design Brief

The Visual Design Brief
The visual brief will include photos of other shoes, cars, clothing or anything the PM thinks can help the footwear designer set the style or specific design details.  In some cases if the shoe is for a pro athlete, you may be inspired by the athlete’s personal style or something they like.

This information should all be in the designer’s mind when pen hits the paper.  First step the rough concept drawings.  Just get the idea first.  Once the design direction has been set the designer may create a CAD drawing to refine the concept.

Step by Step Guide
Footwear Brand Building

Learn more about the cost to make a sneaker and the rules for importing shoes by checkout How To Start Your Own Shoe Company. 195 pages, 330 color photos.
Buy Now
On Sale $39.99

Posted on

Shoe Designers Specification Pack: For Download

Shoe Designers Specification Pack

Get Started Designing Shoes Today!

Shoe Designers Spec PackThis Shoe Specification Drawing Pack is all you need to get started detailing your own shoe designs. This pack contains a technical spec drawing which is a fully detailed shoe design ready for your creative touch. Upper views, outsole designs, material specs, and colors are all included. This is how a pro prepares a shoe design for the factory. This 8-page drawing set is in Adobe .pdf format and Adobe Illustrator .ai live vector file. No shoe design spec pack is complete without the flat pattern. We have included the actual factory-made flat pattern for this shoe in Adobe .pdf format and Adobe Illustrator .ai live vector file. From this drawing pack, we created a real shoe specification document so you can see exactly what a shoe factory needs to bring your shoe design to life. The fully detailed spec contains line items for shoe parts, material specs, and colors. The file is in Microsoft .xls format. To complete this spec pack we have included a real factory outsole blueprint with every part called out. You can see all the details in PDF and live vector .ai formats.

This pack contains a complete shoe development specification:

1.  Sample shoe specification drawing (8 pages).  Includes PDF and live vector .ai formats.
2.  The factory made flat pattern in PDF and live vector .ai formats.
3.  A real factory blueprint for an EVA/ rubber running shoe outsole unit in PDF and live vector .ai formats.
4.  Complete line item shoe specification in Microsoft .xls format.

Available for Instant Download: $14.99

Ariss_Jogger_Spec_SheetIncluded: Shoe Production Specification

A detailed specification sheet is absolutely critical to your success. If you leave line items open with no detail the factory will choose whatever they have available inside the factory for these parts. This may be good or bad, but either way, you will get an unexpected result.


shoe specification drawingsIncluded: Shoe Technical Drawings

This technical drawing pack is all you need to get started detailing your new shoe designs. The technical spec drawing is a fully detailed shoe design ready for your creative touch to detail shoe uppers, shoe outsoles, material, and colors. This is how footwear pros prepare a shoe design for the factory.  This 8-page drawing set is in Adobe .pdf format and Adobe Illustrator .ai live vector file.


Factory shoe flat pattern

Included: Shoe Flat Pattern

This is the actual factory-made flat pattern for the sample shoe. It is saved in Adobe .pdf format and Adobe Illustrator .ai live vector file.


how to draw shoe outsoles, shoe blue printIncluded: Shoe Outsole Blueprints

These outsole blueprints are real production drawings. Drawn by the factory mold shop in preparation for cutting the first sample outsole, they show every detail of the design, construction, and materials. The blueprints are in Adobe .pdf format and Adobe Illustrator .ai live vector file.

New Course
How to Create Shoe Specifications

9 Spec creations lessons.
2 hours of video instruction.
Create a spec step by step .
Material Design Guide included.

Learn more
enroll now $199

Posted on

The Cost of Shoe Parts

what do shoe parts cost

What is the cost of shoe component parts?

When a designer draws a new shoe or a footwear product line manager starts a new line plan, it is important to have an idea of what the different shoe parts cost. To meet the target selling price and avoid high import duty categories it is critical to get your price right.  Here is quick cost breakdown of the standard parts of a sports shoe.

What do shoe parts cost shoe materials list

Shoe Materials List:

Toe Cap Suede Leather $0.82 Vamp MESH+4MMKF329+24GT/C $0.16
Quarter/Eye row Suede Leather  $.85
Quarter 220D Nylon +4MMKF329+24GT/C $1.20
Quarter logo ACTION $0.15
Collar 220D Nylon +4MMKF329+24GT/C $0.20
Heel Counter Suede Leather  $0.69
Heel logo Screen Print $0.15
Tongue 220D Nylon +4MMKF329+24GT/C $0.15
Tongue Lining 180G PU +4MMKF329+24GT/C $0.12
Collar Lining 180G PU +4MMKF329+24GT/C $0.28
Tongue Foam 20mm KFF $0.13
Collar Foam 20mm KFF $0.13
Inner Lining 180g Cosmo $0.12
Toe Box .8 Syrlin $0.03
Counter PVC injection Counter $0.10
Eye row Reinforcement Supertuff $0.03
Tongue Straps 40mm Elastic $0.13
Tongue Logo Woven Label $0.03
Lace 8mm Flat Lace $0.20
Upper Stitching $0.04
Outsole #67-w34 $1.50
Midsole Two color wedge EVA $1.50
Sock liner Standard molded Eva $0.85
Insole 1.5mm insole board $0.09
Outsole Lamination $0.50
Cement & Thread $0.50
Standard shoe packing is around $.77

Here is a list of shoe material suppliers 

The Ultimate Shoe Material Guide Book

Start with In-depth study of material types available in modern shoemaking. Learn the Technical details of shoe material specification. 195 pages or 300 color photos.

Buy Now

on sale $39.99

Posted on

Running Shoe Parts Terminology

Running Shoe parts Diagram

The Running Shoe and its Parts:The Anatomy of a Shoe


erminology of a Running Shoe Parts: Toe Box, Upper, Lacing, Pull Tab, Heel Counter, Midsole, Insole, Foxing, Insoles, Outsole.Running Shoe Parts Terminology:

The Toe Tip:
Thin rubber strip from the outsole with a stitch grove to hold it on to the upper.
Rubber Outsole:
Compression molded in a flat mold
Toe Burst Panel:
Reinforces the vamp to prevent the big toe nail from tearing the vamp
Vamp:
The running shoe vamp should be soft, flexible and breathable.
Tongue Attachment:
A double row of stitching that anchors the base of the tongue to the vamp.
Mudguard:
The Muguard is the shoe .elementor-divider__svg:first-of-type{-webkit-box-flex:0;-ms-flex-positive:0;flex-grow:0;-ms-flex-negative:100;flex-shrink:100}.elementor-widget-divider--element-align-left .elementor-divider-separator:before{content:none}.elementor-widget-divider--element-align-left .elementor-divider__element{margin-left:0}.elementor-widget-divider--element-align-right .elementor-divider .elementor-divider-separator>.elementor-divider__svg:last-of-type{-webkit-box-flex:0;-ms-flex-positive:0;flex-grow:0;-ms-flex-negative:100;flex-shrink:100}.elementor-widget-divider--element-align-right .elementor-divider-separator:after{content:none}.elementor-widget-divider--element-align-right .elementor-divider__element{margin-right:0}.elementor-widget-divider:not(.elementor-widget-divider--view-line_text):not(.elementor-widget-divider--view-line_icon) .elementor-divider-separator{border-top:var(--divider-border-width) var(--divider-border-style) var(--divider-color)}.elementor-widget-divider--separator-type-pattern{--divider-border-style:none}.elementor-widget-divider--separator-type-pattern.elementor-widget-divider--view-line .elementor-divider-separator,.elementor-widget-divider--separator-type-pattern:not(.elementor-widget-divider--view-line) .elementor-divider-separator:after,.elementor-widget-divider--separator-type-pattern:not(.elementor-widget-divider--view-line) .elementor-divider-separator:before,.elementor-widget-divider--separator-type-pattern:not([class*=elementor-widget-divider--view]) .elementor-divider-separator{width:100%;min-height:var(--divider-pattern-height);-webkit-mask-size:var(--divider-pattern-size) 100%;mask-size:var(--divider-pattern-size) 100%;-webkit-mask-repeat:var(--divider-pattern-repeat);mask-repeat:var(--divider-pattern-repeat);background-color:var(--divider-color);-webkit-mask-image:var(--divider-pattern-url);mask-image:var(--divider-pattern-url)}.elementor-widget-divider--no-spacing{--divider-pattern-size:auto}.elementor-widget-divider--bg-round{--divider-pattern-repeat:round}.rtl .elementor-widget-divider .elementor-divider__text{direction:rtl}.e-container>.elementor-widget-divider{width:var(--container-widget-width,100%);--flex-grow:var(--container-widget-flex-grow,0)}

Start Building Your Brand

A must-have for anyone serious about launching a footwear company. 4 text books, shoe business documents and downloadable content not available anywhere else! The Shoe Company Start-Up Pro Pack is all you need to get your shoe business off the ground.
Learn more
Download Today

Posted on

Shoe Design: Know your Footbeds

Get to now your footbeds!

The footbed or insole or sockliner, whatever you call it is important to the fit, feel, performance and cost of your shoe design.  Footbeds come in all shapes, sizes and materials,  It’s important to make the right selection to compliment your shoe design.

When a shoe is in development it’s important to have  plan for the footbed.  Each shoe last will have a “sock allowance” build into the bottom, this creates the space inside the shoe, in can be 4 mm or 6mm or more.  You have the get this right or you shoe won’t fit quite right, then again a little extra foam in your footbed can be used to fine tune and fitting issues.

The footbed is also key to the lifespan of your shoe.  A thin footbed made of too soft, cheap foam can collapse after just a few days leaving the shoe fitting loose and your customer with tired feet.   The ability for a foam to survive being placed underfoot is called it’s compression set or compression resistance.  Not all foams are suitable for long lasting footbed service!  Shoe companies are now putting in better footbeds, in the past you could find a cheap $.65 footbed in a pair of $100.00 running shoes!

Common shoe footbed types.

Footbeds basically come in two construction types.  Molded or die cut.  The molded footbeds are made of Compression molded EVA, Poured PU (polyurethane foam),  Latex & Cork, sponge rubber or PE (polyethylene) foam.   You can add to the molded footbed other features like Injection molded stiffeners,  support frames, gel pods or air bags.   The sky is the limit!  But you need to remember a $4.00 footbed will add almost $20.00 to the retail price of your shoe!

PU-FootBed-Pouring
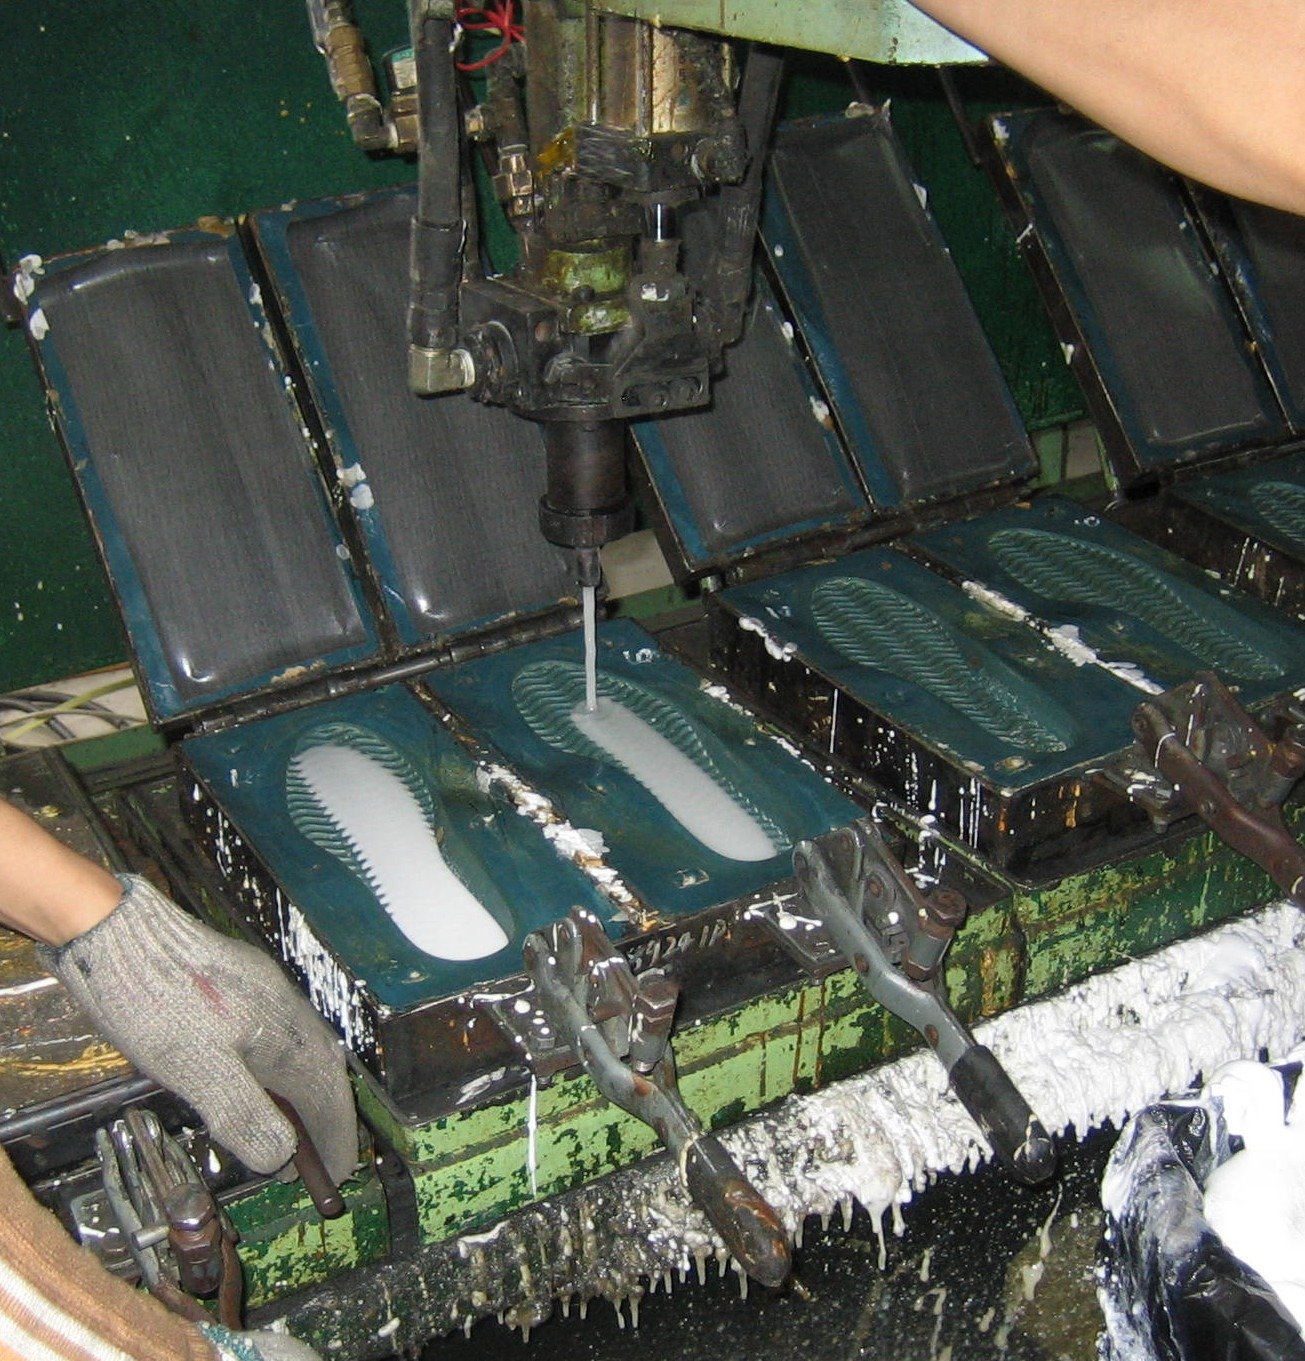
The molded footbed is a must for performance athletic shoes, the contours will support the foot and hold the foot in place.  Hiking, hunting and military boots need a molded footbeds. The strobel shoes may be a thinner as the inside of  the shoe will have more contours from the last and molded midsoles.   Stiffer board lasted boots should have a molded footbed to provide support and fill up the square corners near the edges.
shoe design flat footbed
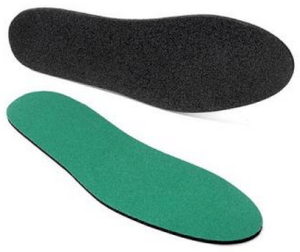
The die cut footbed can the the cheapest piece of junk or it can be really plush.  Die cut does not have to mean cheap.  Yes the most basic shoes will have thin die cut footbeds made of soft EVA-Food-Bed-Press
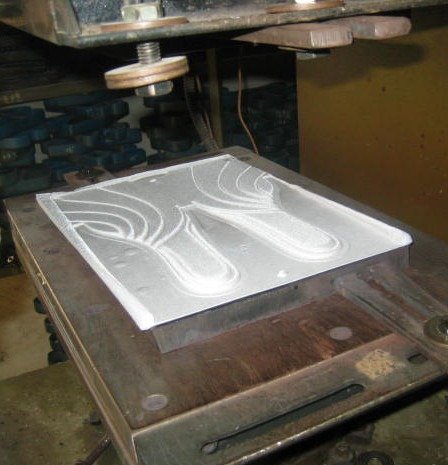
EVA foam that will last just a few weeks.  High end shoes can have really nice leather-covered die cut footbeds made with multiple layers of high quality long lasting PU foam, neoprene rubber or gel sheet. Fashion
and casual shoes can have die cut footbeds. Soccer cleats, the even expensive ones, often have thin die cut footbeds.

Footbed cover fabric.

Footbeds can come with making different cover fabrics or linings.  The best fabrics have enough grip to hold your feet in place.  Too smooth will not be stable, to grippy will ruin your socks.  Running shoes, hiking boot footbeds need abrasion resistant materials to last for miles and miles.  The footbed material must resist crocking (crocking is color transfer by friction or rubbing).  Your shoes should not discolor your socks.   Leather footbeds are nice, but maybe not the best for athletic shoes.

Other footbed features.

Footbeds can be multiple densities of foam.   They can have perforations or other venting features.  Moisture wicking fabric covers or bright graphics are a nice touch.  Most companies will have their own molds with refined shapes and molded in logos.  Another trick companies use is a very soft latex foam wedge under the heel, this latex will last for a while but after a few days or a week it will be crushed flat.  This is done to improve the “try on” or “in store” feeling.  For winter boots or hunting boots you will find insulated footbeds with heat reflecting coatings.

Shop around, try on many different styles of shoes, you will find lots of options.  Let price, performance and comfort be your guide!


Posted on

Nike Air Jordan Imminent Shoe Review

Air Jordan Imminent Back View

Nike Air Jordan Imminent Shoe Review:

No doubt Nike makes great shoes, but today we are going to take a critical look at the Nike Air Jordan Imminent.  Rather than review the styling from “Sneaker Freak” perspective or the performance of the shoe for actually playing basketball, I want to do a “tear down” to study the construction, materials, assembly, value and production costs.

Our review  will start with what it costs Nike to make the Air Jordan Imminent.  The retail price of the Jordan Imminent is on the high side at $120.   Based on the selling price of $120 for an 8% import duty shoe,  with ocean shipping included,  I calculate the shoe factory build price to be around $25.00.  In 2012, Nike paid Michael Jordan over 60 million dollars, so I figure there must be a royalty payment of maybe a dollar per pair?  So let’s figure it’s around $24.00 to make the shoe.  Of Nike’s build price we can estimate 25% to 35% for the factory LOP,  maybe $8.00.   That leaves between $16.00 to $18.00 dollars for the materials, upper, leather and outsole parts.
Learn about shoe design The Nike Air Jordan Imminent upper pattern is not complicated.   Only 7 panels to make the upper, so the stitching make or cost is not very high. The Jordan Imminent is very well put together. The stitching is clean and straight and all the upper stitching is a double row. While I’m a little surprised to see that none of leather edges are skived and tuned, the exposed edges are solid black, by drum dyed leather or painted edges.  The full grain leather vamp is smooth and well-formed, evidence that the leather is well backed, I would expect Imminent’s upper parts are assembled with hot melt glue and carefully pre-molded before the lasting operations to make such a nice shape.
Nike Air Jordan Imminent ReviewFor the logo treatments, Nike has gone with a very simple look for the Air Jordan Imminent.  Only 2 embossed logos made by RF welding process.  The heel side logo on the lateral side and tongue logos are both cleanly and deeply embossed, this leads me to believe that Nike has swapped in a matte finish synthetic material for these panels instead of full grain leather.  Full grain leather doesn’t melt so it will resist deep embossing.  The synthetic leather logo panel is showing white backing on the edge…could be better.

The double row of stitching around the tongue logo is super clean and perfectly round, definitely made by a computer stitching machine. The embossed stitch flange is a nice touch also.

The 3D air mesh with black over red for the tongue and heel pad is a neat and subtle accent. All the tongue seams are turned out so there is not a stitch to be seen, very nice.

The upper materials in general are nice but nothing exotic or expensive.  The waxed laces are simple and clean.  Red webbing covers the heel seams, a great way to hide ugly seams and a good way to increase the cutting yield without the shoe looking like a puzzle.  The collar topline is neatly rolled into the lycra lining.  I did notice a small kink where the eyestay reinforcing ends, maybe a little extra skiving inside could smooth that out.  A word about the eyelets, there is none.  Just punched holes for all the positions.   Okay…but not great.

Air Jordan Imminent Back View        Heel View  How nike shoes are made

Following the ultra clean theme for the Air Jordan Imminent outsole, Nike has gone with a very simple design for the midsole and outsole parts. The injection molded EVA midsole is a single color with three contour breaks.  I did see some waves in the midsole top line,  I do expect there will be waves where the uppers leather panels overlap, but my pair  has a few small waves on flat panels, not the best workmanship but a very minor issue.
Jordan Imminent Heel air BagThe midsole is solid EVA in the forefoot with a small heel air bag.  The Nike Air bag is blow molded with 10 stabilizing pillars.  After molding,  the air bag is painted silver to add an accent.   A closer look shows the Air Jordan Imminent air bag has the blow mold seam hidden by the outsole bottom or midsole.

The rubber bottom is a simple color blocking with an EVA break showing in the forefoot. The rubber parting lines are thin and super clean, well-trimmed.  This is evidence of high quality tooling, as you would expect on any Air Jordan shoe.
SIde View of Outsioe


Overall this is a clean shoe, simply built, nice materials.  An efficient, labor-saving design, lacking the extra nice touches that you would like to see in a shoe which costs $120.00.  I like the shoe.  It’s well made, with high quality materials, a basic clean shoe.

Posted on

How to Design Shoe Outsole Tooling Part 1

How Eva is Made

Outsole Tooling

shutterstock_264364937 How to make shoe outsoles eva outsoleThe outsole tooling for athletic shoe is the most complicated and most expensive piece of equipment required for production.  The outsole tooling for footwear comes in many different styles and configurations.  Shoe outsoles are made from many different types of rubber, plastic, foam, leather or fabric each requiring it’s own tooling requirements and manufacturing technology.

We are going to talk about the design requirements and tooling for the rubber, plastic and foam outsoles found in the modern athletic sports and casual shoes.   The outsole design you select for your shoe design is critical to it’s comfort, performance and price.   You will need to know about the equipment requirements and unit price for each type of outsole design.

Design shoe mould Mold It’s critical that you understand the Tooling and manufacturing requirements for each outsole type.  If you are designing for Nike go ahead and design a complicated outsole with blow molded air bags, plastic injections etc…. The sky is the limit. $20,000 per size is no problem.  If the production is a million pairs $150,000  for the tooling is no problem.  However if you are start up strapped for cash,  a cup sole unit is $1400 per size is more realistic.

Of course performance matters.  You would never use Rubber cupsole for a running shoe or likewise a combat boot with the huge air bag is also a bad idea.

Basic Outsole Types:   Rubber Cupsole,  Cut and Buff EVA wedge sole, Combination Cut and Buff/Cupsole,  Two piece EVA rubber sole, Vulcanized Rubber sole,  Lightweight EVA Outsole, EVA Sole unit, Injection Molded EVA, Injection Molded plastic Sole unit, Blow Molded Air Bag Sole Unit.

Outsole Types

shutterstock_285892169 Air Bag Midsole The air bag midsole is made by the blow molding process. The midsole starts out as hot semi-liquid plastic extrusion tube (called a parison).

Air Bag Midsole

The air bag midsole is made by the blow molding process.  The midsole starts out as hot semi-liquid plastic extrusion tube (called a parison).  A steel mold clamps around the tube and the air is injected inside to fill the bag and inflates the shape to fill the mold.  The tooling and machines are very expensize. The plastic can be tinted and the bag top and bottom surfaces can be painted.  In this case the air bag is attached to an EVA tray that is then bonded to the shoe outsole by cold cement process.  The type of sole unit is great for running and cross training.  The air bag does look cool but due to the blow molding process the plastic walls of the bag can be a little thick.  This sole unit requires an EVA Compression mold, Rubber compression mold and blow molds.
TOOLING:$$$$    UNITPRICE:$$$$

The standard two part sole is made with light weight CM EVA midsole, bonded to a rubber outsole.shutterstock_279056639

Compression Molded EVA or CMEVA

The standard two part sole is made with light weight  CM EVA midsole, bonded to a rubber outsole.   The EVA foam is expanded into blocks then cut down to fit into a mold.  The mold is heated causing the EVA to re-expand and fill the compression mold.  The density and durometer is set by how much foam is compressed into the mold and the formula of the foam.   More foam is harder and gives the sole design more definition.  Midsole is bonded to the rubber in the stock fitting room before the unit meets the upper in assembly.  This sole unit requires an EVA compression mold and a rubber compression mold.
TOOLING:$$   UNIT PRICE:$$

How to Pick Shoe Materials

Start with In-depth reviews of material types available in modern shoemaking. Learn the Technical details of shoe material specification. 195 pages or 300 color photos.

Learn more

on sale $39.99

Many firms have been experimenting with foamless injection molded midsoles. The shoe has a stiff moderating plate under the heel to keep the shoe stable shutterstock_220781398
Injected Midsole

Many firms have been experimenting with foamless injection molded midsoles.  The shoe has a stiff moderating plate under the heel to keep the shoe stable. The Midsole structure is likely made of Nylon or TPU plastic.  The rubber tread is attached by stock fitting.  This sole unit requires an EVA Compression mold for the midsole hidden inside, Rubber compression mold for the tread and Injection molds for the midsole component.
TOOLING:$$$$    UNITPRICE:$$$$

This running shoe uses an injection molded EVA midsole with rubber inserts. shutterstock_227205646Injection EVA Midsole

This running shoe uses an injection molded EVA midsole with rubber inserts.  The Injected midsole has a thicker, smoother skin than compression molded EVA midsole.  The Injected EVA midsole has a more uniform density and better detail definition than the compression molded EVA.  This unit is very light, very flexible but will wear quickly.  The Injection molded tooling has a high production rate but the molds are over $3,000 per sizes and requires an expensive machine.  The compression EVA tooling is half the price and can be made in the most basic pressing room. This sole unit requires an EVA injection mold and rubber compression mold.
TOOLING:$$$   UNIT PRICE:$$

This classic Die Cut EVA wedge midsole is bonded to a compression molded rubber bottom. shutterstock_289873175

The EVA Wedge

This classic Die Cut EVA  wedge midsole is bonded to a compression molded rubber bottom.  The top wedge shape of the EVA is cut by pressing the EVA with a profile roller while a blade splits off the bottom layers.  The white layer is buffed and bonded to the rubber bottom.  All three parts are them buffed to create the angled side wall.  Labor intensive but required very little tooling.  In fact one bottom tool can be trimmed to make 4 to 6  sizes. This New Balance shoe requires a rubber compression tool.
TOOLING:$   UNIT PRICE:$

The shoe is made by PU foam direct attach.shutterstock_86681128

Poured PU Midsole

The shoe is made by PU foam direct attach.  In this process the Upper is clamped into the top of a mold.   The mold is filled in two shots, first the sole is molded, once the bottom cools in a few minutes a second shot of light weight PU will fill the space between the Upper and bottom. The PU fuses directly to the upper.  This sole requires a 2 part PU rubber injection mold AND a million dollar machine.
TOOLING:$$$   UNIT PRICE:$

This classic cup shoe with a one piece rubber cupsole. shutterstock_219385027Classic Rubber Cupsole
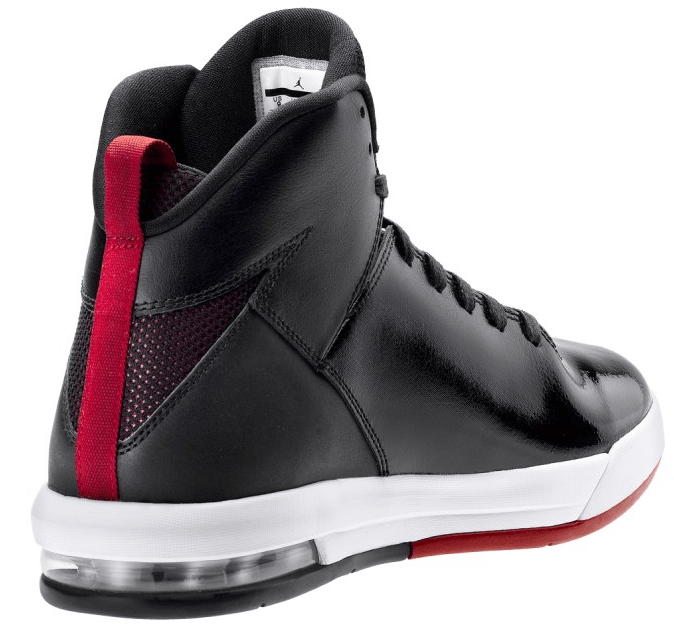
This classic cup shoe with a one piece rubber cupsole.  The white side wall and black rubber are molded together in one operation.  The mold has a middle plate allowing the to parts to be formed separately, before the rubber is fully cured the middle plate is removed the rubber colors can fuse together without a messy seam.  The side logo is painted after molding.  Inside you will find a die-cut piece of EVA foam.  The stitch groove is an under cut in the mold but the stretchable rubber is easily removed after molding.  The channel stitching is done after assembly. This requires only a rubber compression mold.

This is a rubber cupsole with eggcrate inside
TOOLING:$   UNIT PRICE:$
The cup sole mold can be made with no foam filler inside.  The cheapest shoes may have rubber egg crate filler.

This classic air bag shoe midsole is made by over molding PU but in this case the air bag is clipped in heel and exposed. shutterstock_312082184PU poured Air

This classic air bag  shoe midsole is made by over molding PU but in this case the air bag is clipped in heel and exposed.  The window is where the clamps hold the bag in place and they stop the PU from covering the bag.  The rubber sole is made by compression,  the top of the black part is molds parting line.   The Yellow part with specs is the same PU part holding the air bag but this area is masked off and painted.   After the PU parts are cleaned and painted , they are bonded to the rubber parts by the stock fitting line.  The toe channel stitching is done after assembly. This outsole requires a rubber compression tool, Air bag mold and PU midsole mold.
TOOLING:$$   UNIT PRICE:$$

New Courses
for Brand Builders

Shoemaking Basics for Designers & Brand builders
How to Select Shoe Materials
Creating Footwear Specifications


Learn more

Enroll now

This indoor soccer shoe is a combination cupsole and cut and buff. shutterstock_317387078

Cup & Cut and buff sole

This indoor soccer shoe is a combination cupsole and cut and buff.  The rubber is pressed then the EVA wedge is cement in place.  The EVA is then buffed down to match the rubber side wall.  This construction is more flexible and lighter than a standard rubber cupsole.  This outsole requires a rubber compression mold.

TOOLING:$$   UNIT PRICE:$$

Classic Vulcanized Outsole

shutterstock_324031223 This outsole is standard vulcanized shoe constructionThis outsole is standard vulcanized shoe construction.  This is how Vans makes it’s shoes, and how the Converse All Star is made.   The sole bottom is bonded to the upper, then striped rubber  foxing tape wraps them both.  After this assembly operation is done the entire shoe is cooked to cure the rubber making the bonds permanent. See Vulcanized VS Cold Cement  This outsole requires a rubber compression mold for the bottom and a specialized vulcanize production factory.
TOOLING:$   UNIT PRICE:$

Injection Molded Outsole

Soccer Cleat Injection Molded Outsole
This soccer cleat outsole is made by injection molding process.  Cleated shoes for soccer, football and baseball require stiff supportive bottoms with heavy cleats.   Cleated shoes are made by the cold cement process.  The Sole unit may be sewn to the upper after the cementing operation.   This outsole requires a plastic injection mold.    Complicated designs with several colors require an expensive mold, Simple designs require a less expensive tooling.  Cleats with metal spikes or inserts require over molding processes.  This type injection tooling requires a specialized injection molding factory.
TOOLING:$$-$$$$   UNIT PRICE:$ to $$$$

New Course
How to Select Shoe Materials

14 Shoe material lessons.
Over 4 1/2 hours of video instruction.
In-depth study of leather, textiles, synthetics and plastics.
Material Design Guide Text Book included.

Learn more
enroll now $399

Posted on

How Shoes are Made Video

How Shoes Are Made Video:

I found this video on YouTube. It’s a quick walk down a typical shoe assembly line. This is a very small, one-line factory, which is not the typical size of a modern shoe factory. The shoes being made in the video are for a local Asian footwear brand. The process they use is exactly the same as Nike uses to manufacture their shoes. In the video, it is difficult to see what’s going on so I have detailed a few of the steps in the process for you here.  The video picks up at the start of the shoe assembly line, the uppers are already stitched and stacked waiting for final assembly.

The Start of the Shoe Assembly Line Video:

This video does not clearly show the lasts being inserted but you can see the shoe coming out of the first “shrinking” heat tunnel. The heat helps dry the steamed shoe uppers. Once out of the tunnel, the lasting machine operator gives the shoe a quick squeeze. This machine is the same type used for board lasting and can be set up to stretch a shoe upper down tight onto the shoe last. A heel lasting machine can be used on the back of the shoe. I don’t see this heel lasting machine on this shoe assembly line. How Shoes are Made Video- The upper is lasted How Shoes are Made Video-SOle_marking

The next operation happens fast. The worker pulls a shoe off the line and matches it to the correct size outsole. A foot-activated press holds the shoe down while she marks the top edge of the molded EVA midsole with a pen. This mark is called the glue line. In this case, the line is a guide for the workers at the cementing work station. If this shoe required roughing, the workers with the buffing tools would follow the same line before the primer and glue are applied.

Shoe factory video- outsole glueingNext, you see the workers apply the primer and cement to the uppers and the shoe outsoles. The outsoles and uppers are on opposite sides of the assembly line. This allows the workers to apply different compounds of primer and glue to each part. The outsole requires a different primer for a strong bond.

Shoe factory video- outsole assembly- cementingAt the next station, the outsoles are moved to a different conveyor belt. This allows the glue to be dried at a different temperature.

Outsole Assembly:

Shoe factory video- outsole assemblyOnce the primer and cement are dry, the parts can be assembled. The worker matches the correct size outsole with the upper and then presses them together by hand. He carefully but quickly aligns them, starting at the toe to make sure it’s centered. Next, the worker will flip the shoe and set the heel into position. The cement is dry but tacky so it can be repositioned without affecting the final bonding strength.

Shoe manufacturing video - sole bondingA metal or plastic tool is used to make sure the midsole follows the glue line and confirm the edges are straight. This tool can also be used to remove air bubbles or unroll any tucked edges on the midsole.

To speed set the glue bond the shoe is cooled in a chilling tunnel. To ensure the outsole and upper have complete contact, the shoe will go through three pressing operations. The downward press, the side press, and the toe and heel press. These pressing surfaces must be clean and smooth so as not to damage or soil the assembled shoe. The bottom press should be made with a matching negative casting of the outsole or a contoured pressing plate to ensure the arch area is fully pressed.
shoe assembly line Video- pressing shoe assembly line Video - sole pressing

After pressing, it’s time to remove the shoe last and insert the footbed.

That’s it!  If you are interested in learning more please check out our book  “How Shoes are Made”   and browse our other titles and accessories in our bookstore.