Outsole Tooling
 The outsole tooling for athletic shoe is the most complicated and most expensive piece of equipment required for production. The outsole tooling for footwear comes in many different styles and configurations. Shoe outsoles are made from many different types of rubber, plastic, foam, leather or fabric each requiring it’s own tooling requirements and manufacturing technology.
We are going to talk about the design requirements and tooling for the rubber, plastic and foam outsoles found in the modern athletic sports and casual shoes. The outsole design you select for your shoe design is critical to it’s comfort, performance and price. You will need to know about the equipment requirements and unit price for each type of outsole design.
 It’s critical that you understand the Tooling and manufacturing requirements for each outsole type. If you are designing for Nike go ahead and design a complicated outsole with blow molded air bags, plastic injections etc…. The sky is the limit. $20,000 per size is no problem. If the production is a million pairs $150,000 for the tooling is no problem. However if you are start up strapped for cash, a cup sole unit is $1400 per size is more realistic.
Of course performance matters. You would never use Rubber cupsole for a running shoe or likewise a combat boot with the huge air bag is also a bad idea.
Basic Outsole Types: Rubber Cupsole, Cut and Buff EVA wedge sole, Combination Cut and Buff/Cupsole, Two piece EVA rubber sole, Vulcanized Rubber sole, Lightweight EVA Outsole, EVA Sole unit, Injection Molded EVA, Injection Molded plastic Sole unit, Blow Molded Air Bag Sole Unit.
Outsole Types

Air Bag Midsole
The air bag midsole is made by the blow molding process. The midsole starts out as hot semi-liquid plastic extrusion tube (called a parison). A steel mold clamps around the tube and the air is injected inside to fill the bag and inflates the shape to fill the mold. The tooling and machines are very expensize. The plastic can be tinted and the bag top and bottom surfaces can be painted. In this case the air bag is attached to an EVA tray that is then bonded to the shoe outsole by cold cement process. The type of sole unit is great for running and cross training. The air bag does look cool but due to the blow molding process the plastic walls of the bag can be a little thick. This sole unit requires an EVA Compression mold, Rubber compression mold and blow molds.
TOOLING:$$$$ UNITPRICE:$$$$

Compression Molded EVA or CMEVA
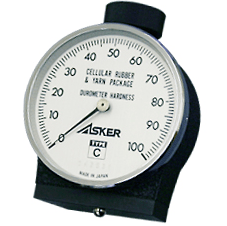
The standard two part sole is made with light weight CM EVA midsole, bonded to a rubber outsole. The EVA foam is expanded into blocks then cut down to fit into a mold. The mold is heated causing the EVA to re-expand and fill the compression mold. The density and durometer is set by how much foam is compressed into the mold and the formula of the foam. More foam is harder and gives the sole design more definition. Midsole is bonded to the rubber in the stock fitting room before the unit meets the upper in assembly. This sole unit requires an EVA compression mold and a rubber compression mold.
TOOLING:$$ UNIT PRICE:$$
How to Pick Shoe Materials
Start with In-depth reviews of material types available in modern shoemaking. Learn the Technical details of shoe material specification. 195 pages or 300 color photos.
Learn more
on sale $39.99

Injected Midsole
Many firms have been experimenting with foamless injection molded midsoles. The shoe has a stiff moderating plate under the heel to keep the shoe stable. The Midsole structure is likely made of Nylon or TPU plastic. The rubber tread is attached by stock fitting. This sole unit requires an EVA Compression mold for the midsole hidden inside, Rubber compression mold for the tread and Injection molds for the midsole component.
TOOLING:$$$$ UNITPRICE:$$$$
 Injection EVA Midsole
This running shoe uses an injection molded EVA midsole with rubber inserts. The Injected midsole has a thicker, smoother skin than compression molded EVA midsole. The Injected EVA midsole has a more uniform density and better detail definition than the compression molded EVA. This unit is very light, very flexible but will wear quickly. The Injection molded tooling has a high production rate but the molds are over $3,000 per sizes and requires an expensive machine. The compression EVA tooling is half the price and can be made in the most basic pressing room. This sole unit requires an EVA injection mold and rubber compression mold.
TOOLING:$$$ UNIT PRICE:$$

The EVA Wedge
This classic Die Cut EVA wedge midsole is bonded to a compression molded rubber bottom. The top wedge shape of the EVA is cut by pressing the EVA with a profile roller while a blade splits off the bottom layers. The white layer is buffed and bonded to the rubber bottom. All three parts are them buffed to create the angled side wall. Labor intensive but required very little tooling. In fact one bottom tool can be trimmed to make 4 to 6 sizes. This New Balance shoe requires a rubber compression tool.
TOOLING:$ UNIT PRICE:$

Poured PU Midsole
The shoe is made by PU foam direct attach. In this process the Upper is clamped into the top of a mold. The mold is filled in two shots, first the sole is molded, once the bottom cools in a few minutes a second shot of light weight PU will fill the space between the Upper and bottom. The PU fuses directly to the upper. This sole requires a 2 part PU rubber injection mold AND a million dollar machine.
TOOLING:$$$ UNIT PRICE:$
 Classic Rubber Cupsole
This classic cup shoe with a one piece rubber cupsole. The white side wall and black rubber are molded together in one operation. The mold has a middle plate allowing the to parts to be formed separately, before the rubber is fully cured the middle plate is removed the rubber colors can fuse together without a messy seam. The side logo is painted after molding. Inside you will find a die-cut piece of EVA foam. The stitch groove is an under cut in the mold but the stretchable rubber is easily removed after molding. The channel stitching is done after assembly. This requires only a rubber compression mold.

TOOLING:$ UNIT PRICE:$
The cup sole mold can be made with no foam filler inside. The cheapest shoes may have rubber egg crate filler.
 PU poured Air
This classic air bag shoe midsole is made by over molding PU but in this case the air bag is clipped in heel and exposed. The window is where the clamps hold the bag in place and they stop the PU from covering the bag. The rubber sole is made by compression, the top of the black part is molds parting line. The Yellow part with specs is the same PU part holding the air bag but this area is masked off and painted. After the PU parts are cleaned and painted , they are bonded to the rubber parts by the stock fitting line. The toe channel stitching is done after assembly. This outsole requires a rubber compression tool, Air bag mold and PU midsole mold.
TOOLING:$$ UNIT PRICE:$$
New Courses
for Brand Builders
Shoemaking Basics for Designers & Brand builders
How to Select Shoe Materials
Creating Footwear Specifications
Learn more
Enroll now

Cup & Cut and buff sole
This indoor soccer shoe is a combination cupsole and cut and buff. The rubber is pressed then the EVA wedge is cement in place. The EVA is then buffed down to match the rubber side wall. This construction is more flexible and lighter than a standard rubber cupsole. This outsole requires a rubber compression mold.
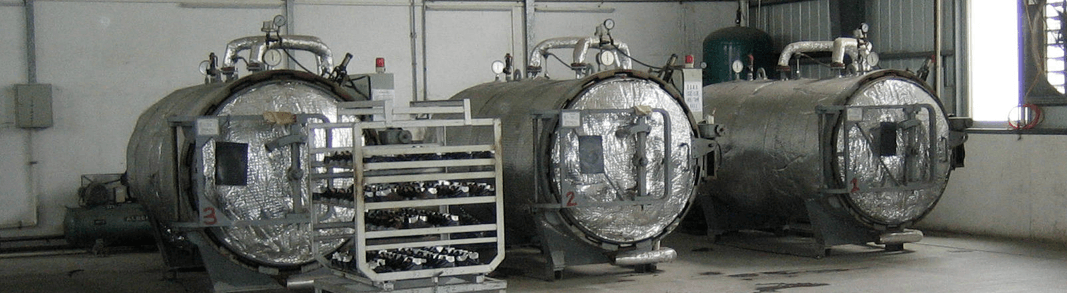
Classic Vulcanized Outsole
 This outsole is standard vulcanized shoe construction. This is how Vans makes it’s shoes, and how the Converse All Star is made. The sole bottom is bonded to the upper, then striped rubber foxing tape wraps them both. After this assembly operation is done the entire shoe is cooked to cure the rubber making the bonds permanent. See Vulcanized VS Cold Cement This outsole requires a rubber compression mold for the bottom and a specialized vulcanize production factory.
TOOLING:$ UNIT PRICE:$
Injection Molded Outsole

This soccer cleat outsole is made by injection molding process. Cleated shoes for soccer, football and baseball require stiff supportive bottoms with heavy cleats. Cleated shoes are made by the cold cement process. The Sole unit may be sewn to the upper after the cementing operation. This outsole requires a plastic injection mold. Complicated designs with several colors require an expensive mold, Simple designs require a less expensive tooling. Cleats with metal spikes or inserts require over molding processes. This type injection tooling requires a specialized injection molding factory.
TOOLING:$$-$$$$ UNIT PRICE:$ to $$$$
New Course
How to Select Shoe Materials
14 Shoe material lessons.
Over 4 1/2 hours of video instruction.
In-depth study of leather, textiles, synthetics and plastics.
Material Design Guide Text Book included.
Learn more
enroll now $399


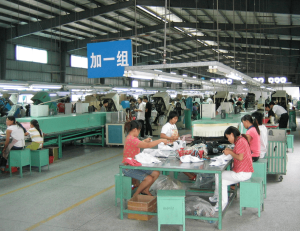 How many pairs can one shoe assembly line will make. One assembly line 1000 to 1500 pairs per day of a simple shoe. Now assuming a shoe factory will be operating about 300 days a year roughly 50 weeks time six days a week, with overtime, roughly comes to about pairs of shoes from one assembly line per year, so a 10 line shoe factory could make 3 1/2 million pairs of shoes and one year.
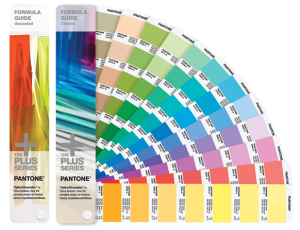 The Pantone color specification book is required for every shoe designer and developer. You will need to have a Pantone color book to communicate with the shoe factory and your customers exactly what color you want. The Pantone corporation color books are the industry standard for color matching. You will find that every shoe factory will have a Pantone book so it’s easy for you to reference a color. Without the Pantone book, it’s almost impossible to match colors correctly with your overseas factories. They are expensive, you can share one in your office. This is a must-have shoe designer’s tool. You can get these from Amazon.
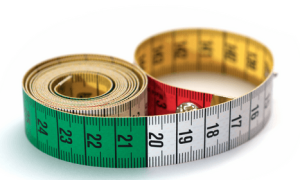
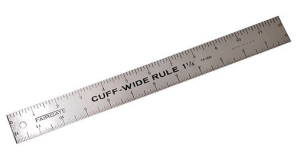 A small steel ruler is very useful for measuring all the shoe parts. Make sure that the end of the ruler is cut off so it starts at zero so you can measure the inside of the shoe collar height by pushing the ruler into the bottom of the shoe.
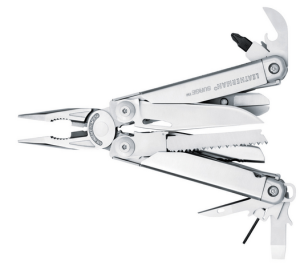
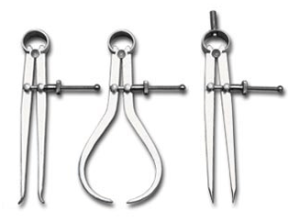
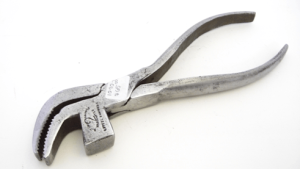 Shoemaking lasting pliers are also a very useful tool to have around. In the shoe factory, they are used to pull the edges of the material down on the last and then tack it down with a hammer part. As a developer, you will often use this tool to pull a shoe apart and see what’s inside.
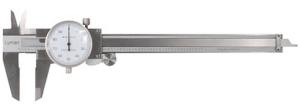 A pair of dial calipers or digital calipers is also very useful in making shoes. We use calipers every day to measure the width of small shoe components.
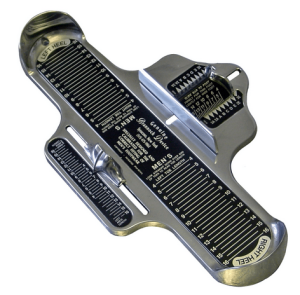
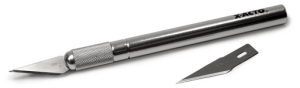 An X-Acto knife is also an indispensable tool for cutting material swatches, for opening up shoes and cutting open seams. A very sharp hobby knife is a useful tool.
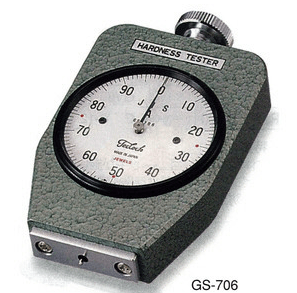
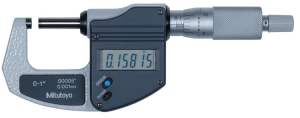 A micrometer is a very helpful tool to have in your shoe development office. We use this for checking the thickness of leather products or any synthetic material. We use a micrometer almost every day to confirm that the materials in the sample shoe match the product specification.
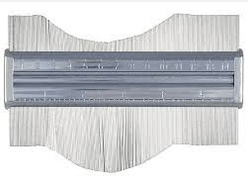 A profile gauge is nice to have around when you are checking lasts. It’s useful for checking complex curves quickly. While not a common tool, we use this when we are working up a new last or checking that a midsole is following the last bottom curve correctly.
 In the cold cement process, the shoe upper can be paired with a Strobel bottom. For this classic jogger style, the outsole covers the edge of the upper so a Strobel bottom will make the shoe lighter and more flexible.


")